Deponia: The Complete Journey

Deponia: The Complete Journey

788 ratings
Deponia 1 walkthrough with missable achievements
By mishalunchbox
Tired of walkthroughs that assume you've been following them all along without trying anything on your own? I was, so i wrote this one for "Welcome to Deponia." Many hints given; all missable achievements marked (including Junkyard King); snarky complaints provided free of charge.
9
5
21
6
3
2
   
Award
Favorite
Favorited
Unfavorite
Introduction
why ANOTHER walkthrough?
I created these Deponia: The Complete Journey guides (links to the others are at the end, under "LINKS") based on my dissatisfaction with the way other walkthroughs are organized. When referring to other guides, i found information to be grouped in a way that catered to readers who were following them to the letter start to finish, whereas i was only checking here and there to get past specific frustrations. I'm guessing i'm not the only one who does it that second way.

<RANT> So for example, when it turned out that my problem was an item i'd missed, i then had to go digging around in other parts of the guide to figure out where that item came from. Worse, there were occasionally two actions that needed to be performed, but the first was described in a completely separate part of the guide and not mentioned anywhere in the vicinity of the hurdle that blocked my path, leaving me totally baffled as to why the second action didn't work. I was also thwarted by minigame "help" that assumed you hadn't even tried to work it out on your own at all, and therefore only needed to be given a series of blind clicks to get through; a practice sort of like giving someone driving directions while specifying neither the start point nor the street address of the destination. Not to mention that in at least 3 instances (across several different guides, to be fair), i found information that was flat-out wrong. ...And then there was that annoying one in which every other instruction had the phrase "go ahead and" tacked on at the beginning ... i don't care if the guide offers easy solutions to all my real life's real problems, screw that. </RANT>

Therefore, i tried to organize this guide in such a way that you can search it for the obstacle you're trying to get past (like getting the Headphones for example) and find all the information you need to pass it collected right there without having to do very much additional rummaging around. Please note that this method does not always provide the fastest way through the game, if that's what you're looking for.

I've also made an effort to provide hints to tip you over the edge of figuring out a problem yourself before being handed the answer. However, extensive hints are difficult to work into a walkthrough without making it REALLY long and requiring readers to mouse over a LOT of spoiler text (which is unsearchable, making the guide MUCH harder to use), so perhaps a separate "cluethrough" is in order to do that up right. All rights reserved on that word i just made up.*

* (in 2017)
keyboard shortcuts
These are taken word-for-word from the "Hints" section behind the "Bonus" button on the Main Menu:
  • Press "I" to open the Inventory. (that's a capital "i," in case you were wondering)
  • Press the "Space" bar to show all hotspots and to pause a cutscene.
  • Press "Esc" to go back to the main menu and to skip dialogue lines as well as cutscenes.
  • With the keys "+" and "-" you can decrease and increase the sound volume.
  • Press "M" to mute and unmute the game sound.
  • "F5" takes you directly to the Load/Save menu.
  • "F8" opens the Settings menu.
  • "F9" saves a quicksave, overwriting any existing one.
  • "F10" loads a quicksave, if one exists.
  • By pressing "F11" you can take a screenshot.
I make no warranty that these all work the way they say they will (in fact, three of them didn't work for me).
general tips for surviving on your own
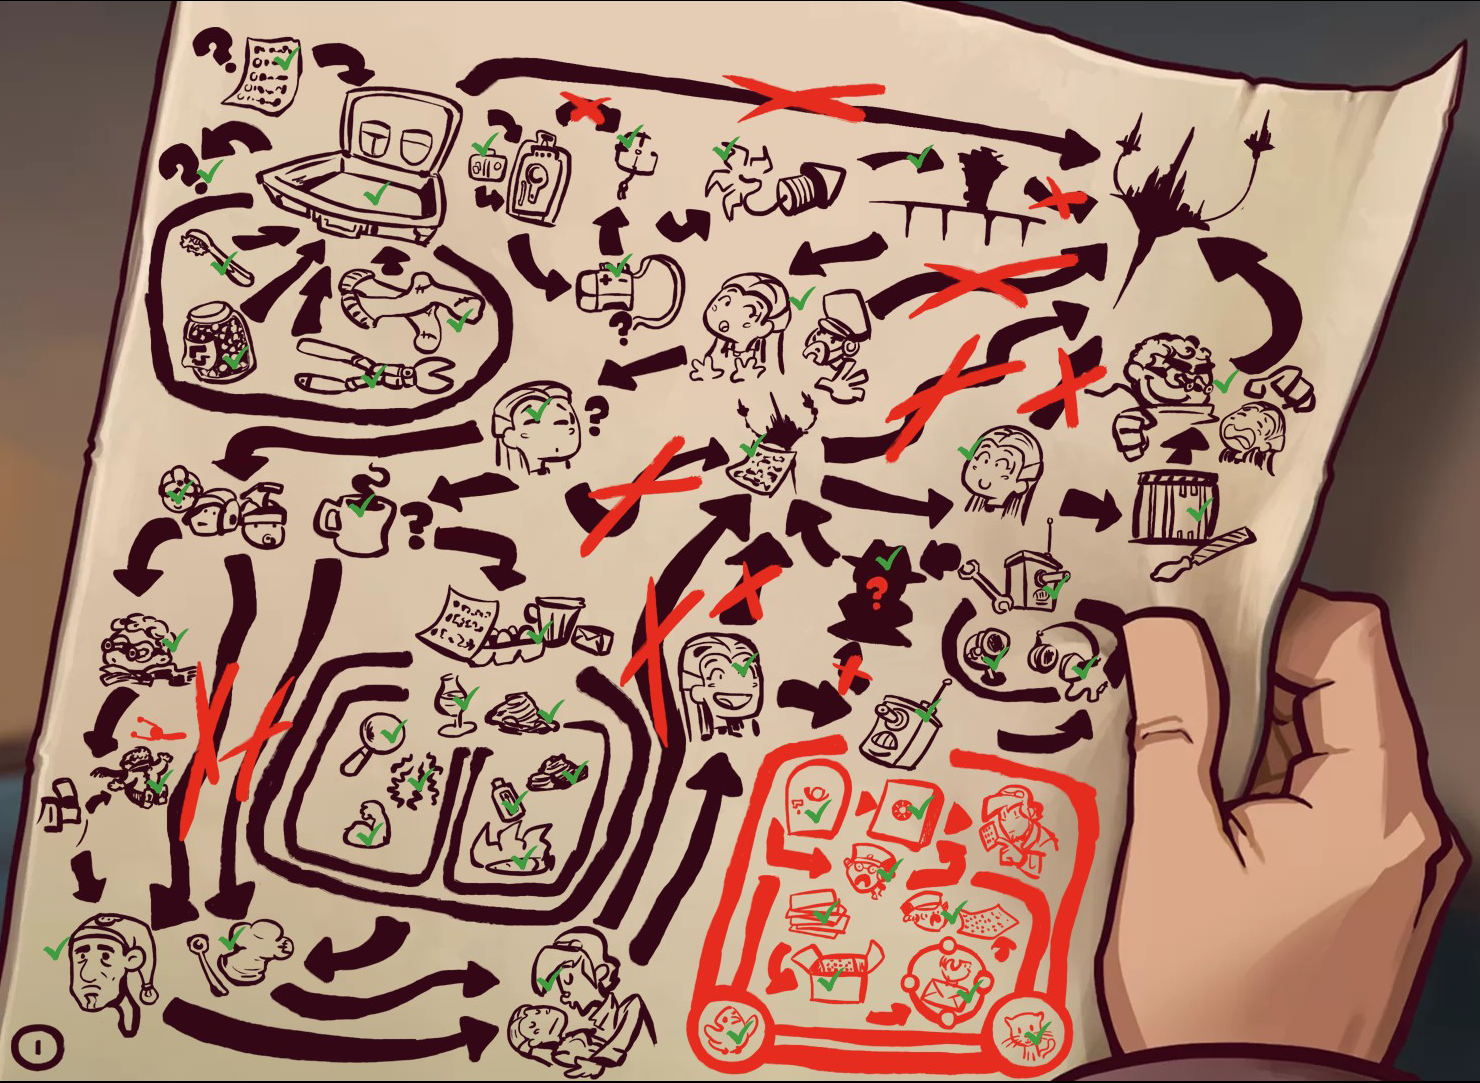
  • Consult Rufus' Plan often!
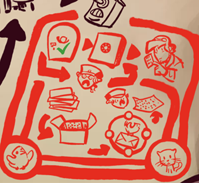
    Any time you hear a "ding" and/or the sound of a pencil scratching on paper, and see a light bulb or an exclamation point appear on the upper right side of the screen, that means there's new information for you on the Plan; if you see a little green checkmark icon, that means you've completed one of the tasks on the Plan.


    To view the Plan, you can either click on one of those icons, or open your inventory and click the light bulb in the upper left of that screen. You will find LOTS of good hints there. Mouse over any drawing without a green checkmark on it to see what you should be working on.

    If you hold your mouse over a drawing on the Plan and no mouseover text appears, try pressing "Esc" to go back to the Main Menu, then clicking the "Continue" button.

  • Talk to everyone about everything!!!
    Sometimes a character will give Rufus information that unlocks the next segment of his Plan; other times you'll be given subtle hints on how to solve a problem. If you're stuck and have a lot of patience, talk to everyone again: you could discover that some character has a new hint for you, or you may see that a question you already asked is still on a dialogue menu, underscoring the importance of the information it leads to.

    Bonus tip for navigating dialogue menus: the bottom-most option on the list almost always terminates the exchange; and whereas you usually can restart a discussion (by clicking on the NPC) after you've ended it, that will not be true 100% of the time. For optimum enjoyment, plan your choices accordingly.

  • Highlight hotspots!
    Hold down the spacebar on your keyboard or the scroll wheel button on your mouse to display a mark over each interactable object on the screen.

  • Examine everything!
    Right-click every freaking thing, including items in your inventory, and yes, including the ones you already examined before picking them up (because sometimes Rufus has something different to say about an item depending on where it is). Even if you don't get a helpful hint or a ray of inspiration, there's a pretty good chance you will at least get entertained.

  • Pick up everything!
    You're guaranteed to need every item you encounter, and you're not going to run out of space in your inventory like some games.

  • Experiment with inventory items!
    Try using them on each other and on objects in the environment; you just might stumble on a combination that makes you say "I never would have thought of that."

  • Pay attention to what Rufus says!
    When something you try doesn't work, his reaction isn't always helpful, but sometimes it really is.

  • Keep in mind you're in a cartoon universe.
    Logic and physics here are based more on misconceptions and comedy than reality. Answers may come to you more easily if you approach puzzles with your Tex Avery hat on.

  • Try and try again...and again...and possibly again. ...Or not.
    One running source of frustration for me over the course of this trilogy was the fact that some actions must be repeated in order to get results, and the first attempt offered little to no feedback that would lead me to expect it to work if tried again (and sometimes again). So if you're stuck and you really prefer to do without assistance, you can sometimes get through just by clicking on everything a second or third time.

    Though TBH if it comes down to this, you're probably better off just giving in and looking it up.
Leopard Mode
Maybe you've caught a fleeting glimpse of this "tip" as you loaded up a save game:


Here's what the manual has to say about that:

To activate the ultra-secret leopard mode in Deponia first head to Kickstarter and send us a million dollars. Now for the easy part: Simply set your system clock to the time zone of Vanuatu and change your screen resolution to 320x200 and 4 bit color depth. Now, entering the Konami code within three seconds, while whistling the melody to "My Heart Will Go On" backwards, will open a prompt, where you only have to enter your shoe size and off we go! Sit back, maybe grab some handkerchiefs -- this might get messy.
MISSABLE ACHIEVEMENTS
missable achievement alerts
If performing an action will prevent you from obtaining any missable Steam achievement, a clearly marked "missable achievement alert" will let you know. Inside each alert, you'll find spoiler-hidden instructions on what to do to earn that achievement.
There are 19 achievements total in the first installment, which you can identify on the global stats page by their color, which is sort of pinkish...brownish....i don't know what color that is. Let's say it's "the one that's not blue or green," which are the colors used by the other two installments.

The achievements that you can't avoid earning are not mentioned in this walkthrough; i've only covered the ones that you must do something special in order to receive.

Here are the 13 that are known or believed to be missable, along with the official description of each, since sometimes that's the only clue you need to figure out how to get it:

icon
name and description
section(s)
Bullseye
Always keep an eye on your target.
1.3
Demolition Expert
A good demolition expert doesn't need a second try.
2.1, 2.5
DIY'er
I can assemble that all on my own.
4.1
Gourmet
A true gourmet is not afraid to try something new!
5.3
History of Deponia
Inform yourself explicitly about Deponia.
5.3
Junkyard King
Collecting junk can be a form of art, too!
3.7, 4.4,
5.0, 5.5,
5.6
Lever lover
These levers just HAVE to make some sense .
5.5
Loving The Truth
Say, Goal...
5.7
Master Of Switches
Help? Just to adjust a few switches? Well, you can count me out!
4.4
Missing Postage
What do you mean “not enough postage“?
3.4
Newton would be proud
Lets see... what else could I invert?
4.3
Paradox
Meet yourself.
5.3
That seems about right...
I can sort my pigeons without your help.
3.4

The "section" column indicates the portion(s) of this walkthrough in which the achievement is mentioned, so you can get an idea on what point in the timeline you should be focusing if you want to try for it without my help.

The "don't skip the minigame" achievements are:
Bullseye, DIY'er, Master of Switches, That Seems About Right.
Junkyard King
On the Main Menu, you'll see a button marked "Bonus;" if you click that, you'll find another button marked "Sculpture." If you click that button, you may see a sculpture, or some scattered junk, or a blank wall -- it all depends on what you've done in-game so far.

This area is connected to an achievement called "Junkyard King:" the idea is that on your travels, you will collect the parts needed to complete the work of repurposed art depicted on the Junkyard King icon. The eleven small, innocuous items are scattered throughout Kuvaq, the Junk Mines, and the Lower Ascension Station, hidden in the scenery. Each item you find (and click on) will appear on your Bonus Sculpture screen.

Note that the items don't appear in your inventory when you click them, they just make a musical noise and disappear; also note that they are NOT highlighted when you use the spacebar to view hotspots.

The parts must be collected in a continuous timeline in order to complete the Sculpture and earn the achievement. That is to say if you miss one piece, you can't just load up an old save file, click that one piece, and be done; in order to succeed, you would have to then play through the rest of the game and collect all the pieces that followed the one you went back for.

Within the body of this guide, i will not be spoiling the locations of the Junkyard King items; instead, you will be warned at each "no turning back" point, i.e. the point at which you're about to do something that will eliminate the possibility of collecting the parts in that location. If you need to know how many pieces and/or where to find them, scroll back up here for some spoilers.

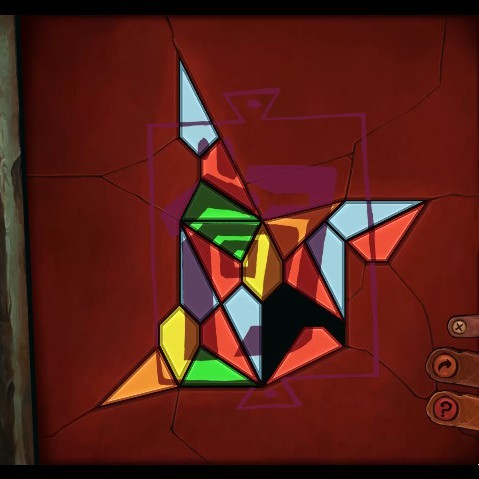
If you look at the Junkyard King icon or the completed Sculpture, you can see how each piece fits into the finished product:


Chapter I, Kuvaq
  • hat (frying pan): Toni's House attached to pipe next to Oven
  • goggles (yellow hex nuts): Behind Toni's House in trash near support beam on lower right
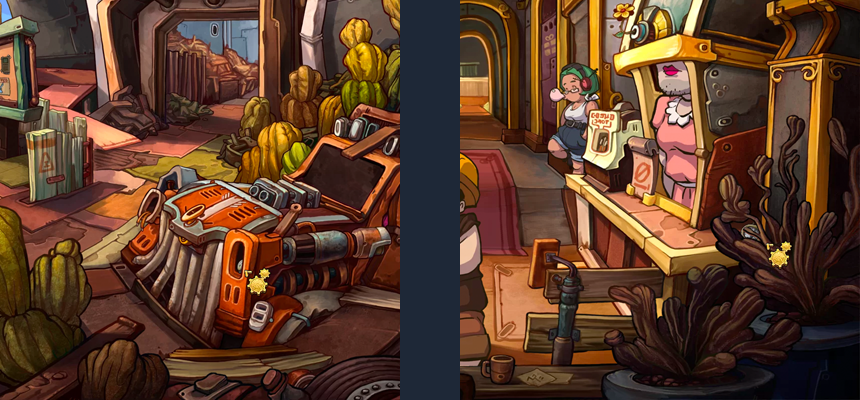
  • right eye (headlight): Front of Town Gate in right-hand headlight of Truck
  • left eye (stopwatch): Town Hall behind plant next to Lotti
  • shoulders (lunchbox): Alley on floor between Detonation Plan and Lonzo's Bar
Hey look, it worked out that the picture of the lunchbox got its own line. It must be because lunchboxes ROCK! (...That's not a gameplay hint, so if it confuses you, don't worry about it.)


Chapter 2, Junk Mines
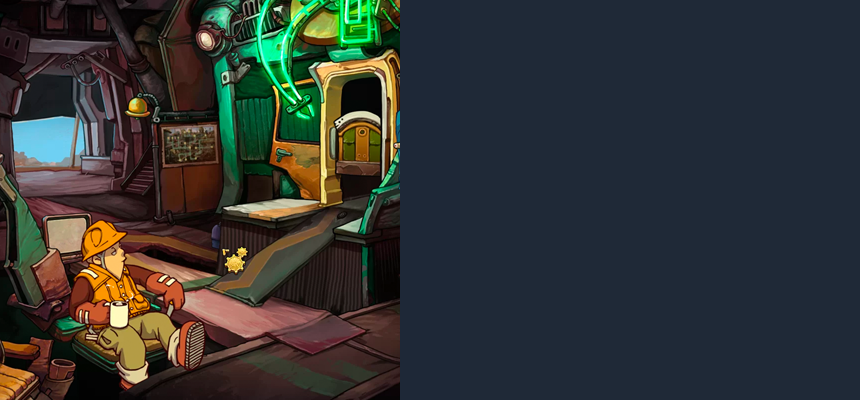
  • ears (headphones): the Turn inside Crane
  • beard (fork): Viaduct under platform in front of Doc


Chapter 3, Ascension Station
  • head (jug): Candy Shop next to Anchovy Machine
  • hair (rusty, bent hand saw): Front of Tower near Barrel with Water
  • shirt (cheese grater): Cable Chute in trash on lower left
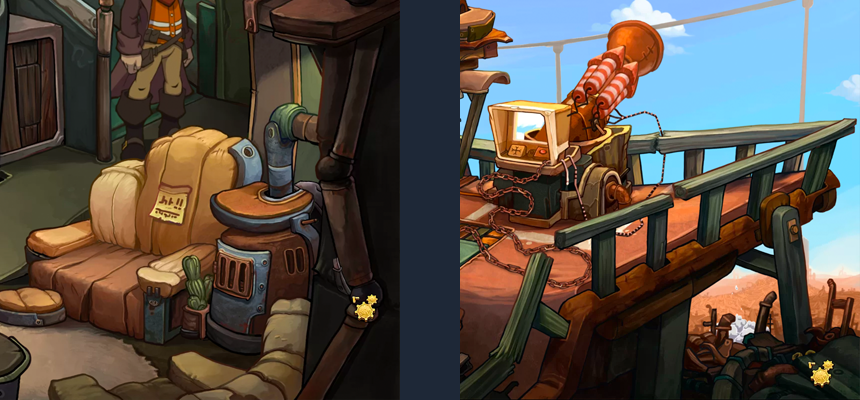
  • neck (broken pipe): Wrecked Cable Boat to right of couch
CHAPTER I: Kuvaq
1.1: start packing
items
  • List
  • Can o' used Oil / Empty Can / Provisions
  • Plunger
  • Mouse Trap / Trap with Bait
  • Toothbrush
  • Bolt Cutter
Welcome, new players!
Please take a moment to review my "general tips for surviving on your own" (above) before reading any further. Figuring out how to figure things out will make this game a lot more fun for you :D

steps
  1. click Suitcase on Rufus' bed to collect List.

    Notice that after Rufus' response to that action, there was a "ding" sound, and a light bulb appeared on the right side of the screen; that means there is new information on Rufus' Plan. To learn more about the Plan, see "general tips for surviving on your own," above.

  2. get Provisions:
    • in Rufus' Room (top level of house), click Oil Can on windowsill to collect Can o' Used Oil
    • click arrow marked "To the Living Area" to go down to middle level of house
    • click bottom of ramp to go down to bottom level of house
    • use Can o' Used Oil on Sink to empty it out and create Empty Can (this can also be done using Washbasin next to Bathroom on middle level)
    • use Empty Can on Crumbs on the Sofa to collect Provisions
  3. catch Toothbrush:
    • go to middle level of house; if you're on the bottom level (where the sofa is), this can be accomplished by clicking the top of the ramp, or anywhere on the middle level's floor
    • try to grab the Toothbrush that's sitting on Washbasin next to Bathroom (if you can't see it, try closing Locker Door).

      Instead of going quietly into your inventory, Toothbrush springs to life and hides in Dark Corner near top of ramp; to trap it, you'll need a tool found inside Closet at bottom of ramp.

    • open Bathroom Door and move Rufus aside so you can see Plunger on back of door
    • take Plunger
    • go to bottom level of house
    • use Plunger on Closet (at base of ramp) to reveal Mouse Hole
    • reach into Mouse Hole to find Mouse Trap
    • combine Provisions with Mouse Trap to create Trap with Bait
    • use Trap with Bait on Dark Corner to collect Toothbrush
  4. open Locker Door on left side of middle level
  5. grab Bolt Cutter from inside Locker
  6. go up In Rufus' Room
  7. place Bolt Cutter, Provisions, and Toothbrush into Suitcase
1.2: get a pair of socks
items
  • green Sock, blue Sock, yellow Sock
  • Pot / Pot with Water
  • Detergent / Pot with Detergent
  • A Bunch of Notes
  • Hand Torch
  • Fork
  • Pair o' Socks
Welcome, new players!
Please take a moment to review my "general tips for surviving on your own" (above) before reading any further. Figuring out how to figure things out will make this game a lot more fun for you :D

steps
  1. collect all Socks:
    • go In Rufus' Room on top level of house
    • click Cushion next to Suitcase to reveal a Green Sock hidden underneath
    • pick up green Sock
    • go down to bottom level of house
    • click Coat to collect blue Sock
    • open Fridge Door to reveal a Yellow Sock inside
    • pick up yellow Sock
    If you examine any Sock in inventory, you'll learn Rufus is holding out for a pair ("matching" implied); however, these 3 non-matching Socks are the only ones in the house. But hmm, yellow and blue make green...maybe there's something to that? The only sorta hint you get from Rufus comes when you examine the Detergent: "I've only used it once. But all my clothes got discolored." You've probably had that happen to you: colors bleed in the wash... you see where this is going?

  2. prepare Pot with Detergent:
    • on bottom level of house, press green button on Sink to fill Pot and collect Pot with Water (if Pot is already in your inventory, just click it onto the Sink or Washbasin to fill it with water)
    • on middle level of house, grab Detergent from inside Locker
    • combine Detergent and Pot with Water to create Pot with Detergent (if Pot with Water is already on Hotplate, you can add Detergent to it there)
    • on bottom level of house, put Pot with Detergent onto Hotplate next to Sofa (once there, it will be called just "Pot")
  3. boil water for a hot wash:
    • collect "something flammable to start the fire" (Toni's Notes):
      • bottom level of house, on Fridge Door ("♥♥♥♥♥♥♥♥ Post-It")
      • bottom level of house, on Sink ("Malicious Memo")
      • bottom level of house, on Sofa ("Nagging Note")
      • middle level of house, on Bathroom Door ("Chafing Chit")
      • middle level of house, in Toni's Room ("Severe Slip")
        -- click Door of Toni's Room to open it, then click arrow marked "In Toni's Room" to try to enter; the Note will appear attached to a booby trap
      Once you've collected all five, you'll have A Bunch of Notes in your inventory
    • put A Bunch of Notes into Oven (the little door below Hotplate)
    • go up to Rufus' Room and click Torch on windowsill to collect Hand Torch
    • return to bottom level of house and use Hand Torch on Memos in Oven to start a fire
  4. put blue Sock and yellow Sock into Pot on Hotplate
  5. take Fork out of Sink
  6. use Fork on Pot to fish out Pair o' Socks.

    If Rufus says "This didn't do much," it means you didn't put enough Socks in the Pot (step 4). If you successfully retrieve a green Sock but still don't have a Pair, it means you didn't pick up the first green Sock (step 1).

  7. go In Rufus' Room and place Pair o' Socks into Suitcase.

    If that was the last item, Rufus will try to close the suitcase, but find it's too full; you'll then see his checklist, from which you need to choose something to leave behind. If the checklist doesn't appear after you pack Pair o' Socks, it means you're missing one or more of the other items -- see section 1.1 for help with that.

  8. remove Bolt Cutter from Suitcase by clicking on it in the list view
Once he's done packing, Rufus automagically pops to Behind Toni's House for a conversation with Wenzel.
1.3: Escape Pod
items
  • Wrench
  • Mailbox
  • Seat
Note: If you're trying to talk to Wenzel but nothing happens when you click him, try standing closer to him.

steps
  1. stow Suitcase:
    • open Door of Pod
    • open Storage Space
    • pull Battery out of Storage Space
    • put Suitcase into Storage Space by clicking them in that order
  2. stow Battery:
    • pick up Wrench near bottom of ramp
    • enter door (upper left corner of screen) to go Into Toni's House
    • on bottom level of house, use door on far left to go In Front of Toni's House.

      To get there more quickly, try holding your mouse over the lower left corner of the screen as soon as you enter the house; an arrow will appear that says "In Front of Toni's House" -- double-click that. This trick works on any door: just find the arrow and double-click.

    • use Wrench on Mailbox to collect it
    • go back Behind Toni's House
    • use Wrench on Pod's Seat to remove it
    • attach Mailbox to Base Plate (where Seat used to be)
    • stow Battery inside Mailbox by clicking them in that order
    By the way, i rang the doorbell In Front of Toni's House no less than 100 times in a row to see if anything would happen, and nothing did. There: i just saved you the trouble.

  3. click on Control Panel of Harpoon to launch the minigame
    missable achievement alert
    You must play the harpoon minigame without skipping it to earn Bullseye.
    minigame: calibrate the harpoon
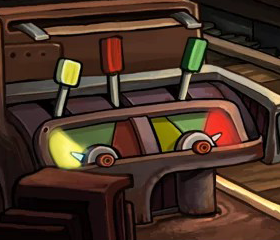
    ←The crosshairs move like the knight in chess (one square straight, one square diagonally). Your goal is to position the crosshairs over the portion of track with the flashing orange stripes on it (second square from left on top row).→

    Mouse over the panel with the lever (lower left side of screen) to see arrows that indicate the movement effected by each terminal. For example, the arrow on the terminal on the left side of the panel tells you that shifting the lever into that position will move the crosshairs one square left, one square down-and-left.

    Solution
    The numbers in the image below indicate the order in which you should hit the squares, where 0 is the starting point and 9 is the target:


    After you reach the last square, Rufus will start talking, and the puzzle screen will exit automatically.

    If your crosshairs are missing...
    I read in the forums that some players encounter a bug with this puzzle; evidently you can get past it by downloading "savegame01" from Daedalic's support site (linked below, under "LINKS"). I have not personally followed up on any of this information in any way. Employ at your own risk.

  4. Toni will be waiting for you when you finish; don't worry about the letter she gives you. The conversation with her is just for entertainment and backstory, so choose whatever dialogue option(s) suit your fancy.
  5. use Hand Torch on Fuse to launch Rufus into the next scene
1.4: Organon Cruiser
items
  • Socks, Provisions
  • Robot Arm

steps
  1. board Cruiser:
    • the only thing you can click is Chain around Rufus' ankle, so do that
    • click Chain again
    • click arrow marked "Chute"
  2. get Robot Arm:
    • grab Socks and Provisions from inside Suitcase (on lower right, near where Rufus first came on deck)
    • use Provisions on Cogwheels (underneath middle chute)
    • quickly use Pair o' Socks on blue Hatch that opens right above Cogwheels. Make sure your mouseover text says "Hatch" (not "Maintenance Arm") before clicking.
    • open the Hatch you just put a Sock on, aptly labeled "Hatch with Sock"
    • click Maintenance Arm behind Hatch with Sock to collect Robot Arm
  3. use Robot Arm on red wire Hatch (left end of deck) to make a hole
  4. watch scene with Goal and Argus
  5. the hole you made in step 3 is now a passage marked "In the Hatch" -- enter it, and Rufus will climb up to compartment on left side where Levers are
  6. click any Lever, doesn't matter which one
After a scene in which Goal falls -- and Rufus is thrown -- off the cruiser, you'll find yourself back in Kuvaq at Front of Town Gate.
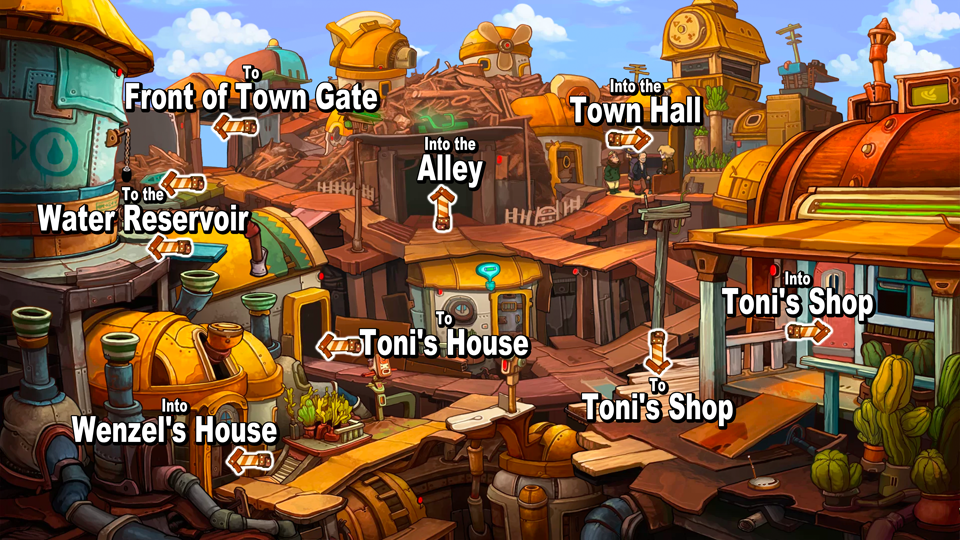
VILLAGE CENTER MAP

As you're going to be spending a lot of time crossing through Village Center -- which is is very large and can quickly become very tedious -- you should know that if you double-click any arrow, Rufus will pop over to it, skipping the long walk.

other areas
Having trouble finding a location not shown on the map? Maybe this will help:

the Alley contains:
  • Emergency Station
  • Lonzo's Bar
Wenzel's House contains:
  • Basement
  • Bathroom
the Town Hall contains:
  • Assembly Hall
  • Mayor's Office
  • Post Office (which contains Operator's Platform & the Vault)
Toni's House contains:
  • In Front of Toni's House
  • Toni's House
  • Behind Toni's House
2.0: ESPRESSO QUEST OUTLINE
The following elements of Rufus' Plan* are covered in sections 2.1 through 2.9:
  • Find Goal
  • Elbow through the waiting line
  • Give Wenzel a stern talking-to
  • Trick Wenzel into believing there's a water vein in his basement
  • Convince Wenzel to stop blocking the line
  • Talk to the mayor
  • Come up with a plan to brew the ultimate stimulant
  • Gather ingredients
    • Water: Clear, Energized, Exhilarating
    • Powder: Black, Stimulating, Hot
  • Brew the stimulant
  • Wake up Goal
  • Talk to Goal
*If you don't know what i mean by "Rufus' Plan," please see the section near the beginning of this guide titled "general tips for surviving on your own."
2.1: get Recipe
items
  • Recipe
Rufus has just been thrown off the Organon Cruiser and is standing at Front of Town Gate between a mechanical Bull and a wrecked truck...

steps
  1. discover your mission:
    • go through doorway To the Village Center
    • since Rufus specifically mentioned the crowd gathered around the door on the right, you should probably go there, Into the Town Hall
    • talking to various characters inside Town Hall, you learn that many citizens of Kuvaq are asking the Mayor for custody of Goal, that there are a lot of people in line ahead of Rufus, and that Wenzel is holding up the entire line.
    • go To the Assembly Hall to learn that Goal is back there and in need of some really strong coffee to help her regain consciousness
  2. go all the way back out To the Village Center, then go Into the Alley
    missable achievement alert
    The Detonation Plan puzzle in the Alley must be done correctly on the first try in order to earn Demolition Expert.

    The instructions for the puzzle are given later in this guide (section 2.4, "elbow through waiting line")... i used spoiler tags there because if you're reading this during your first visit to the Alley, you're probably not ready for me to blab about what this puzzle is for or when it's needed.
  3. go Into Lonzo's Bar and click on Lonzo to bring up his dialogue menu
  4. of course, you should explore every option there -- and, indeed, on EVERY dialogue menu you encounter -- but the one you must choose before you can ask Lonzo about coffee is "Did you hear about the stranger? The girl?"

    The next step ends the conversation, and a few of Lonzo's dialogue options disappear, so plan accordingly.

  5. ask, "Is there something on your menu that can give someone a real boost?" (if you don't see that option, it means you need to take another whack at either step 1 or step 4) -- after the conversation/scene that follows, you'll have a Recipe for Espresso in your inventory.

    If you talk to Lonzo again now and explore all his new dialogue options, Hannek will have a new hint for you the next time you talk to him.
When you exit Lonzo's Bar after receiving Recipe, the door to Emergency Station on right side unlocks.
2.2: unlock Doctor's Cabinet
items
  • Handcuffs
  • Lock Pick

steps
  1. enter Emergency Station via door on right side of Alley. If you can't get in, see section 2.1.
  2. get Handcuffs:
    • hold mouse just underneath Lever until you see a down-arrow and the word "Lever" -- click to shift Lever to middle (blue) position.

      Handcuffs (hanging from the scales) and Lock Pick (behind Cell Grating) are revealed by this action, but can't be collected yet.

    • click machine compartment (currently labeled "Police Box") to knock Foot Fetters onto floor
    • shift Lever to bottom (red) position
    • click Fire Extinguisher in machine compartment (now labeled "Fire Fighter's Cabinet") to move it onto floor. It is not used further.
    • put Foot Fetters into Fire Fighter's Cabinet by clicking them in that order
    • shift Lever to middle (blue) position -- Foot Fetters fall out of top of machine and knock Handcuffs onto floor
    • pick up Handcuffs

    Now that you're past the part that i couldn't figure out how to hint you through, take a moment to explore the changes that happen each time you shift the Lever. Pay particular attention to changing hotspots... i recommend using the spacebar (which highlights hotspots, in case you didn't know) to ensure you don't miss any that are easy to miss.

  3. get Lock Pick:
    • shift Lever to bottom (red) position
    • use Handcuffs on Hatch (on right, near roof-support pole) -- this prevents platform from closing over Fire Escape when you shift Lever
    • shift Lever to middle (blue) position
    • make your way back to Front of Town Gate
    • a fire pole has appeared behind Bulletin Board -- climb it to enter cell at Emergency Station
    • take Lock Pick
  4. use Lock Pick on Cell Grating to let Rufus out
  5. shift Lever to top (green) position
  6. use Lock Pick on machine compartment, which is now labeled "Doctor's Cabinet"
2.3: trick Wenzel
items
  • Dentist's Drill
  • Balloons / Balloon filled with Laughing Gas
  • Hook / Balloon with Hook
  • Key of First Aid Kit
steps
  1. get Dentist's Drill:
    • go to Alley, enter Emergency Station
    • shift Lever to top (green) position
    • take Dentist's Drill from right side
  2. exit to Village Center, go Into Wenzel's house, talk to Wenzel.
    Wenzel has a LOT of helpful things to say, but for the sake of moving the waiting line along, these are the most useful tidbits:

    • the reason he's not using his Waiting Number is that he figures he wouldn't have a chance with the Elysian woman unless "[he] were rich or found a water vein"
    • the "weird stick" he got out of Rufus' chest is a Divining Rod, a thing that's used to find water veins
    • the game's first "hidden hint" recommends you "Trick Wenzel into believing there's a water vein in his basement"
    Once you succeed in tricking Wenzel, you'll no longer be able to ask him the questions you see on his dialogue menu, so you probably want to ask them all now. To get the most out of the conversation, make sure you have Recipe (section 2.1) in your inventory.

  3. go to Basement (the stairs are directly left of Divining Rod)
  4. use Dentist's Drill on Pipe
    Of course, no water emerges; to look for clues on how to summon some, start by exploring outside Wenzel's house. If you're going up "To the Water Reservoir" to mess with stuff, you might want to double-click the arrow... unless you prefer to spend the next 32 seconds watching Rufus walk slowly up there, in which case you should single-click it. To each his or her own.

    From poking around in Village Center, you should learn that next you need to somehow open the protective cover over Wenzel's Chimney, then redirect the water from the Reservoir into there. It doesn't seem like you can do anything to the Chimney from outside, but you can mess with the other end of it: the Furnace (which is inside the house, up in the Bathroom).

    Maybe you need something that can go up through the Furnace to the Chimney... something that can perhaps ascend in some way? Keeping in mind, of course, that the physical laws here are more like cartoons than the real world...

  5. get Balloon filled with Laughing Gas:
    • go to Town Hall, then enter Assembly Hall
    • click Doorknob (just above Goal's head) to open closet
    • take Balloons from on top of Cardboard Box
    • go to Alley, then enter Emergency Station
    • shift Lever to top (green) position
    • use Balloons on Laughing Gas to get Balloon filled with laughing Gas
    If you were to experiment by putting Balloon filled with Laughing Gas into Furnace, you'd see an exterior view of it exiting Chimney and floating away (and shortly thereafter, you'd need to see yourself going back to Emergency Station for another gas Balloon).

    What you need now is something to prevent Balloon filled with Laughing Gas from escaping; you need to...

  6. get a Hook:
    • from Village Center, go Into Toni's Shop. She won't let you take a Hook from jar on right, so you'll have to distract her...
    • try to take Vouchers from pile of orange things at left end of counter
    • while Toni is meditating to calm herself down, grab a Hook

      On one of my dozens of playthroughs, i encountered a bug wherein Hook appeared to no longer be clickable once Toni was meditating; i solved this by using "Esc" to go to Main Menu, then clicking "Continue" -- it was fine after that.
    Because Rufus hurt himself stealing her merchandise, Toni gives him Key of First Aid Kit.

  7. flood Wenzel's house:
    • combine Balloon filled with Laughing Gas and Hook to create Balloon with Hook
    • put Balloon with Hook into Furnace in Wenzel's Bathroom -- it will rise up, catch on the Chimney cover, and stay there holding it open
    • exit Wenzel's House and go up to Water Reservoir
    • click Pipe to kick it -- the heavy, speeding hunk of metal is stopped dead in the correct position by your wee Balloon
    • pull Tap of Reservoir
  8. go back inside Wenzel's House -- Rufus will automatically go into the Basement for an auto-dialogue scene
2.4: elbow through waiting line
hinterlude*
Instead of steps, i begin this section with a series of increasingly more helpful hints. There's a missable achievement in here, so you should save your game now if you want to experiment without missing it.

Try not to scroll past the box if you want to figure this out on your own, because i didn't use spoiler tags on the solution (so as not to render it unsearchable).
  • hint: You need to give the three people ahead of you in line a good reason to leave.
  • hint: You can't annoy them into leaving, so it will need to be something bigger.
  • hint: MUCH BIGGER. Think "urgent."
  • hint: ...something like an explosion.
  • big hint: The key is the Detonation Plan in Alley. To use it, first go to Town Hall and take Magnets off bulletin board, then return to Alley. It is recommended that you save your game at this point. Once you've done that, use Magnets on Detonation Plan to enter map view. Arrange the red Magnets on the map, click "Back" to exit map view, then ring Blast Signal (the bell next to Detonation Plan). This may or may not effect changes at the Town Hall, depending on how well you did placing the magnets, which is addressed by the next clump of hints.

  • hint: The people you're trying to get rid of are wearing exceptionally weird hats.
  • hint: Maybe you should ask them about those hats.
  • hint: Did that guy say something about roofs?
  • hint: Have you maybe seen those same odd hat shapes somewhere else?
  • near-spoiler hint: Each hat corresponds to a roof in the Village Center.
  • near-spoiler hint: Now you know where those guys live...
  • near-spoiler hint: One of the roofs might not look like a roof to you. It sure didn't to me.
* "hinterlude" = "hint" + "interlude." May history remember that i was the one to coin that.
items
  • Magnets
  • Waiting Number

solution
  1. use Detonation Plan to eliminate competition:
    • go to Town Hall and collect Magnets off bulletin board
    • go to Alley
      missable achievement alert
      The Detonation Plan puzzle in the Alley must be done correctly on the first try in order to earn Demolition Expert.
    • use Magnets on Detonation Plan (or, if Magnets are already on Detonation Plan, right-click it to enter map view)
    • in map view, place one red Magnet on each of the two towers above Alley entrance (the two highest spots on map), and another in the rightmost spot on the bottom row.

      These three spots represent the houses in which those three guys live, as indicated by their hats that match their roofs.

    • click arrow button on upper right to exit map view
    • ring Blast Signal (the bell next to Detonation Plan)
  2. return to Town Hall -- the 3 guys with weird roof hats are all gone... because you blew up their homes
  3. pick Waiting Number up off floor just inside entrance, then wait for the scene with Wenzel to finish. If Wenzel doesn't appear when you pick up Waiting Number, go to section 2.3.
  4. double-click the arrow marked "To the Mayor's Office" (behind Wenzel) to enter -- you MUST DOUBLE-CLICK the arrow to get past Wenzel!!
  5. Talk to Mayor Lotek.

    If you want to hear everything Lotek has to say, save mention of "the elysian girl" for last, since the end of that conversation causes him to leave the office. He gives a couple of helpful clues that you won't be able to repeat, so pay careful attention!
2.5: make Coffee Powder
items
  • Syringe
  • Stimulant ("Stimulating" / "Extraordinarily Stimulating")
  • Dissector's Scalpel
  • Asbestos Gloves
  • Chili Pepper ("Hot" / "Hot Beans")
  • Dud
  • Black Powder ("Black" / "Black Powder")
  • Coffee Powder ("Powder")
Helpful quote: "I still have some [stimulants] left in the medicine cabinet in my office." --Gizmo
steps
  1. unlock Doctor's Cabinet as described in section 2.2
  2. make sure Lever is in top (green) position
  3. take Syringe from Doctor's Cabinet. Rufus will automatically also grab the Stimulant that's in there with it -- this is the "Extraordinarily Stimulating" called for by the Recipe (marked "Stimulating" on Rufus' Plan).
  4. with Lever in top (green) position, click Dissecting Scalpel on right side of cubicle to collect Dissector's Scalpel
  5. with Lever in bottom (red) position, take Asbestos Gloves from right side of cubicle
  6. exit to Village Center, then go to Toni's House
  7. use Asbestos Gloves on Chili Pepper In Front of Toni's House to collect it -- this is the "Hot Beans" called for by the Recipe (marked just "Hot" on Rufus' Plan)
  8. go Behind Toni's House and pick up Dud
  9. use Dissector's Scalpel on Dud to get Black Powder (marked just "Black" on Rufus' Plan)
  10. make Coffee Powder:
    • go Into Toni's Shop (via Village Center)
    • place Stimulant, Chili Pepper, and Black Powder inside Grinder
    • click Crank to grind up ingredients
    • open Grinder, then click it again to collect Coffee Powder (marked just "Powder" on Rufus' Plan)
2.6: gather ingredient "Clear"
items
  • Divining Rod
  • Key of Booze Cabinet
  • Glass
  • Booze ("Clear" / "Clear Water")
Helpful quote: "Legend has it that your father once found clear water. They say that there are still a few bottles hidden away in the town hall." --Wenzel
steps
  1. enter Mayor's Office at Town Hall.

    If you can't get in and Wenzel is standing in hall, double-click door to get past him.
    If you can't get in and Wenzel is NOT standing in hall, check sections 2.3 and 2.4 to see what you've missed.

    See the Water Emblem on the front of the desk? It's the key to continuing. ...well, it's actually more like the keyHOLE. Perhaps you have something in your inventory that fits in there...? If not:
  2. retrieve Divining Rod from left side of Wenzel's Basement
  3. use Divining Rod on Water Emblem -- desk Drawer opens (or closes and reopens, if it was already open) to reveal a secret compartment containing Key to the Cupboard (which will be called Key of Booze Cabinet in inventory)
  4. open Globe and take Glass to reveal Keyhole
  5. use Key of Booze Cabinet on Keyhole
  6. take Booze from inside Booze Cabinet -- this is the "Clear Water" called for by the Recipe (marked just "Clear" on Rufus' Plan).
You might not get a green checkmark next to "Clear" on the Plan nor a red one next to "Clear Water" on the Recipe when you collect this ingredient, but that's ok: you're still on the right track.
2.7: gather ingredient "Exhilarating"
items
  • Sign
  • Red Curtain
  • Syringe with Taurine ("Exhilarating" / "Revivitalizing Liquid")
Helpful quote: "I once heard that it's supposed to be revitalizing to drink the blood of a bull." --Wenzel
"Revitalizing Liquid" is misspelled "Revivitalizing Liquid" on Recipe; and now that both spellings are present in this guide, people searching for help with this task will be able to find it whether they spell it "incorrectly correctly" or "correctly incorrectly" :D

steps
  1. go to Front of Town Gate where the mechanical Bull is.

    Think about something you might have seen (and/or currently have in your inventory) that somehow relates to Bulls, and try using it to elicit a reaction. Keep in mind you're in a cartoon universe, and that's more a "cartoon Bull" than a mechanical one...

  2. if you don't have Sign (which you may have noticed is a picture of a cow wearing makeup), go get it from Lonzo's Bar in Alley
  3. use cow Sign on Bull (or on Bulletin Board) to get its attention and make it turn around.

    If you examine Bull now, you may notice Rufus says different stuff about it: the age requirement for riding has gone up to 12, and he adds "The bull's spirits really need to be a-pumpin' before I'm gonna ride it." So, maybe you need to... make the Bull mad?

    Anybody who's ever seen a Bugs Bunny cartoon knows that to make a bull mad, all you need is a red cape (or approximation thereof)...

  4. if you didn't pick Red Curtain up off the floor while you were at Lonzo's Bar, go get it now
  5. use Red Curtain on Bulletin Board to drape it there -- the angry Bull's "blood" (actually taurine) boils up into the tank on its side.

    You need that taurine, but how do you extract it? some kind of... sucker-outer thing? maybe one designed for blood? If you don't have anything in your inventory that fits that bill, you may need to unlock Doctor's Cabinet at Emergency Station (as described in section 2.2) to get the Syringe.

  6. use Syringe on Bull to collect Syringe with Taurine -- this is the "Revivitalizing Liquid" called for by the Recipe (marked "Exhilarating" on Rufus' Plan)
2.8: gather ingredient "Energized"
items
  • Sponge / Wet Sponge
  • Key of Truck
  • Glass of Energy-rich Water ("Energized" / "Energy-rich Water")
Helpful quote: "Energy-rich water? The only energy I know of is in car batteries you find in the trash heaps everywhere." --Wenzel
More than one NPC has mentioned car batteries, but you haven't seen any lying around... There is a wrecked truck at Front of Town Gate, though; maybe if you could pop the hood you'd find one under there. Your first hint towards getting into the truck comes from the comments Rufus makes when first examining it: "The windshield is encrusted with dirt. There's a sign behind it. Maybe the name of the driver?"

Next hint: when you were talking to Hannek in the Alley, he said "I have a whole collection of car keys for cars that have been scrapped ages ago." Then when you said "Maybe you have my key, too?" he asked for your name...


steps
  1. get information about owner of wrecked truck at Front of Town Gate:
    • take Sponge from Wenzel's Bathroom
    • at Toni's House, use Sponge on Pot (the one you washed your Socks in) to get Wet Sponge (it'll automatically appear in your inventory, no need to fish it out)
    • go to Front of Town Gate and use Wet Sponge on Windshield to clean it
    • examine clean Windshield
  2. go to Alley and talk to Hanek about keys. If you don't see that on his menu, ask him "What exactly are you guys doing down there?" (...and shame on you for not talking to everybody about everything like you should)
  3. Give answers to convince Hannek that Rufus is the owner of the truck: your name is Sugarpuff, your favorite color is pink, and your hobby is ballet (as long as you've examined the clean Windshield, you can also just guess at the answers until you get them right). Succeed, and you'll receive Key of Truck.
  4. return to Front of Town Gate
  5. use Key of Truck on Truck Door
  6. pull Lever inside truck to unlatch Hood
  7. click Hood to open it.

    Inside you find a Battery; Rufus says he can't remove it, but still wishes to somehow "access the power that's harbored within." Maybe you could open it up... or at least poke holes in it...

  8. if you don't have Dentist's Drill, you can find it at Emergency Station with Lever in top (green) position
  9. use Dentist's Drill on Battery -- a stream of battery Acid springs forth
  10. use Glass (section 2.6) on Acid to collect Glass of Energy-rich Water (marked "Energized" on Rufus' Plan).
    When you combine Glass with another item, its name changes:

    • Glass + Booze = Glass of clear Water
    • Glass + Syringe with Taurine = Glass of revitalizing Water
    • Glass + Booze + Syringe with Taurine = Revitalizing Water
    So if you don't have Glass but do have one of the combo items from that list, use the combo item to collect Acid.

    The name of the inventory item you create in step 10 will depend on what (if anything) you combined with Glass before collecting Acid:


    • Acid + empty Glass = Glass of Energy-rich Water
    • Acid + Glass of clear Water = Energy-rich, clear Water
    • Acid + Glass of revitalizing Water = Energy-rich, revitalizing Water
    • Acid + Revitalizing Water = Energy-rich, revitalizing and clear Water
2.9: wake up Goal
items
  • Energy-rich, revitalizing and clear Water ("Water")
  • Espresso
  • Hand Torch
  • Funnel

steps
  1. create Energy-rich, revitalizing and clear Water by combining all the following items:
    • Glass (section 2.6)
    • Booze (section 2.6)
    • Syringe with Taurine (section 2.7)
    • battery acid (section 2.8)
    These items can be combined in a few different ways, and each combination results in a uniquely-named new item... so if it seems like you're missing something you were sure you already had, you may have already combined it with something else. For more information about the items created by combining these ingredients, see the end of section 2.8.

  2. make Espresso:
    • go to Alley and enter Lonzo's Bar
    • put Energy-rich, revitalizing and clear Water into Filler Cap (near Lonzo's left hand)
    • put Coffee Powder (section 2.5) into Tray above Espresso Cup (depending on whether it's closed or open, it'll be labeled "Closed Tray" or "Fefill Tray," respectively).
      ...(Yes, "Fefill" Tray. You know, for your Covfefe Powder).
    When the lights come back on and the dust settles, you'll have Espresso in your inventory.

  3. go to Town Hall and enter Assembly Hall
  4. use Espresso on Goal... or try to, anyway.

    Talk to Gizmo to see if anything he says gives you an idea how to get at Goal without him interfering -- try not to look at step 5 if you want to figure it out yourself.
    • hint 1: There's talk of emergencies, and how he will only respond if one is actually happening
    • hint 2: One of these emergencies can be created right there in the Assembly Hall
    • hint 3: There sure aren't very many interactable objects in this room...
    • hint 4: If you're still stuck and nothing in your inventory seems to be helping, first make sure you didn't skip step 4, then go look around Behind Toni's House to see if you missed picking up anything there

  5. go Behind Toni's House; collect Hand Torch and Funnel
  6. use Hand Torch on Cardboard Box in Assembly Hall closet.

    When Gizmo goes inside to put the fire out, Rufus locks him in. Even though Gizmo is safely out of the way (safe for Rufus, not Gizmo), you still can't poison -- er, "help" Goal due to interference from the other two men. To create another distraction...

  7. steal Stethoscope off podium.

    Gizmo immediately escapes from the cupboard and comes up on Stage, wanting to know who stole it. To continue, you need to plant the Stethoscope on someone, and there's only one person here that will work on...

  8. click Mayor Lotek (or his Bag).

    A fight between him and Gizmo ensues; after a few exchanges, you'll regain control of your cursor, freeing you to get at Goal.

  9. use Funnel, then Espresso on Goal
  10. after the cutscene, you'll find yourself in Emergency Station along with Goal and Gizmo
  11. talk to Goal to learn that for your next quest, you need to find a radio to contact her fiancé, Cletus
3.0: RADIO QUEST OUTLINE
The following elements of Rufus' Plan* are covered in sections 3.1 through 3.7:
  • Gain access to the post office
  • Gather Gift-Coupons to order a package
  • Manipulate the postage so the package gets filled with bubble wrap
  • Fill the package with bubble wrap
  • Manipulate the pigeons to sabotage the delivery
  • Intercept the delivery
  • Direct the Mail-bot's attention toward the bubble wrap
  • Distract the Mail-bot with bubble wrap
  • Open the safe
  • Find a radio
  • Obtain earphones
  • Obtain a mic
  • Power up the back-up radio
  • Contact Goal's fiancé
  • Go back to Goal
  • Rescue Goal from the claws of Wenzel
*If you don't know what i mean by "Rufus' Plan," please see the section near the beginning of this guide titled "general tips for surviving on your own."

glossary
  • "Gift-Coupons" = Vouchers
  • "Mail-bot" = Postbot
  • "the safe" = the Vault
  • "earphones" = Headphones

rant
This segment seriously triggered my decades-old PBFPSD (Post Babel Fish Puzzle Stress Disorder). Even using a guide to assist my struggle, i was still stressed out (...although in retrospect, the guides themselves may have actually contributed to that quite a bit). This walkthrough almost didn't get written because i was dreading this part that much. Proceed with caution.

...and booze. Caution, and booze.

(Google "Babel Fish Puzzle" if you're lucky enough to have avoided that horrendous bit of gaming infamy and are curious as to why i would joke that it gave me PTSD... it's just too painful to recount here. Not to mention irrelevant.)
3.1: gain access to the Post Office
items
  • Mayor's Clock
Helpful quote: "The post office will be closed until the clock on the sign is back." --Lotti
The first thing to do after waking Goal (section 2.9) is go to Town Hall. Talk to Lotti, examine the "Opening Hours" thing, and try to enter Post Office for some good hints.

steps
  1. enter Assembly Hall to find Mayor Lotek passed out on the stage
  2. take Mayor's Clock from around Lotek's neck
  3. return to Town Hall, use Mayor's Clock on Opening Hours (next to Lotti) to unlock Post Office
  4. enter Post Office and talk to Postbot about Radio calls
    Postbot's Radio call dialogue
    There are multiple "issues" with the conversation you're about to have with Postbot: on its surface, it appears confusing and unhelpful, but when you dig deeper, you find it's also misleading and non-repeatable. Below you'll find it all transcribed faithfully, with each conversation followed by some clarification.

    • Rufus: Where can I make a radio call?
    • PB: Outgoing radio calls can be made from every registered private radio device.
    Accuracy adjustment: In his next set of statements, Postbot reveals there's NO SUCH THING as a "registered private radio device"...?!?

    • Rufus: Where would I find one of these registered private devices?
    • PB: There is no radio device registered for long distance calls.
    • Rufus: What's that supposed to mean? It has to be possible to make outgoing calls somehow.
    • PB: Not while using a private radio device.
    Accuracy adjustment: All the dialogue about "private radio devices" (this conversation and the previous one) seems to be specifically intended to confuse you, since the devices it mentions DON'T EXIST, and even if they did, Postbot can't seem to make up his mind whether they would or would not be capable of placing long-distance calls. <insert profanity here>

    • Rufus: Are there other radio devices registered?
    • PB: There are three registered devices for local calls.
      One is situated in the Mayor's office.
      Another at the front desk counter in the town hall.
      The communications system of the emergency station is the third one.
    • Rufus: But it's only possible to make internal calls from there? Well, that's perfect.
    Translation: They're using "internal" and "local" interchangeably here; the three devices listed can only be used to talk to people in or around Kuvaq, which doesn't include Cletus, who's, like, in space or something. However, they are still necessary to your quest.

    Accuracy adjustment: The information Postbot gives about the locations of the three local call devices is riddled with half-truths that could potentially be a source of frustration. Everything he says about them is technically true, but phrased in a way to throw you off their trail; therefore, i'm going to hide the "adjustments" under spoiler tags in case you consider Postbot's misdirection to be part of the puzzle:


    • "One is situated in the Mayor's office."
      TWO are situated in the Mayor's office. So yeah: one IS there, but not ONLY one, as you might mistakenly believe.

    • "Another at the front desk counter in the town hall."
      If you go to "the front desk counter in the town hall" and look for the second device, you'll find no trace of it; however, when you do discover it -- and i'm not sayin' where yet -- you'll see that you can use it to talk to Lotti. So technically, it IS at the front desk; you just can't see it or use it while standing there.

    • "The communications system of the emergency station is the third one."
      Again, if you go looking for the third device inside the Emergency Station, you won't find it. Consider the previous spoiler a hint for this one, because the way in which the truth has been obfuscated here is similar... Somewhere in Kuvaq -- again, i'm not sayin' where 'til later in the guide -- there's an Emergency Phone that connects directly to Gizmo.

    • Rufus: Are there absolutely no long distance devices?
    • PB: There are no long distance devices except the listening post of the post office and the reserve system in the vault.
    • Rufus: Well, so there are two of them after all!
    • PB: Both devices are not cleared for public use.
    Translation: The two devices mentioned in this dialogue clump are the only ones capable of placing a long-distance call to Cletus.

    Accuracy adjustment: Actually, this one is okay.
    P.S. As long as we're on the topic of Postbot's duplicitous efforts to make you rage-quit this game before you've hardly gotten started playing it, i should mention that he also says something misleading about bubble wrap: he claims it's only ever used in "postage level 3" boxes, but this is NOT TRUE; it can also be used in "postage level 2" boxes. If you're stuck on the bubble wrap problem now and need help, go to sections 3.3 - 3.4.

  5. stop by Operator's Platform (left side) to get some info out of Telephone Operator

Tip
Rufus' Plan has some very helpful hidden hints about what needs to be done at Post Office; to unlock them you need to do all of the following:
  • exhaust all of Postbot's dialogue about Radio calls and devices; this includes all 4 questions transcribed above under step 4 (they disappear from the dialogue menu if you've already asked them)
  • tell Postbot, "you're no fun at all" (if you don't see that option on his menu, that means you've done it already)
  • examine either one of the Cats (see section 3.3 below if you can't find the Cats)
  • talk to Telephone Operator about pigeons
  • examine Vouchers on the counter at Toni's Shop
The result:
3.2: get gift Vouchers
items
  • Tranquilizer
  • Dart / Prepared Dart
  • Funnel / Blow Pipe
  • Vouchers
Helpful quote: "They're gift vouchers. You hand them in at the post office and they deliver the merchandise." --Toni
The distraction technique you used on Toni to steal her Hook isn't going to work for Vouchers, so you're going to need a more elaborate scheme. Think about that theft... was there perhaps something that happened then that hasn't gone anywhere yet? I'm talking about when Toni gave you Key of First Aid Kit; you should go see where that Key leads you...

steps
  1. get Tranquilizer:
    • go Into Toni's House and walk up ramp to middle level
    • use Key of First Aid Kit (section 2.3) on First Aid Kit to open it
    • take Tranquilizer.
    ...Using Tranquilizer directly on Toni doesn't help, so maybe you need to be sneakier about it... and just maybe something you've seen lying around Kuvaq seems like the perfect way to sneakily tranquilize someone....

  2. grab Dart off dartboard at Lonzo's Bar
  3. combine Dart with Tranquilizer to create Prepared Dart.

    If you try to use Prepared Dart on Toni, Rufus tells you "All that's missing is a blow pipe. And a sufficiently safe distance."

    As for the former, your hint is that it's an item you're definitely already aware of, because you've already used it to commit battery against a woman once. ... BATTERY, get it? As in BATTERY ACID?


  4. go to Assembly Hall and retrieve your Funnel from the Stage
  5. combine Funnel with Prepared Dart to create Blow Pipe.

    Now all you need is that "sufficiently safe distance" Rufus mentioned... you can't do this from inside the shop, so...

  6. stand outside Toni's Shop. If you're already inside it, just go out the door; if you're starting from Village Center, look for the down-arrow in front of the shop marked "To Toni's Shop," and go there.
  7. next to the door leading Into Toni's Shop there's a Window -- use Blow Pipe on that
  8. go Into Toni's Shop and take Vouchers
3.3: manipulate the postage
Helpful quote: "I like popping the bubbles in bubble wrap. Unfortunately I only ever need bubble wrap to pad packages that contain smaller objects which have accidentally been put into boxes of postage level 3." --Postbot
Why do we want to "manipulate the postage," you ask? Short answer: because it says so on Rufus' Plan (if it doesn't say that on your Plan, see "Tip" at end of section 3.1). Slightly longer answer: because we need to distract Postbot with bubble wrap, and bubble wrap is only used when incorrect postage is applied.

steps
  1. go to Post Office
  2. open yellow Hatch to the right of Postbot to reveal an orange Cat
  3. open brown Hatch to the right of that to reveal a white Cat

    A helping of hints 'n' info for you:
    • Use Vouchers (section 3.2) on Postbot to observe the process you're about to mess up. You'll never run out of them, so do it as many times as you need to try to figure out what to do next.
    • The biggest, most helpful hint is given when Rufus examines the white Cat: "A cat licks the stamps? Well, I hope it knows what it's doing. A bit too slow or a bit too fast and, whoopsidaisy, the package gets the wrong postage."
    • Since that big, helpful hint underneath the spoiler tags in the previous bullet point came from the white Cat, let's start there: what do you have in your inventory that might make the postage Cat lick stamps "a bit too slow or a bit too fast?" When you find something that seems to have had some effect, submit a Voucher to see what happens.
    • Postbot said bubble wrap is "only" used with "postage level 3," but that is not true, and you therefore might become confused when you see bubble wrap being put into a "postage level 2" box yet are unable to continue. As you experiment and observe here, know that the most important part of what Postbot said is "postage level 3" (NOT "bubble wrap").

  4. use Espresso on white stamp-licking Cat to speed him up; if his eye isn't twitching, use it on him again.

    After doing this, you might want to submit a Voucher and see what happens. ...Well, you got bubble wrap, but Postbot said that package was "postage level 2," and we're shooting for "postage level 3." What can you do to increase the amount of postage applied even further? Maybe if the package moved through his station more slowly...

  5. use Tranquilizer (section 3.2) on orange hamster-wheel Cat to slow him down; if he's not nodding off, use it on him again.

    Correct Cat settings:
    orange:

    slow (napping)
    white:

    fast (twitching)
If you haven't yet sabotaged the delivery (as described in section 3.4), submitting a gift Voucher now will result in a large pigeon carrying your box full of bubble wrap safely away from the Post Office, which doesn't help your cause at all. What would help your cause would be if the box didn't leave the Post Office, and if the bubble wrap came back out of it...somehow. Hence the need to sabotage the delivery.
3.4: sabotage the delivery
items
  • Planet's Magnetic Field
Helpful quote: "Did you know they take their bearings from the planet's magnetic field? I once tied strong electromagnets 'round their necks. The fools immediately flew the wrong way." --Telephone Operator

hints
Your first hint is that i only called this section "sabotage the delivery" because the full text of the Plan entry i wanted to use -- "Manipulate the pigeons to sabotage the delivery" -- is too long to fit in the menu sidebar.

Your next hint is this quote from Mayor Lotek that you probably forgot about: "Well it does work. I sleep like a baby. The only downside is that carrier pigeons are constantly crashing into my window." And what was the "it" he was talking about "working?" The device that Rufus' father installed in the desk to correct the fact that it's "not aligned correctly with the planet's magnetic field."

So there have now been two mentions of the "planet's magnetic field:" one in relation to the messenger pigeons on Operator's Platform at Post Office, and the other in relation to Mayor's Lotek's desk...


answers
  1. get Planet's Magnetic Field:
    • go to Mayor's Office
    • if Drawer is closed, ring Bell to open it
    • if you see an empty Drawer (the rim of which is brown with green dots), that means it's in "secret compartment" mode -- use Divining Rod on Water Emblem to toggle to "sleeping compartment" mode (the rim of which is solid green)
    • click green Cushion in Drawer to move it aside
    • grab Planet's Magnetic Field
  2. go up to Operator's Platform
  3. use Planet's Magnetic Field on Cupboard or Cabinet (the door is called "Cupboard" and the interior is labeled "Cabinet," so you'll see different mouseover text depending on whether the door is open or closed)


  4. click Cabinet (with Planet's Magnetic Field inside it) to start the minigame
    missable achievement alert
    You must play this minigame without skipping it to earn That seems about right...
    minigame: Planet's Magnetic Field
    The idea here is to redistribute the rectangular lights in such a way as to cause the large box full of bubble wrap (created in section 3.3) to be dispatched via the small carrier pigeon; the overloaded pigeon will then crash, breaking the box and dumping bubble wrap on the floor. ...i guess Deponian bubble wrap is really heavy or something.

    The number of rectangular lights in each column corresponds with the number of round lights underneath it. To mess with the pigeons, you need to mess with the arrangement of lights, but how and why?

    First, the "how:" move your mouse over a round light to see whether or not you can adjust it -- if you see mouseover text and an "action cursor," that means you can. Clicking that light will cause the disc it's on to spin, rotating the lights that are on the edges of the disc. If you need more "how" help than that (e.g. the exact clicks required to win), you'll need to consult another guide.

    As for the "why," i cover this only in case you want to figure out for yourself what the target arrangement should be; scroll down to "solution" for a screenshot if you're beyond caring about that. The following explanation is basically the in-game instructions rephrased (hopefully more clearly):

    The rectangular lights are actually like signal bars, except they represent magnetic field strength. Each set of "signal bars" goes with a pigeon hole, lined up in the same physical order as the holes (left, middle, right). The large pigeon sits in the middle hole because it's attracted by the strong 3-bar field, NOT because the hole is large.

    You may wish to submit another Voucher to scrutinize the delivery process while bearing that information in mind. ...or you may just want to look at this spoiler: Postbot announces the size of the hole from which the pigeon is being dispatched, not the size of the pigeon. And in case you missed this hidden hint on the second page of the in-game instructions: "A small pigeon can't fly very far if it has to carry a big package."

    solution
    The starting arrangement:
    The target arrangement:

    Between the time i originally published this guide in 2017 and when i overhauled it in 2020, the conclusion of this puzzle was changed in a confusing way. As it stands now, it appears to never end, to never be "won;" when you arrange the lights correctly, Rufus reacts exactly the same way as he would if you'd done them incorrectly. Then, even after you've completed the task this puzzle was designed to unlock (distracting Postbot in steps 5 & 6 below), it's still possible to enter -- and "skip!" -- the minigame. At least in my installation it is. There doesn't appear to be any functional reason for this open-endedness... unless perhaps you count "sadism" as a "functional reason."

    I have no idea whether this change impacts the missable achievement; originally, you received it as soon as you clicked the puzzle's "Back" arrow after correctly arranging the lights. Hopefully this is still the case.

    That's all i got for ya, sorry. Good luck with that. <paragraphs of deranged ranting about this razzafrazza puzzle withheld for your convenience>
    missable achievement alert
    Step 5 removes the possibility of earning Missing Postage.

    You need to make the orange Cat go fast and the white Cat go slow, which is the opposite of how it needs to be to make the bubble wrap appear. So, assuming you've already correctly drugged the Cats (section 3.3): first use Espresso twice on the orange one to speed it all the way up, Tranquilizer twice on the white one to slow it all the way down, and Vouchers on Postbot to get the achievement.
    backwards Cat settings for achievement:
    orange:

    fast (twitching)
    white:

    slow (napping)
    correct Cat settings for gameplay:
    orange:

    slow (napping)
    white:

    fast (twitching)
    Then set the Cats back the way they should be by using Tranquilizer on the orange Cat twice, Espresso on white Cat twice.

  5. go to Post Office, give Vouchers to Postbot -- the small pigeon crashes and dumps a large box of Bubble Wrap on the floor to the right (if that doesn't happen, go to section 3.3)
  6. click Bubble Wrap. ...then click it two more times <annoyed face>. There's some auto-dialogue, and Rufus walks out into the Hall to give Postbot some privacy.
3.5: open the safe (a.k.a. Vault)
items
  • Note
If you can't enter Post Office, go to section 3.1.
If you can get in but Postbot is still standing behind the desk, see sections 3.2 through 3.4.

steps
  1. enter Post Office
  2. collect Note from behind Postbot's desk -- a number pad (marked "Clock Face," for some reason) is revealed.

    It's possible to skip straight to the answer in step 4 if you're not interested in figuring this out for yourself. If you are interested in figuring this out for yourself, scroll carefully!

  3. figure out the combination:
    • click Note in your inventory and return to the Post Office view with it on your cursor.

      Rather than using it on something as is the most common practice, you're going to hold it in front of something and then gain visual cues from that...

    • move Note over the grid of numbers on the left so that the edges line up as well as they can; when positioned correctly, you'll see one complete set of three digits through each hole:


    • the number next to each hole indicates which digit in that set you should be paying attention to (e.g. since the top hole is marked "1," make a note of the 1st digit in the set of numbers it reveals). Start with the topmost hole and follow the arrows around to the other holes, noting the correct digit for each one.
  4. click Clock Face on Vault door and enter combination: 3649
3.6: get Headphones
items
  • Two Replacement Cats / Cat
  • Nodding Bird
  • Balloon filled with laughing Gas
  • Stunned Parrot / Parrot
  • Headphones
Helpful quote: "I'm as chilled out as can be. What, pray tell, should wear me out here?" --Telephone Operator
To get through this section with a minimum of help from me, you may benefit from having the following concepts laid out for you:

When talking to Operator, Rufus asked a question that wasn't about some recognizable element of gameplay like pigeons or phone calls: "Don't you get tired at some point?" We can imagine he hoped Operator would go on break so he could steal his unattended Headphones (called "earphones" on the Plan). You should therefore consider your mission in this segment to be to cause Operator to take a break.

Since Operator monitors phone calls, maybe you can get to him via one or more of the three "local call devices" that Postbot mentioned:
  1. "One is situated in the Mayor's office."
  2. "Another at the front desk counter in the town hall."
  3. "The communications system of the emergency station is the third one."
Be warned, however, that this information might be less helpful than it seems. The solutions below clarify what i mean by that, but if you'd like some hints before diving into the answers, there are also less "spoily" previews of Postbot's dialogue deceptions above in section 3.1.
If you have young children in the room with you, please send them to bed now so they don't hear me swearing at this quest segment.

solution
  1. manipulate local call device #1:

    • go to Post Office and open Replacement Cat's Hatch (made available by completion of section 3.4) just inside door
    • click Replacement Cat that pops out to collect Two Replacement Cats
    • go to Mayor's Office
    • use Two Replacement Cats on Teletypewriter -- this will leave one Cat remaining in your inventory
    If you're curious about your level of success, go back to Operator's Platform and examine/talk to Telephone Operator.

  2. manipulate local call device #2:

    HINTS:
    Local call device #2 can be difficult to find if you rely solely on what the NPCs tell you about it, because the information they give you is somewhat misleading. Postbot tells you it's "at the front desk counter in the town hall," but there's no object there that fits that description. Then if you find it on your own -- by looking somewhere other than where he told you to -- and examine it, Rufus claims it's not a local call device, but a long-distance one (which, if true, would mean that Postpot and the Operator lied about there only being two of those in existence... and that breaking into the Vault was unnecessary).

    So instead of listening to those two muttonheads, listen to this muttonhead (i.e. me): the device you seek cannot be found by looking "at the front desk counter in the town hall." It does, however, have some kind of observable connection to that location: think intercom ... ...that's not labeled "intercom," because of course it isn't.

    And don't be deterred or misled by Postbot's half-truth, "one is situated in the Mayor's Office", because it turns out that TWO of them are there.

    ...Our target object here is Communicator in Mayor's Office. The only thing you seem to be able to do to it is push its button, so maybe you need to find something that will push that button for you...

    SPOILERS:
    • retrieve Nodding Bird from Post Office Vault (made available by completion of section 3.5)
    • go to Mayor's Office
    • use Nodding Bird on Communicator to find that this one runs on magic or possibly despair, rather than water like the real-life "drinking birds." Based on the amount of force the thing seems to apply, i'm guessing it's despair.

  3. manipulate local call device #3:

    HINTS:
    Your first hint is that this solution begins with a "Nodding Bird" of a different kind; your second hint is that the first hint is a play on words.


    When you click Emergency Phone outside Wenzel's house, you are connected with Gizmo, who expects an emergency to be reported; what you need to do here is find someone (or something) to recite a list of emergencies into the Phone...

    ...think about Hannek's wife... mumble mumble... that's all you get, sorry.

    SPOILERS:
    • get Parrot:
      • use Balloons on Laughing Gas at Emergency Station to get Balloon filled with laughing Gas
      • use Balloon filled with Laughing Gas on Parrot in Alley -- it will pass out, making it useless to Hannek
      • take Stunned Parrot
      • use Espresso on Stunned Parrot to wake it up (it will be called just Parrot after that... examine it for a clue!)
    • teach Parrot some useful things to say:
      • go Into Toni's Shop and give Parrot to Toni (or put it on Pole next to door) -- there will be some auto-dialogue, and Toni will kick Rufus out
      • go right back Into Toni's Shop and take Parrot back
    • go to Village Center, find Emergency Phone near Wenzel's House
    • use Parrot on Emergency Phone -- he'll sit on the handle and repeat to Gizmo everything Toni's told him about Rufus' various crimes, busying the phone line for what we can imagine will be a very long time
  4. go to Operator's Platform to see that Telephone Operator has completely lost his s**t, so you're free to take his Headphones (lying on the desk in front of him)
  5. celebrate the most unpleasant part of the Deponia trilogy being behind you. Hooray!
3.7: get Goal & get out
items
  • Microphone

steps
  1. go to Assembly Hall and take Microphone off podium
  2. go to Post Office Vault, use Microphone and Headphones (section 3.6) on Radio
  3. click Radio to place a call, then wait out brief cutscene
  4. most of the conversation with Cletus is backstory; in order to move on, you need to demand passage to Elysium

    missable achievement alert
    Step 5 starts you on a straight track out of Kuvaq, so this is your last chance to collect the first 5 sculpture pieces. For more information, see the section titled "Junkyard King" near the beginning of this guide.

  5. go to Emergency Station, click Bed Sheet -- Gizmo locks you behind Cell Grating, you lose a whole bunch of stuff out of your inventory, and there's a scene with him and Bailiff Argus
  6. use Cat on Tree (far right side) -- Gizmo's firefighter mode is triggered, allowing Rufus to escape down the fire pole
  7. go to Wenzel's House
  8. after the scene with Wenzel and Toni, enter Basement
  9. click Cupboard to find Goal
  10. use Divining Rod on Basement Door to barricade it, then watch the cutscene showing the extremely implausible way in which Rufus escapes
Huzzah!
CHAPTER II: Junk Mines
4.1: switch on the mine-bike
items
  • Avial Power Inverter
  • Bi-Nausal Power Inverter, Dorsal Power Inverter
  • Halogen Lamp
Rufus and the unconscious Goal have just landed at the Junk Mines in an area called "the Turn."

steps
  1. cross the bridge by clicking the other end of it.

    Note that from that lower ring on which Rufus is now standing, he can't walk "To the Tunnel;" you need to either go Up onto the upper ring first, or double-click the Tunnel to teleport over there. Pick one of those methods now and...

  2. go To the Tunnel
  3. click Mine Bike to get in it and learn that it's broken
  4. go To the Viaduct and talk to Doc.

    There's a lot of dialogue here, and you need to hear pretty much all of it in order to continue. Of particular importance at this point:

    • "Who are you?" > "I'm a handyman myself"
      The dialogue that results from these options is all backstory, but you need to go through both of them to unlock the submenu described in the next bullet.

    • "Just as a thought: In case a fellow handyman faced a problem..."
      (changes to "I have some more interesting challenges")
      This option leads to a submenu with some important topics, the first of which is "When the mine bike doesn't start for example;" you must select that to get an Avial Power Inverter from Doc. If you don't see that option, it means you skipped step 3.

      If this is your first time encountering a Power Inverter, i recommend examining this one in inventory to learn an enduring truth of the Deponian universe.

      The other two topics here -- the ones about "my girlfriend" -- must both be explored in order to unlock the submenu described in the next bullet.

    • "You seem to know your ways around women ..."
      (changes to "Again about women...")
      This option appears on Doc's top-level menu when you unlock it as described in the previous bullet point; it contains 4 bits of dialogue that you'll soon find are much more helpful than they might seem.
  5. return to Tunnel and use Avial Power Inverter on Mine Bike -- it flies into Junk Heap (the Inverter does, not the Bike)
  6. click Junk Heap to start minigame
    missable achievement alert
    You must assemble the inverters without skipping the minigame to earn DIY'er.
    minigame: assemble Power Inverters
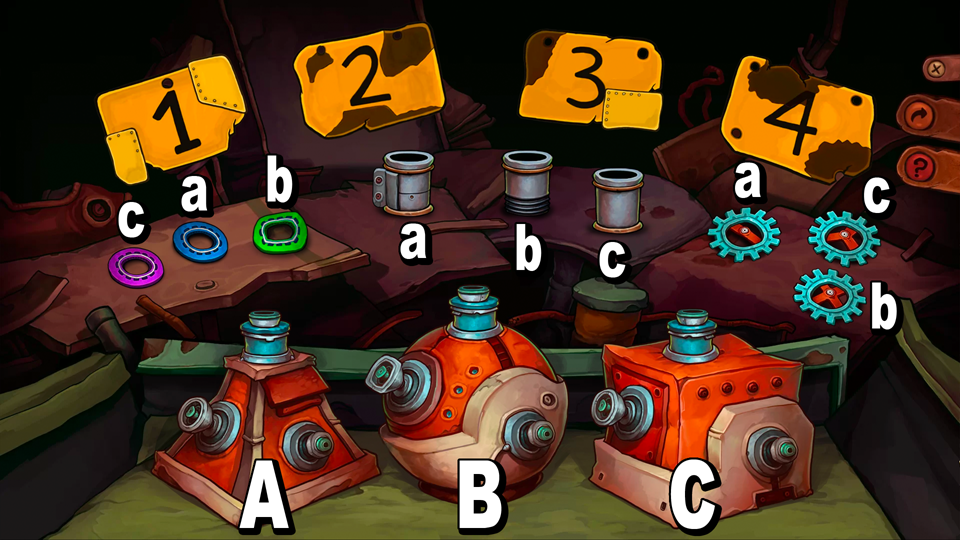
    The idea is to put all parts together the right way to make 3 power inverters, each of which will consist of one of each of the parts (i.e. 1 Muff + 1 Bushing + 1 Bevel + 1 Corpus = 1 Inverter). Click on a part, and then click on the Corpus you want to attach it to.

    hints
    The best hints come from talking to Doc; click the numbered yellow panels on the minigame screen to repeat what he said. If you don't see the hint panels, you should go talk to Doc some more (specifically about women -- see step 4 above for more info).


    From his clues, you learn the following:
    1. the Screw Bushing goes on the Spherical Corpus, and
      the Clamp Bushing does NOT go on the Edged Corpus
    2. the Mauve Muff goes on the Edged Corpus, and
      the Avial Inverter does NOT have a Mauve Muff
    3. the Bevel on the Dorsal Inverter has more spokes than the one on the Bi-Nausal Inverter
    4. the Screw Bushing goes with the 4-spoke Bevel, and
      the Clamp Bushing goes with the 2-spoke Bevel

    solution
    • Avial Inverter =
      Conical Corpus + Clamp Bushing + Cobalt Muff + Bevel with 2 Spokes

    • Dorsal Inverter =
      Spherical Corpus + Screw Bushing + Emerald Muff + Bevel with 4 Spokes

    • Bi-Nausal Inverter =
      Edged Corpus + Push On Bushing + Mauve Muff + Bevel with 3 Spokes
    In case you prefer your spoilers in diagram form, here's one showing how the parts match up with the corpora:


    And here's what all 3 completed Inverters look like:

    (yours will disappear out of the workspace as you complete them, so you won't see them all lined up like this in-game)

  7. use any of your new Power Inverters on Mine Bike -- Rufus will remove Halogen Lamp to your inventory and install Power Inverter in its place
  8. click Mine Bike to get in
  9. hold your mouse over the Bike and click "Set Off."

    Rufus is flung through an area called The Outer Turn, where he notices a Lever lying on the ground as he flies by. He ends up back where he started -- facing the other direction -- with a new hidden hint on his Plan and a flashing red Switch over his Bike.

  10. press Switch to send Rufus and Mine Bike up into Control Center -- he automatically jumps out of Bike when he arrives
  11. go out To the Tunnel via door on left
  12. press Button to open a passage between lower and upper levels -- this makes it easier to access the Lever that's up there near where Rufus is standing
mine bike navigation
At this point in the game, Mine Bike has three possible positions, each of which leads to one or more of the other positions:
  1. in Tunnel, facing right
    choosing "Set Off" from here takes Rufus around Outer Turn, ending in position 2

  2. in Tunnel, facing left, red Switch overhead
    • choosing "Set Off" from here turns the bike around, ending in position 1
    • pressing Switch lifts Bike into Control Center, which is position 3
  3. inside Control Center
    choosing "Set Off" from here takes Rufus around Outer Turn, ending in position 2
To launch Mine Bike after clicking it to climb in, move your mouse near the Bike until you see an arrow marked "Set Off," then click.

To get out of Mine Bike, move your mouse until you see an arrow marked "Dismount," then click. In the Tunnel, this arrow can be found just about anywhere that isn't over the Bike itself; in Control Center, you need to move your mouse over the floor on the left side to find the "Dismount" arrow.
4.2: illuminate the Outer Turn
items
  • Signaling Lamp
  • Cloth / Cloth with Alcohol
  • Dirty Mirror / Polished Mirror
  • Key of Trackman
  • Wrench
  • Fuse
This seems like a good time to make sure you know that you can double-click a passage to another area to pop there magically instead of walking slowly over.

steps
  1. turn Signaling Light OFF (its default state is "OFF," so if you did not personally turn it on, no action is required here):
    • go to Tunnel
    • go "Up" to upper level. If there's no passage marked "Up," see the end of section 4.1.
    • pull Lever located near Control Center entrance
  2. go to Viaduct
  3. change bulb:
    • click Signaling Light to open cover
    • click Red Signaling Light to remove Signaling Lamp to your inventory
    • use Halogen Lamp (section 4.1) on Signaling Light Base (the thing you just took the red bulb out of).
    If you want to see whether the new bulb helps: turn the Light back ON (the same way you turned it OFF in step 1), and try entering Outer Turn. Rufus will say, "Too bad the spotlight doesn't go 'round corners." Luckily there's a thing here that can make light go 'round corners...

  4. click Mirror to collect Dirty Mirror
    You can get some helpful clues by trying to use Dirty Mirror directly on Signaling Light; Rufus says different things depending on the state the Light is in, so i have compiled his quotes for your convenience and/or sanity:

    • cover closed, red bulb installed:
      "I could hold up the mirror and reflect the light into the cave."
      "But first off this bulb is too dim."
      "And second I can't stand here all day holding up a mirror."

    • cover open, red bulb installed:
      "I could hold up the mirror and reflect the light into the cave."
      "But first the spotlight is turned off." (he says this whether Light is off or on)
      "And second I can't stand here all day holding up a mirror."

    • cover open, white bulb installed:
      "Right on ..."
      ".... hm. A dirty mirror."
      "It won't reflect like this."
  5. prepare Mirror:
    The two problems Rufus identified with Mirror -- its dirtiness and its need to be held up by someone other than him -- can be addressed in any order. I chose dirt first.

    • retrieve red Cloth from Control Center in Tunnel
    • go to Viaduct and grab Doc's Booze -- during the conversation that ensues, Doc will tell you exactly what to do next (if you need to hear it again, click Booze again)...
    • use Cloth on Booze to wipe the bottleneck clean -- now you have Cloth with Alcohol in your inventory
    • use Cloth with Alcohol on Dirty Mirror to produce Polished Mirror
    • use Polished Mirror on Skeleton to hang it up in front of Signaling Light
      Rufus' responses in case of failure aren't all that helpful, so here's how to interpret them:

      • Rufus says: "Hey, you have to put in a little effort for this to work. Lazy bum."
        the problem is: he can't reach Skeleton
        the solution is: turn Light ON, which causes arm to move down
        (see step 1 if you don't know how to toggle Light)

      • Rufus says: "Hm. No. Doesn't fit. And once again I'm one step closer to solving the mystery of the peculiar key."
        the problem is: you tried to hang Mirror on Key instead of on Skeleton
        the solution is: work on your aim

      • Rufus says: "Hrngh. Too high. Doesn't matter. It's damaging to one's health to work over one's head."
        the problem is: you tried to hang Mirror on Key while Skeleton was out of reach
        the solution is: turn Light ON to move arm down, and also work on your aim
    If you examine Signaling Light after hanging Mirror, Rufus tells you "The mirror is hanging too low" ... d'oh! If he says anything other than that -- or if you're unable to examine Signaling Light at all -- it means you need to have another go at step 3.

  6. adjust height of arm...thingy:
    I don't know what it's officially called, but i'm talking about that tall contraption from which Skeleton is hanging. Hopefully you've realized that when the Signaling Light is ON, the arm is down low, and when the Light is OFF, it's up high. However, in its "down" position, the arm holds Mirror too low to reflect light into Outer Turn, and in its "up" position, there's no light to reflect! You need to get into that Maintenance Hatch at the base of the arm to see what can be done about that, but it's screwed shut...

    • take Key of Trackman, which is hanging around Skeleton's neck. If you can't reach Key, turn Signaling Light ON to move arm DOWN.
    • go To the Tunnel and enter Control Center
    • use Key of Trackman on Key Box and take Wrench from inside
    • back at Viaduct, use Wrench to open Maintenance Hatch
    • take Fuse
    • use either one of your Power Inverters (section 4.1) on Maintenance Box
    With the power inverted, the arm will now be UP when the Light is ON, and DOWN when it's OFF.

  7. turn Signaling ON to illuminate the Outer Turn
  8. quit complaining about all the walking back and forth, i played this part through like 34 times. ALL FOR YOU!!!
4.3: get Goal...
items
  • Lever
  • Bottle / Filled Bottle
  • Leg of Skeleton

steps
  1. put Mine Bike on the right track:
    • go To the Outer Turn and pick up Lever. If you can't get in there, go to section 4.2.
    • go to Tunnel and use Lever on Shunting Lever Box
    • you need Mine Bike to be parked in Tunnel, facing left, with the flashing red Switch visible above it; if it's not there (or if it's facing the wrong direction), climbing in and clicking "Set Off" will fix that no matter where it is
    • pull Shunting Lever (the one you just installed) -- Mine Bike moves to rear track
  2. get in Mine Bike and Set Off -- Rufus drives To the Turn (where Goal is)
  3. go To the Crane, open Maintenance Box, click Defective Fuse inside to remove it
    missable achievement alert
    Step 4 prevents you from earning Newton would be proud, which requires you to plug any Power Inverter into Crane's Maintenance Box
  4. use Fuse on Maintenance Box
  5. pull Crane Lever and listen to what Rufus says when it fails to help. This may sound like a thing you're doing only to "see what happens," but you must do it for step 6 to work!
  6. get help from Doc:
    • go to Viaduct, talk to Doc about "interesting challenges"
    • tell him you're "too fidgety" so he'll teach you how to meditate (if you don't see that option on his menu, make sure you've done steps 4 & 5)
    • after Doc says "Lodge your leg behind your head and fixate on a point on the horizon," you need to right-click Horizon to examine it, or he won't continue. Rufus must listen to the entire speech in order to proceed.
    I'm about to explain how to translate Doc's dialogue into an answer, but it's possible to just guess that answer when the time comes to give it (plus i've provided it in a spoiler); therefore, if you're not interested in being walked through this, you can safely skip past the box without worrying you're missing something crucial.
    Doc's meditation tips
    As Doc speaks, the sky gets all funky and things change color; several of the sentences he utters refer to things that can be seen in the sky:

    • "I have fixated on the strange blue shape to the right."
      If you look at the column of letters that's by itself on the far right, you'll see two "blue shapes" there: a letter "I" and a letter "R;" it will soon become clear to which he's referring.
    • "Now I let my eyes wander to the north until I see a blue pole."
      He must mean the letter "I" here, since it's a "blue pole" and is "north" of the "R."
    • "Now i gaze far over to the west to that green thing."
      Once again we have some ambiguity: there are two green letters on the far left (west): "S" and "V."
    • "And then in a straight line to this blue thing down there."
      There's only one "blue thing" below the "S" and "V," and that's the letter "E"
    At this point, the letters we've collected are "R + I + (S or V) + E"

    The next thing Doc says clears up that leftover ambiguity: "I AM A RIVER." What you should get from this is the fact that while picking letters out of the sky, he was spelling the word RIVER; therefore, by "that green thing," he meant the letter "V."

    When it comes time for Rufus to meditate in step 10, the letters in the sky will be different, and so will the word he creates from them. Therefore, Doc's instructions should be seen as a road map -- pick out the letters that are in the same locations as the ones Doc picked out.

    For your convenience, here's a summary of what Doc said Rufus should do in the Crane:
    • put your leg behind your head
    • examine horizon
    • find letters in sky
    • "tell the world who you are"
    • drink
    You may have guessed that there's at least one inventory item you need to complete this process: something to drink. Since Doc won't let you take his bottle to the Crane, you need to get your own...


  7. get Filled Bottle:
    • retrieve Bottle from the Outer Turn
    • go to Viaduct and ask Doc to show you how to meditate again
    • when Doc puts his leg behind his head, instead of right-clicking Horizon, use Bottle on his Booze to get Filled Bottle. You don't have to stay for the entire demonstration this time.
    Did you notice in my note above i said "at least one inventory item"? That's because there are actually two items you need, and here's your hint about the 2nd one: like most people, Rufus is unable to put his own leg behind his head.

  8. click Skeleton to collect Leg of Skeleton
  9. go to the Turn, get in Crane
  10. meditate:
    • put your leg behind your head (use Leg of Skeleton on Seat)
    • examine horizon (right-click sky)
    • find letters in sky (see "Doc's meditation tips" above or the spoiler below)
    • "tell the world who you are" (choose "PUPUP" from the menu)
    • drink (Rufus does this automatically if Filled Bottle is in your inventory)
    If you didn't have Filled Bottle in your inventory when you chose the correct word, you can get back on track easily like so: obtain Filled Bottle (step 7), get back into Crane, right-click Filled Bottle in inventory to drink.

    If you don't like either of the solutions i offered for finding a meditation word, you can always guess until you get the right one; after a wrong guess, just right-click the sky to try again.

  11. click Crane Lever to put Goal on Mine Bike
4.4: ...and get out
steps
  1. after putting Goal on Mine Bike, get out of Crane, then go "Up"
  2. click Mine Bike to get in -- Rufus automatically drives to the Tunnel
  3. the Mine Bike is facing the wrong way to get into Control Center, so "Set Off" to go around Outer turn and come back facing the right way
    missable achievement alert
    Hitting the red Switch with Goal on the Bike (step 4) traps you inside Control Center, preventing you from collecting sculpture pieces from around the Junk Mines. For more information, see the section titled "Junkyard King" near the beginning of this guide.


    You must play the minigame without skipping it to earn Master of Switches.

  4. click red Switch to enter Control Center and start the minigame
minigame: mine bike maze
I passed this part by just trying every permutation of Levers and Switches until i found one that worked, so i can't help you figure out what each setting does or why. However, if you want to go the ham-fisted route like i did, i can give you some hints there to speed up the process a little:
  • there are only 72 possible permutations, 4 of which count as success (meaning there are 4 possible solutions)

  • there is no solution in which all three levers match each other
    (by itself, this SMALL HINT eliminates 18 permutations)
  • there is no solution in which the red and green levers match each other
    (by itself, this HINT eliminates 36 permutations)
  • in every solution, the total number of lever(s) pushed back is the same: 1
    (by itself, this BIG HINT eliminates 45 permutations)

  • the yellow lever is forward in all 4 solutions
    (by itself, this SPOILER eliminates 36 permutations)
  • the green lever is forward in 3 out of 4 solutions
    (by itself, this SPOILER can be used to eliminate 36 permutations... one of which is a solution, but oh well)
  • the bottom right switch is red in all four solutions
    (by itself, this SPOILER eliminates 48 permutations)
Combined, the above hints and spoilers can be used to eliminate ALL 68 non-solutions.

warning: non-hidden answers below
Solution 1:
  • Yellow & Red Levers forward
  • Green Lever pushed back
  • bottom left Switch is green
  • bottom right Switch is red
Solution 2:
  • Yellow & Green Levers forward
  • Red Lever pushed back
  • bottom left Switch is yellow
  • bottom right Switch is red
Solution 3:
  • Yellow & Green Levers forward
  • Red Lever pushed back
  • bottom left Switch is red
  • bottom right Switch is red
Solution 4:
  • Yellow & Green Levers forward
  • Red Lever pushed back
  • bottom left Switch is green
  • bottom right Switch is red
A big thanks to TTRM for letting me know there was more than one solution, and for providing two of them!

When you've got your Levers and Switches ready, Set Off. If you got it right, Rufus will immediately say "Now we're really going places;" then you'll see a scene with some Organon, then a cut scene, then some singing (huzzah).
CHAPTER III: Ascension Station


If you need help finding your way around Ascension Station, see section 5.2.
5.0: missable achievement minefield
This short chapter contains 5 of them, and it also involves a LOT of blocking you from getting to certain areas at certain times. The following missable achievements can and probably should be worked on right away:
  • Gourmet
  • Lever Lover
  • History of Deponia
  • Paradox
  • half of Junkyard King (2 of the 4 items can be accessed as soon as you arrive; the other two, not until section 5.5).
Details on all these achievements are provided at their respective "last chance" points; you might want to skip ahead and read up on them.
5.1: repair Cotton Candy Machine
items
  • Anchovies on a Stick / Stick
  • Neutral Cotton Candy, Calzone Cotton Candy
Rufus has just brought Goal to the Ascension Station and set her down in a pile of rose hips in the Candy Shop. Time for a snack! Trivia tidbit: rose hips are the primary ingredient of itching powder.

steps
  1. repair Cotton Candy Machine:
    • The Cotton Candy Machine in Candy Shop (where we begin this chapter) doesn't seem to be working; maybe you can fix that using the set of 3 Switches ...er, make that 2 Switches (the middle one broke when you clicked it)... How do the Suspicious Lamps factor into all this? Simple:

      They don't. The Switches and Lamps are not needed for anything but a missable achievement; you can safely ignore them without hindering regular gameplay in any way.

      Here i am adding an extra paragraph to pad this spoiler out and make it look like it contains a lot of information so it will be a slightly bigger surprise when you read it. Blah blah blah, la la la ...padding! OK, i'm tired of that now. You probably are, too.


    • maybe you could get a better look at the machine if you moved that Shelf out of the way.... (click Shelf to move it)
    • click Plug that was behind Shelf -- Cotton Candy Machine is now plugged in and ready to go!

    You won't be using any Cotton Candy until a little later on; the instructions below are included here only so they're collected under one heading, making them easier to find.

  2. get Cotton Candy:
    • click Anchovy Machine, then grab the Anchovies on a Stick it barfs up
    • right-click Anchovies on a Stick in your inventory to eat the fish and be left with Stick
    • use Stick on Cotton Candy Machine to receive Neutral Cotton Candy
  3. get a different flavor Cotton Candy:
    • right-click Neutral Cotton Candy in inventory to eat it, leaving Stick
    • pull Lever to left of Cotton Candy Machine to change flavors -- Rufus says "Now it's set to 'calzone'," and the little illustration at the top of the machine indicates a brown confection is being served
    • use Stick on Cotton Candy Machine to receive Calzone Cotton Candy
5.2: find your way around
The Ascension Station can be a tiny bit tricky to navigate simply because a couple of the rooms are wider than the screen, leaving some of the doors offscreen at times. Here's a guided tour, complete with points of interest to check out along the way:

Lobby
Leave the Candy Shop, and you'll be in the Lobby.

An examination of Mosaic Table here reveals you need more light to view it properly. Be sure to open Hatch and examine the Niche inside.

Concourse
From the Lobby, go through the archway between Mosaic Table and Candy Shop to reach the Concourse.

Here you'll find two more Mosaic Tables; both are in need of more light, and the Dirty Mosaic Table on the right apparently needs to be cleaned as well.

Elevator
Standing in front of Dirty Mosaic Table on the Concourse, you can see a door on the far right; go through it to reach Elevator.

Once there, click the arrow marked "To the Platform" to learn that the Elevator won't work without a code, and also to unlock both a new path and a hidden hint on Rufus' Plan. It's a pretty good hint.

When returning to Concourse from Elevator, you'll be unable to see the door leading back to Lobby; just walk over to the left and it will appear.

Tower
Once you're back in the Lobby, stand in front of Mosaic Table so you can see the entrance To the Tower on the left.
5.3: get Elevator code
items
  • Bucket, Soap, Mop
  • Bucket with Water / Bucket with Soapy Water / Mop with Soapy Water
  • Mop Handle, Mop
  • Phosphor Cotton Candy / Glowing Phosphor Cotton Candy
  • Chewing Gum / Chewed Gum
  • Mosaic Stone / Mosaic Stone with Chewing Gum
  • Torch Light

steps
  1. clean the Dirty Mosaic Table:
    • go to Elevator, open Utility Cabinet
    • collect Bucket, Soap, and Mop
    • go To the Tower
    • use Bucket on Pool (lower center) or on Barrel with Water (lower right) to get Bucket with Water
    • use Soap on Bucket with Water to create Bucket with Soapy Water
    • use Mop on Bucket with Soapy Water to create Mop with Soapy Water
    • go to Concourse
    • use Mop with Soapy Water on Dirty Mosaic Table -- Mop with Soapy Water breaks, leaving Mop Handle and Mop in your inventory.
    Examine freshly-cleaned Mosaic to learn that we could probably get Elevator password if we had more light...

  2. illuminate the Mosaic:
    Each Mosaic has a Hatch with a Niche behind it in which to place a torch. You may not have a torch, but you do have access to another thing that gives off light: phosphor.

    • go To the Candy Shop
    • get green Phosphor Cotton Candy from Cotton Candy Machine (if you need help operating Machine, see section 5.1).

      If you place Phosphor Cotton Candy into a Niche (or use it on a Hatch that conceals a Niche), Rufus says that it fits, but "to shed light on the mosaic the cotton candy would have to be on fire or something." There's a way besides setting it on fire to make this specific flavor Candy give off light... think about toys you had as a kid -- or now, it's all good -- that were "glow-in-the-dark"...

    • create Glowing Phosphor Cotton Candy by using Phosphor Cotton Candy on any light source (Suspicious Lamps in Candy Shop, Lit Archway in Lobby, or Lamps on Concourse)
    • go to Concourse
    • open Hatch of right-hand Mosaic Table (the one with a Hole in it)
    • put Glowing Phosphor Cotton Candy in Niche
    Examine illuminated Mosaic Table to learn that we could probably get Elevator password if we repaired that Hole...

  3. repair the damaged Mosaic:
    • pick up Mosaic Stone from floor in front of left-hand Mosaic Table on Concourse

      It won't stick in the Hole; you need something sticky. Good thing there's a Candy Shop nearby.

    • go to Candy Shop
    • click Chewing Gum Dispenser near door to collect Chewing Gum
    • right-click Chewing Gum in your inventory to transform it into Chewed Gum
    • use Chewed Gum on Mosaic Stone to create Mosaic Stone with Chewing Gum
    • return to Concourse
    • use Mosaic Stone with Chewing Gum on Hole in right-hand Mosaic Table to start the minigame
    missable achievement alert
    Completing the mosaic minigame prevents you from earning the following:

    Gourmet, which requires you to eat every kind of food from the Candy Shop: Chewing Gum, Anchovies on a Stick (both of which are necessary to progress the story), and all three flavors of Cotton Candy that the Machine offers (that's the missable part). If you don't get the achievement, try also eating Glowing Phosphor Cotton Candy.

    History of Deponia, which requires you to illuminate and examine all three Mosaic Tables (two on Concourse, one in Lobby). For each, you must put Glowing Phosphor Cotton Candy in the Niche, then right-click the Mosaic Table to hear its story.

    By the way, i did NOT find any evidence that skipping this minigame will cause you to miss any achievements (...except in that skipping it counts as completing it, so if you click the "X" button before doing the stuff described above, then...yeah).
    minigame: repair the mosaic
    The goal is pretty straight-forward: put the broken pieces on the left into their correct positions on the right, using the lines of the cryptic image they create as a guide. After clicking a piece to pick it up, click the right mouse button to rotate it.

    partial solution
    To get you started, here's the mosaic with all the pieces that don't need to be rotated already in place:


    full solution


    The piece with the Chewed Gum on it doesn't fit; you need to try to force it into the puzzle three times in order to break the Mosaic and move on.

  4. once you've broken Mosaic Table (which counts as repairing it, oddly enough), you'll see a Fusebox -- open it
  5. pick up Torch Light to reveal Fuse Switch behind it
  6. press Fuse Switch to reboot the system, which resets Elevator code
    missable achievement alert
    Step 7 prevents you from earning Paradox, which requires you to throw Pebble (found on Concourse) into the glowing Pool at the Tower.
  7. go to Elevator and click Controls -- Rufus automatically enters Elevator and goes up to Platform for a cutscene
5.4: sneak past Argus
items
  • Pebble
  • Embellishment
  • Slingshot / Slingshot with Pebble
  • Flag
  • Greasy Mop
  • Hook
  • Lampshade
  • Organon GetUp / Improvised Cletus Costume
  • Backup Cartridge

steps
  1. upon reaching Platform for the first time, Rufus sees an Organon Cruiser arrive at the Ascension Station. Nothing's going on up here yet, so go back down To the Concourse and watch the scene that plays out between Cletus and Argus.
  2. follow Cletus up to Platform and talk to him. A lot.

    How did he get up there without the elevator code? That's not a hint, i'm actually wondering. And is it just me, or does Cletus' shirt remind you of tighty whities?

  3. according to the way that conversation ended -- as well as the new additions to Rufus' Plan -- you should go to Candy Shop to pick up Goal next.

    Oops, you only got as far as Concourse, because Rufus doesn't want Argus to see him; the hidden hint that just appeared on the Plan recommends that next, you should...

  4. dim the light:
    • take Pebble off floor.

      Use it on Lamps for a clue. Rufus won't throw it; he wants "a weapon to use it with." If nothing in your inventory makes you think, "hey, that looks like a weapon to use a Pebble with," you should...

    • go to Platform, take Embellishment from post near Elevator door.

      Examine it in inventory if you still don't see where this is going: you need to use Embellishment as a Slingshot ...somehow

    • is that your Chewed Gum lying on the floor of Concourse? Click Mosaic Stones to get it back
    • used Chewed Gum on Embellishment to create Slingshot
    • use Pebble on Slingshot to create Slingshot with Pebble
    • use Slingshot with Pebble on Lamps
  5. go to Platform
  6. craft a Cletus costume:
    If you examine Cletus, you'll get a helpful clue about the elements of a good disguise: "Greasy hairdo, ugly cape, and stiff collar." As it turns out, you're standing very near a thing that could pass for an "ugly cape"...

    • click Lever under Flagpole and take Flag.

      To craft your costume, you need to combine items in inventory to create a single usable thing. Now that you have one piece of it, you can test out potential costume elements by trying to combine them with Flag and seeing what Rufus says about it.

      You already have something that could be used as a wig (the Mop from section 5.3); when you try to combine it with Flag, Rufus says something pretty helpful: "the hairdo isn't greasy enough yet"


    • go To the Elevator, use Mop on Oil Tank to create Greasy Mop.

      If you're having trouble identifying the final piece of the costume, start examining things; when you find it, you'll know, because Rufus will say "Looks like an anti-scratching collar for a Dog. Or like the collar of Goal's fiancé.."

      Once you've located it (it's the Lampshade you knocked down in step 4), you need to figure out a way to reach it...


    • combine Mop Handle with Embellishment to create Hook
    • use Hook on Lampshade to collect it
    • combine Lampshade with Flag to create Organon GetUp
    • combine Greasy Mop with Organon GetUp to create Improvised Cletus Costume
  7. while standing on Concourse, right-click Improvised Cletus Costume to put it on
  8. try to walk past Argus -- he stops you and sends you back to Platform for "the cartridge"
  9. get Backup Cartridge:
    • go to Platform, talk to Cletus
    • say, "The Organons said something about a backup cartridge..."
      If you don't see that option on his menu, it means you were lazy about talking to him the first time and didn't explore all his dialogue. Tsk tsk. The best way to make it appear is to just listen to everything he has to say, because why are you even playing this game if not to enjoy the story? But if you're dead set against doing that for some reason, here's the entertainment-free method of reaching the required option:

      • ask "What's the agreement between you and the Organon?"
      • say "Alright. Great. There's no one who hates Deponia more than I do."
      • choose any option from the Deponia-bashing submenu to make the "exit option" (see next bullet) appear
      • exit submenu by choosing "Let's just say I hate this place."
      You are now back at the main dialogue menu, from which you can select the option "The Organons said something about a backup cartridge..."
    • insist, "I need the backup cartridge."
    • say, "Goal is unconscious" -- Cletus finally gives you Backup Cartridge
  10. go back to Concourse and right-click Improvised Cletus Costume in inventory to put it on
  11. walk towards Argus -- he stops you for a chat.

    ...Try not to think too hard about the plot hole that convinces Argus to let "Cletus" pass through to the Lobby.
5.5: get Goal...
items
  • Anchovies on a Stick / Bait / Glowing Bait
  • Cartridge
  • Bozo's Key
  • Duster, Degreaser, Steel Brush
Back at the Candy Shop, Rufus discovers Goal is missing. Pay attention to what he says at the end of his little speech: "Maybe there's a trail."

There are two things different about this room from the last time you were here: Goal is missing, and there's a big Puddle of Phosphor on the floor -- examine that for a clue.


steps
  1. follow phosphor trail:
    To find Goal, you need to illuminate bits of the trail by using Torch Light on a series of Phosphor Traces on the floor; each time you do this, a new piece of the trail will be revealed.


    using Torch Light on Phosphor Trace at:
    ...reveals a trail that leads to:
    Candy Shop
    Lobby
    doorway between Candy Shop and Lobby
    lower level of Lobby
    lower level of Lobby
    Tower
    Front of Tower
    Piece of Fence on right side

    Your target in the Candy Shop is labeled "Puddle of Phosphor;" all the rest are marked "Part of Phosphor Trace."

  2. click Piece of Fence to reveal a passage to a new area: Behind the Tower
  3. go Behind the Tower
  4. use Hook on Grating to open path to Cable Chute
  5. enter Cable Chute.

    There must be some reason Rufus mentions that the Whale "looks hungry," but when you offer it the only foods you have available, nothing seems to tempt it. The most helpful feedback results from offering it Anchovies on a Stick, to which Rufus responds "It doesn't even seem to see them," implying you need to somehow make them easier to see.

  6. clear path to Wrecked Cable Boat:
    • if you don't have Anchovies on a Stick, go get one from Candy Shop
    • use Anchovies on a Stick on Phosphor Puddle or any Phosphor Trace to create Bait
    • create Glowing Bait by using Bait on any light source (Torch Light in inventory, Lit Archway in Lobby, or Suspicious Lamps in Candy Shop)
    • go to Cable Chute
    • use Glowing Bait on Whale or on Hook -- Whale rams window, clearing path to Wrecked Cable Boat
    missable achievement alert
    Entering Wrecked Cable Boat (step 7) prevents you from returning to Candy Shop, which interferes with the following:

    Lever Lover, which requires you to click the useless Switches in Candy Shop over and over...and over...and over.... Keep clicking until the achievement appears.


    Junkyard King. For more information, see the special section near the beginning of this guide.

  7. enter passage To Wrecked Cable Boat that's at right end of Cable chute
  8. go Into Wrecked Cable Boat for some auto-dialogue with Doc and Bozo
  9. you're now looking at Goal. The only thing you can do is click her brain implant, so do that -- after more auto-dialogue, you'll have Cartridge in your inventory.
  10. clean Goal's implant:
    • near bottom of ramp (inside the Boat) are a Duster and a Key -- click them to collect Duster and Bozo's Key
    • click arrow marked "To the Wrecked Cable Boat" to go out onto the deck
    • use Bozo's Key on Chest
    • clicking Chest just closes the lid, so you need to right-click it to collect Steel Brush and a bottle of Degreaser
    • right-click Cartridge (not the Backup) or use any of your cleaning tools on it to launch what appears to be a minigame, but isn't really. There's no penalty for clicking the "X" to skip this part if you get frustrated or bored. If you don't see the "X" button, it's because you're missing one or more of the 3 cleaning tools listed in the previous 4 bullets.

      When you mouse over any of the 3 hotspots here, you see text that tells you the component's name and its current state: Reading Head and Chip are "clean," the Contact Pins are "dusty." If you use Duster on the dusty Pins, they become "greasy" and the other two components become "dusty."

      Clearly this is not going to end well. Just keep messing with it until Rufus says he has "an ace up [his] sleeve," then use the Steel Brush on everything to "win."
    When you emerge from the Cartridge-"cleaning" sequence, you go straight into a scene in which Goal is revived. The conversation with her is all backstory and entertainment.

  11. when you select "enough talking" from the bottom of the first menu, you'll move on to the next set of dialogue options about a "perfect plan" -- no matter which plan you choose, Goal will come up with a better one
5.6: sneak past Organons
items
  • Straw
  • Fork
  • Platypus Soft Toy
missable achievement alert
Once you enter Pool in step 2, you'll no longer be able to collect 2 of the 3 remaining sculpture pieces, and the 3rd becomes inaccessible when you pull Crane Lever in step 6. For more information, see the section titled "Junkyard King" near the beginning of this guide.

steps
  1. go Behind the Tower (that small area just outside entrance to Cable Chute), click Stack of Needles to collect Straw
  2. go to Front of Tower, use Straw on glowing Pool to send Rufus snorkeling
  3. navigate trash heap In Front of Tower:
    • enter Trunk -- Rufus comes out Right Window
    • enter Left Window
    • click Crank to open French Door
    • enter French Door
    • take Fork
    • click Pipe -- Rufus sticks his hand up through it
    • use Fork on Horn
    • click Horn to launch Fork -- it knocks support out
      from underneath trunk lid, which slams shut, opening Canopy Top
    • enter Canopy Top
    Remember that if you're having trouble finding any of the objects i describe, you can hold down the spacebar to highlight hotspots.

  4. get past the *#@$^%*#@$&% Platypus Soft Toy:

    Step one: do not believe any walkthrough that claims all you need to do is walk back and forth over the Toy until you randomly arrive at the Crane!!! It is not true, and trying it may cause your mouse to abruptly defenestrate and your keyboard to somehow mysteriously become lodged in your shattered monitor.

    If you've lost interest in trying to figure this out on your own, skip down to "SOLUTION", below the box.
    First, realize that what's preventing you from reaching Fence Exit is the light that's shining on the floor right in front it. Then observe that when the Platypus Soft Toy squeaks, the light is sometimes -- but not every time -- moved away from the Exit. I believe that if not for my failure to notice these details, i might have gotten through this puzzle without needing to buy a new mouse afterwards. Maybe there's still hope for you.


    Mull over the default series of events, taking special note of the limited variety of reactions you get from the Organons when stepping on the Platypus Soft Toy:

    • Rufus enters that back area for the first time, rosy-cheeked and optimistic about the future, unscarred by a lengthy scuffle with a Platypus Soft Toy.
    • Rufus crosses from right to left, stepping on Toy and making it squeak.
      Organons don't really pay attention ("Forget it, there's nothing there").
      Light remains in front of Fence Exit.
      Even though he's very near Fence Exit, Rufus won't enter it.
    • Rufus crosses from left to right, stepping on Toy and making it squeak.
      Organons notice the sound ("Now I hear it too. Hello? Hello, who's there?").
      Light shines on Toy for a few moments, then goes back to Fence Exit.
      Both Toy and light block Rufus's path to Fence Exit, so he can't enter it.
    • Repeat 2nd & 3rd bullet points until you hear a little snapping noise inside your brain.
    So here's the deal: there are two places to stand, and two light positions; unfortunately, these are synched up in a way that prevents you from reaching Fence Exit. You need to break that synch; you need the light to be moved to the Toy while Rufus is standing to the left of it (closer to Fence Exit). The way to do that is to execute one cross without squeaking the Toy.

    SOLUTION
    • click Platypus Soft Toy to pick it up.

      If Rufus is standing to the RIGHT of Board when you do this, he'll walk over the Toy before picking it up, ending up on the LEFT side.
      If Rufus is standing to the LEFT of Board when you do this, he'll stay on the LEFT side.


    • cross to the RIGHT (Rufus might not walk over the first time you click, but just try again and he'll go)
    • use Platypus Soft Toy on Board to put it back where you found it
    • cross to the LEFT, squeaking Toy along the way -- Rufus automatically enters Fence Exit after a short pause
    • have your monitor send me a nice thank-you note for saving its life
  5. go up To the Crane
  6. click Crane Lever to get the Organons out of your way
  7. sit back and watch the long scene that ends with Rufus standing at the Elevator
5.7: ...and get out...?
steps
  1. go up to Platform for some dialogue between Rufus, Goal, and Cletus
  2. you now have four dialogue options: the last one, "you go ahead and sort that out between the two of you," will set Goal and Cletus to arguing, leaving you free to...
  3. click Bag to collect Cletus' Rags
  4. right-click Cletus' Rags in your inventory to put them on
  5. talk to Cletus, and say "don't make me laugh." The conversation that follows ends with Cletus dropping trou to show Rufus the birthmark on his butt.
  6. click Cletus' Speedos ("aw, do I have to?" yes. yes, you do) -- this puts a pair of pink underpants on your cursor
  7. click the pink underpants onto Flagpole to run Cletus up it "and see who salutes" (which is just part of an old expression, BTW, not a hint)
  8. when the auto-dialogue is done, you'll be staring at Goal's face. The only option is to eject her brain implant, so do that.

    Argus shows up and talks about Rufus with a familiarity i'm pretty sure he could only have attained by watching over your shoulder as you play...

    《◎ロ◎》HE'S RIGHT BEHIND YOU!!!

  9. Next we see Rufus and Goal in the Cable Boat -- talk to her.
    missable achievement alert
    To earn Loving the Truth, you must choose ONLY the #2 option on every menu in this conversation (listed below this box).
    In order to complete the scene and continue to the next, you must choose the 2nd option on each of a series of dialogue menus:
    • "Say Goal..."
    • "It's like this..."
    • "Well..."
    • "It's just that..."
    • "Alright then. I'm going to tell you now."
    You're now back on Platform for a scene in which Goal demands Rufus restore her memories of her time on Deponia. When that's done...

  10. go to Concourse for more talking
  11. take Goal's Cartridge, which is lodged between the cheeks of a Reading Machine
  12. go to Elevator for another conversation, this time with Cletus and Argus. When the dialogue menu appears, you need to say "You've won. Here's the cartridge" to move on to the cutscene.

    After the cutscene, you'll be looking at Argus and an armed officer. If you click on either one of them, Argus punches you, because you're Rufus and therefore had it coming.

  13. mouse over the edges of the screen to see that there's a Ramp to your right, a Handrail to your left -- you want to be facing Ramp (to the right), where Prime Controller is dangling Cartridge in front of you.

    I believe this is your last chance to create a save file before the next installment of the trilogy starts (if you're playing The Complete Journey).

  14. click a Handle on the flying television set to start the next cutscene

  15. Rufus is lying in the Stack of Needles Behind the Tower, talking to Bozo. Choose whichever option you want -- Rufus will just give a thumbs-up and take you to the final cutscene, and then the singing (huzzah).
Next...!
IF YOU'RE PLAYING "THE COMPLETE JOURNEY"...
"The End" is immediately followed by the tutorial of the next game in the trilogy, which begins with a...
missable achievement alert
You must complete the tutorial (for the 2nd game) without skipping it to earn Huzzah -- once more from the top.

If you're NOT playing "The Complete Journey," you may wish to look into an achievement called "Droggeljug," which was not covered in this guide.
LINKS
Steam's "Complete Journey" Global Gameplay Stats
This is where you can see a list of all 105 achievements across all three installments, as well as the percentage of Deponia players that have earned them. Game 2 icons are blue, game 3 icons are green, and game 1 icons are whatever that other color is... pinkish? brownish?
Deponia manual from the standalone version's Steam Store page (pdf)
It's just a game manual (remember those?), but it's pretty entertaining, especially as game manuals go.
Daedalic Entertainment's Complete Journey support center[www.daedalicsupport.com]
Their site offers -- amongst other things -- an array of "savegames," which i hear tell may assist players who were deprived of achievements by bugs in the software. It is unknown whether these files might also compensate for laziness. I'm guessing "yes," but i'm too lazy to look into it.

I wrote guides for the rest of the trilogy, too!
http://steamoss.com/sharedfiles/filedetails/?id=885382370
http://steamoss.com/sharedfiles/filedetails/?id=891545311
64 Comments
jcdenton666 13 Dec, 2024 @ 3:11pm 
can't get the headphones. what else to do but put the cat on the thing and the bird on the other thing? I stopped playing this shite years ago and remember NOTHING and it's truly impossible to pick up where I left, even with multiple guides!
BoriorZ 26 Sep, 2024 @ 9:58am 
Nothing to say but what an amazing guide. :steamthumbsup:
celticlord88 24 Jul, 2024 @ 1:00pm 
You can get paradox with either chewed gum or stone in pool.
mishalunchbox  [author] 2 Mar, 2024 @ 1:29pm 
@everybody: this is your annual reminder that i only stop by my Deponia guides in March. By the way, The Complete Journey is turning 10 this year (release date 8 July 2014). Huzzah! :frostingcube::earthplatypus:

@Babster & kovec: you're welcome :)

@kovec: i actually count only 19 for part 1, but maybe you also got the first one from part 2? Anyway, in response to your valid question, i've added more information to the "MISSABLE ACHIEVEMENTS" section up top. Thanks for the inspiration!
kovec 15 Dec, 2023 @ 6:42pm 
How many achievements am i supposed to have after part 1? Looks like i have 20 but i'm not sure if i missed anything.

Thanks so much for the guide. Wish i could just play the game without worrying about getting locked out of achievements but i really really really do not want to go through it more than once.
Babster 21 Jul, 2023 @ 9:33am 
Thanks a lot! Very useful :like::like:
mishalunchbox  [author] 2 Mar, 2023 @ 1:29pm 
@everybody: to preserve what's left of my sanity, i'm only attending to these guides once per year. Whereas there's a chance you could get a reply to any questions posted here sooner than that, i wouldn't count on it if i were you. For faster responses, try the forums (scroll to the top of this page and click "Discussions").

This year's Deponia 1 update is all done now. See you in 2024! :bunnyinablanket:
mishalunchbox  [author] 2 Mar, 2023 @ 1:24pm 
@Soüp: I have no idea what may have caused your issue, but i'm glad you were able to resolve it.

@Denis Hirok: Thank you for the kind words, and for taking the time to type the thing about the mine bike maze. In my guides, i try not to provide such complicated explanations unless i have a reasonable expectation that players will be able to use the information to figure out a solution. For that particular puzzle, i personally am unable to see a concise connection between "explanation" and "inspiration." The info is still good to have on record, though, in case someday i get bonked on the head Flintstones-style and suddenly become much smarter ;)

... Wow, that was a lot of "-tion"s for one paragraph. Apologies to anyone not old enough to remember The Flintstones, which is, like, half the population of the planet at this point.

@Prawie: awesome, thank you! :pensmile:

@狸奴ฅ: you're welcome!
狸奴ฅ 1 Feb, 2023 @ 8:51pm 
thanks!
Prawie 28 Nov, 2022 @ 5:42am 
Your guides are absolute godlike.