Sky Rogue

Sky Rogue

62 ratings
Official Modding Guide
By kaiokennyx20 and 1 collaborators
This is a rudimentary guide on how to get started modding. You'll want to download some existing mods to use as examples to figure out where everything goes and how everything works.

It's super rough right now, but will be improved in the future. It will hopefully eventually be surpassed by unofficial mod guides, and I'll delete this one. :)
   
Award
Favorite
Favorited
Unfavorite
Basics
Currently, you can modify the visual look of the aeros the player flies. There are not currently any gameplay-altering mods, or mods for the skybox, terrain, enemies, GUI, etc. There are no explicit plans to support these as well, but we'll see what we can do and be sure to include anything in changelogs.

Unlike prior versions of Sky Rogue, as of Alpha 25.4, each mod gets its own folder. This makes it much easier to operate with the Steam Workshop since the Workshop has a similar format.

In earlier versions:
- Skins go in "skyrogue/Mod/Skins"
- Aeros (.aero.json files) go in "skyrogue/Mod/Aeros"
- .OBJs go in the base directory "skyrogue/Mod/"

However, now it works like this:
- Everything goes in a folder named after your mod, or in the case of Steam Workshop, the published file id.
- Assuming your mod is named "MyRadMod":
- Skins go in "skyrogue/Mod/MyRadMod/Skins"
- Aeros (.aero.json files) go in "skyrogue/Mod/MyRadMod/Aeros"
- .OBJs go in their own directory, "skyrogue/Mod/MyRadMod/Meshes"

Also:
- Audio files (*.ogg): "MyRadMod/Audio"
- Missions (*.mission.json): "MyRadMod/Missions"
- Worlds : "MyRadMod/Worlds"
Skin Creation
Custom skins are placed in your mod's "Skins" directory. Skins may be named anything, and underscores should be used to designate a space. Example: "My_Skin.png".
Skins should be in png format and use the exact layout of the provided skin examples. (These are used as UV maps, so any change to their size or layout will break the skin in-game)

Decals should be power-of-two square .png's (ex: 128x128) with a transparent background. Their naming scheme should be "skin name_DECAL". Example: My_Skin_DECAL. THE WORD DECAL MUST BE IN ALL CAPS TO WORK. Decals should be placed in the same folder as skins.

Here are some files that may be useful.

Palette Diagram:


Default Palette (blank):
Aero Creation
Making aeros is a bit more complicated than skins. What you'll need to do first is use your favourite modelling app to actually create the model. For beginners, I'd suggest Wings3D or Sketchup. Both are pretty easy to get started with, and are simple enough to not overwhelm you.

  • Be sure to create UV unwraps using a palette texture like the one in the Skin Creation guide. This will make team colours map to the correct surfaces.
  • Make sure all of the edges are "hard" edges so that it fits in with the flat-shaded look of the rest of the game. Your modelling program might refer to these as "smoothing groups". This is not necessary, but recommended.
  • Export the final model to .OBJ

Create a folder for your mod pack in the /Mod/ directory. For this guide we'll be using "/Mod/MyCoolAero" Put the .OBJ in the "/Mod/MyCoolAero/Meshes" directory.
You'll also need to create an ".aero.json" file that lets the game know how to set up all the details, like the locations of thrusters and wingtip contrails. There's a modding tool on the way that will let you do this visually, but for now you'll need to just edit the file.

.OBJ Mesh

The easiest way to get started is to follow these steps:

  • Copy the "Aero_MOD_Starr_Wolf.aero.json" file already in the /Mod/Aeros/ directory and rename it to match your custom aero's name.
  • Find this line: "meshName": "star_wolf_star_wolf",
  • Replace "star_wolf_star_wolf" with the name of your .OBJ file, without the .OBJ extension (ex: "aero.obj" -> "aero")
  • Modify the "shortName", "fullName", and "description" values at the top of the file to your liking.
  • If you are supplying a Skin with your modded aero and would prefer that to be its default skin, assuming your skin's name is "Space Police.png", create a line that looks like this:
    "skinName" : "skin_Space Police",
  • Search for objects where "name" is set to "contrail", "contrail_thrust", and "thrust" ex:
    "7": {
    "id": 7,
    "parentID": 6,
    "name": "thrust",
    "position": [ 0, 0, -0.5 ],
    "rotation": [ 0, -5.00895612276508E-06, 0 ],
    "scale": [ 10, 10, 10 ],
    "prefabName": "Afterburner_thrust",
    "meshName": null,
    "materialName": null
    },
  • Modify the "position" values until they match the locations of the wingtips, thrusters, etc on your custom aero model
    • "contrail" objects are wingtip trails
    • "contrail_thrust" objects are the transparent exhaust contrail behind the engine
    • "thrust" objects are the afterburner flame that appears and expands when you throttle up

Without the help of a visual editor, this takes a lot of trial and error. Make use to free flight mode to quickly see your changes. Currently, the game will reload mods every time you start free-flight mode, so there's no need to restart the game to see changes.

Limitations and Workarounds
There is a hard limit of 65,000 vertices per mesh.

You can easily get around this by exporting into multiple .obj files.

Here's an example of using a single .obj, just like all the mods out there today.
"5": { "id": 5, "parentID": 1, "name": "mesh", "position": [ 0, 0, 0 ], "rotation": [ 0, 0, 0 ], "scale": [ 1, 1, 1 ], "prefabName": null, "meshName": "mymesh", "materialName": "palette_team_1" },

Here's how you can split it into multiple .obj files: "mymesh1.obj" and "mymesh2.obj"

"5": { "id": 5, "parentID": 1, "name": "mesh", "position": [ 0, 0, 0 ], "rotation": [ 0, 0, 0 ], "scale": [ 1, 1, 1 ], "prefabName": null, "meshName": "mymesh1", "materialName": "palette_team_1" }, "26": { "id": 26, "parentID": 1, "name": "mesh", "position": [ 0, 0, 0 ], "rotation": [ 0, 0, 0 ], "scale": [ 1, 1, 1 ], "prefabName": null, "meshName": "mymesh2", "materialName": "palette_team_1" },

It is important to do two things:

The very first number and the id are unique, to put it simply, there should be no other section in the file that starts like this:
"26": { "id": 26,

The parentID doesn't change between the two of them. If you're copying and pasting this of course will already be the case.

Stats

To change the stats of the aero, you'll want to paste this:
"templateName": "Aeroplane_falke",
directly above this line:
"transforms": {

This will give your aero the same flying characteristics, payload, and avionics as the Falke. Change the part of the name after the _ to match any other built-in aero to use their stats. If you don't include this line, or you make a typo, it will default to using the Rogue's stats.

Also, for the purposes of the "templateName", the Zulu is actually "Aeroplane_zoke".

(1.2.0 and later)

You can now adjust certain stats beyond using templates. Here's an example from the Starr Wolf mod:

"shortName": "STARRWOLF", "fullName": "Starfighter", "description": "Brick's weapon of choice", "templateName": "aeroplane_rogue", "components" : { "Airfoil" : { "fields" : { "maxThrust" : "10000.0", "throttleChangeSpeed" : "2.0", "ceiling" : "3000.0", "yprSpeed" : "50,10,160", "throttleYprScalar" : 0.5 } }, "Destroyable" : { "fields" : { "hitPoints" : "1992" } }, "LoadoutChassis" : { "fields" : { "basePayload" : "200", "baseAvionics" : "200" } } },

There is now a "components" top-level variable. It's a dictionary containing dictionaries which refer to individual internal components on the aero, which contain values for the data in each component as well as a named key for each value. This example contains the ones you'll probably be more interested in; just copy and paste this and adjust the values.

"yprSpeed" is the maneuverability of an aero on each axis; pitch, yaw, and roll. The values "50,10,160" are the ROGUE's stats and therefore are a good baseline if you want your aero to handle like built-in ones (but feel free to set these to whatever you want!).

"throttleYprScalar" is how much the maneuverability of an aero is multiplied by having your throttle at max or minimum. With the default 0.5, an aero at top throttle is only 50% as maneuverable, and at minimum throttle is 150% as maneuverable. Swing-wing aeros have this set to a higher value, which produces their unique handling characteristics. It is safe to set this to 0 to nullify the effect entirely.

Audio

You can change the engine sound of the aero by including this line in the same place you put the "templateName" and such:
"engineAudio": "engine.ogg",
"engineAudioHigh": "engineHigh.ogg",

"engineAudio" is the normal engine sound, it will pitch up and down with the throttle. "engineAudioHigh" is the 'afterburner' sound you hear when throttling up to max throttle. "engineAudioHigh" is optional: If you set "engineAudio" but not "engineAudioHigh", it will simply disable the sound.

All audio files should be placed in the "Audio" directory next to "Aeros", "Meshes", "Skins", etc. Only .ogg (Ogg Vorbis) is supported; there are plenty of free applications on the internet (such as Audacity) which will convert from any common format to .ogg (.wav, .mp3, .flac, .aac, etc)

Validation

When you are finished editing your .aero.json file, make sure it's valid JSON. Use a tool such as this: http://jsonlint.com/. This will save you a lot of time with trial-and-error if you made any typos.

That's it for now! Your custom aero will fly identically to the Rogue, and have the same hitbox, but that will likely change in the future. Modding is purely cosmetic at this time.
Custom Mission Creation
(Alpha 26.2 and later)

Custom missions allow you to play a single mission with a terrain and enemy or friendly spawns that you have designed. All progress is ignored in custom missions: you can't make a mission that lets you grind for tons of money to use in the main campaign.

To begin, subscribe to the "Example Custom Mission" mod on the Workshop. If you are familiar with the other types of mods you may be able to figure everything out just by taking a look at the mod's files yourself.

There are two components to a Mission:

  • the World, a directory contained in the "Worlds" directory
  • the Mission, a .misson.json file contaiend in the "Missions" directory

World Creation

A world is made of three texture files.

  • heightMap.png - the heightmap. This determines the height of the terrain at each world chunk.
  • moistMap.png - the moisture map. Determines the colour of the terrain.
  • tempMap.png - the temperature map. Also determins the colour of the terrain.

If you do not want to experiment with the moisture and temperature maps, just make them solid neutral gray (RGB: 128,128,128)

Each pixel is exactly 100 x 86.5 units in the gameworld. The terrain itself is rendered in hexes, so every odd row will have an offset and it will seem "jagged" in-game compared to the heightmap texture.

They all must have the exact same resolution, but there are no true limits beyond that. I highly recommend you don't make maps larger than about 200x200: the gameworld will be so large that flying on the edges of it will cause weird glitches in the game's shadows thanks to floating point precision errors. All of them are currently grayscale only; only the "value" data of every pixel is read (R + G + B) and any colours are ignored.


Mission Creation

Open the .mission.json file and have a look around. This is what the attributes mean:

{ "name" : "Example Custom Mission", "description" : "This is an example you can use as a basis for your own custom missions.\n\nFly right into the danger zone!", "site" : { "worldName" : "ExampleMission", "playerStartPosition" : [10, 500, -10], "maxElevation" : 200,
  • name - This appears in the custom mission list
  • description - This appears when you select the mission in the custom mission list
  • worldFile - The name of the world to use. This should exactly match the world's directory name.
  • maxElevation - The maximum elevation of the terrain. Higher values means the terrain will be higher, and it also means that small differences in the heightmap will be greater, and generally make your terrain more rough and chaotic. Technically this should belong as part of the World data, but that's just how it is for now. :)

Then you'll find the spawn list:
"spawns" : [] { "position" : [10, 800, 25], "rotation" : [0,0,0], "spawnType" : 1, "resourceName" : "Aeroplane_schwalbe", "team" : 2, "isMissionObjective" : true, "squadronSize" : 4, "setFlagWhenDestroyed" : "schwalbe_killed" }, { "position" : [10, 800, 28], "rotation" : [0,180,0], "spawnType" : 1, "resourceName" : "Aeroplane_falke", "team" : 2, "isMissionObjective" : true, "squadronSize" : 3, "spawnWhenFlagsSet" : ["schwalbe_killed"] }, { "position" : [20, 800, 4], "rotation" : [0,270,0], "spawnType" : 1, "resourceName" : "Aeroplane_vector", "team" : 2, "isMissionObjective" : false, "squadronSize" : 2, "spawnWhenFlagsSet" : ["schwalbe_killed", "sam_killed"] }, { "position" : [10, 800, 6], "rotation" : [0,0,0], "spawnType" : 1, "resourceName" : "Aeroplane_drakon", "team" : 1, "isMissionObjective" : false, "squadronSize" : 2 }, { "position" : [10, 0, 4], "rotation" : [0,0,0], "spawnType" : 0, "resourceName" : "Buildings/Tower_sam", "team" : 2, "isMissionObjective" : true, "setFlagWhenDestroyed" : "sam_killed" }, { "position" : [10, 0, 16], "rotation" : [0,0,0], "spawnType" : 0, "resourceName" : "Buildings/Tower_lrsam", "team" : 1, } []

  • position - The position in heightmap coordinates: so if you have a 20x20 map, a position of [10, 1000, 10] matches the 10x10 heightmap pixel, at an altitude of 1000 units (the cloud level)
  • rotation - euler angles, x, y, z
  • spawnType - 0 for ground units, 1 for air units ... technically the meaning is different internally but this is how it's used right now.
  • team - the team number. 1 is the player's team, 2 is the enemy team, 0 is "neutral". Extra teams are currently unsupported and will probably cause errors when they try to figure out their team colours and find out there aren't any.
  • resourceName - the name of the thing to be spawned. Check the list below for valid things to put in here. You can also spawn your custom aeros by using their filenames, for example: "MyCoolAero.aero.json". Custom aeros are spawned with a default "rookie" AI.
  • isMissionObjective (optional) - When set to true, this spawn will get a red "MISSION" reticle placed on it. If the player destroys all mission objectives, they will get a "mission complete" message and the mission will end when they land. If there are no mission objectives, the mission will simply never end unless the player dies or quits.
  • squadronSize (optional) - Unused with spawnType 0. The number of members of the air unit squadron. They will spawn in an echelon right formation. (actually I need to check, may be a vic formation)
  • setFlagWhenDestroyed (optional) - Sets a boolean "flag" when this target is destroyed. When it's set on a squadron, the flag will be set when ALL the aeros in the squadron are destroyed. You can name flags whatever you want, and have as many as you want. Be careful to make sure all flag names in your custom mission are exactly the same, ex: "myflag" is NOT the same as "MyFlag".
  • spawnWhenFlagsSet (optional) - This will not spawn until the given list of flags has been set. You can create "waves" of enemies or "stages" of missions by chaining together "setFlagWhenDestroyed" and "spawnWhenFlagsSet" enemy spawns.

Spawn Type 0
Buildings/aerolab Buildings/barracks Buildings/chunk_airbase Buildings/command Buildings/factory Buildings/hangar_large Buildings/hangar_small_pair Buildings/powerplant Buildings/raydome Buildings/rig Buildings/Tower_aaa Buildings/Tower_sam Buildings/Tower_lrsam Vehicles/mech_toro


Spawn Type 1
Aeroplane_drone Aeroplane_schwalbe Aeroplane_schwalbe_vet Aeroplane_rogue_ace MyCoolCustomAero.aero.json etc

Uploading to the Workshop
To upload your creations to the Steam Workshop:

Download the uploader using the "Download" button at the bottom of this page:
http://nihilocrat.itch.io/sky-rogue

  • Before doing anything, create a preview image.... .jpg .png or .gif, Maximum 1MB
  • Log into Steam
  • Open SteamWorkshopUploader.exe
  • Click "Create Item" and make sure you didn't get an error. The error will tell you what you need to do.
  • Rename "MyNewMod" to whatever you actually want to call it (the name actually doesn't matter at all, just name it whatever is easiest for you to organize)
  • Put your mod's files into this folder.
  • Click on the button to open the settings for your mod, and change them to your liking. All paths are relative. Again, follow the model of the other mods when in doubt.
  • Make sure visiblity is set to "Public" if you want it to be visible on the Workshop right away.
  • When everything is ready, click the submit button. If you get a "SUBMITTED!" reply, check the workshop and verify the mod shows up in the list of mods you've made.
Asset Bundles: Alpha 28 and later
All mods using the old system will still still be supported! If you don't want to use the new system, you can keep using the old one. It requires downloading the Unity3D engine and learning a little bit of knowledge about its interface. There's no need to write any code or edit any text files, though!

Quick Walkthrough

  • Install Unity3D version 2017.4.11 from the Unity website (https://unity3d.com/get-unity/download/archive). Before 1.1.5, version 5.6.0 was in use, and before Beta 2, version 5.2.4 was in use, so if you have not yet exported your mod from 2017.4.11, please do so. Other versions might work, but they are not explicitly supported. Make sure you install support for Windows, Mac, and Linux standalones if you're given the option to. Other extras are unnecessary, the example project is also unnecessary.
  • Download the project files on the github page (https://github.com/nihilocrat/SkyRogueModTool) using the "Clone or Download" button to the right.
  • Start Unity3D. It will ask you to create an account, but this isn't necessary; run it "Offline" if you wish. Open the "SkyRogueModTool" folder.
  • Among other directories, it will create "SkyRogueModTool/Example". Using the "Project" window in the lower-left, navigate to this directory.

  • Select the "CustomAero_base.aero" prefab and drag it into the scene window. This will spawn the prefab.

  • Notice that it has appeared in the "Hierarchy" window. Click and drag it into the "Assets" directory in the "Project" window. This will create a new copy of the prefab that you can modify without modifying the original.
  • Look at the Inspector window to the right. At the very top, you should see the prefab's name; clicking on this should let you edit it; name it whatever you want, but make sure its name ends in ".aero".

  • If you scroll down in the Inspector window, you'll see a header titled "Custom Airfoil". Slightly below that you'll see a label for "Max Thrust".
  • Click the number to the left of "Max Thrust" and set it to whatever you want; remember that 9000 is the default of the Rogue and thus the middle ground.

  • When you are finished making changes, scroll up and click the "Apply" button directly to the left of the "Select" and "Revert" buttons. This will save your changes.
  • Here comes a slightly tedious part: go back to your newly-made prefab in the "Assets" directory and select it. Scroll down and make sure the "Max Thrust" value is the one you chose. At the very bottom of the window, below the visual preview, you should see an "Asset Bundle" label with a dropdown next to it. Create a unique name for the number using the "New.." option. Your bundle cannot be loaded if another bundle of the same name is already loaded

  • Now you can export your asset bundle. Along the title bar, you'll see "File", "Edit", "Assets", etc... then "SkyRogue_ModTools". Click this and choose "Build Asset Bundles".

  • This will create a "ModPacks" directory with a "ModPack" subdirectory
  • The "ModPack" directory represents the contents of your mod: in the old modding system, this was represented by various directories ("Aeros", "Meshes", "Skins", etc).
  • Test your mod in the game; the quickest way is to directly copy the "ModPacks" directory (not "ModPack!") into the "Sky Rogue/Mod/" directory and start the game.
  • Upload to the workshop using the directions below. The "ModPack" directory is the sum total of your mod's contents, so this is the only thing you need to upload.

Currently, you must include filename extensions for the game to recognize and load the assets you put in your bundles:

Aeros: ".aero"
Weapons: ".weapon"
Bullets: ".bullet"

Example Assets

"SkyRogueModTool/Example" contains a number of example assets for your asset bundles. It's HIGHLY RECOMMENDED you copy these (Ctrl+D) and move them to your own directories to ensure that they have the correct components and transform hierarchy; an asset that is missing components may not load correctly.

Quick Start: Custom Aero model

- Import the model you've created in your modelling app: formerly this was restricted to only .obj files but now it can be any format that Unity supports. You can import your model by simply dragging and dropping it into the "Assets" folder in the "Project" window, or copying it to the same location (or any subdirectory) in your project files on disk.
- Unity gives you various options for importing your model which you can modify by selecting your imported model in the Project window. Take a quick look if you feel that you need to adjust anything. Consult the Unity docs for more details.
- Follow the walkthrough until you've created your own copy of "CustomAero_base.aero"
- Drag your prefab into the scene view so you can see the default Rogue model
- In the Hierarchy window, click the arrow to the left of the prefab name to see its child objects
- Expand the "graphics" object
- Select the "mesh" object

- In the Inspector window to the right, there is a "Mesh Filter" component with a "Mesh" variable. Click the circle next to the current mesh to open up a chooser, and choose the model you imported

- You will want to move the afterburner, wingtip contrail, and thrust contrail objects like before... however, now you'll be able to do it visually so there's much less time spent with trial and error.
- Export your custom aero!

Custom Airfoil Variables
  • Throttle Change Speed - Acceleration
  • Bank speed - determines how much the plane dives downward when rolling (at it maximum when you're completely inverted)
  • Ypr speed - Maneuverability in degrees per second: it's a vector with three axes, so X is pitch, Y is yaw, Z is roll. The number you see in various GUIs in-game is the X value.
  • Throttle Ypr Scalar - How much of a bonus to maneuverability you get when at zero throttle
  • Climb / Dive performance - How much your effective thrust (and by extension, airspeed) gets adjusted when climbing or diving
  • Max Speed - doesn't actually affect speed, you want to edit Thrust. It merely determines what the GUI thinks the top speed is.
  • Wing area, drag coefficient, base drag - currently unused!

    More documentation will be forthcoming
Weapons (Alpha 28 and later)
Make a copy of "CustomWeapon_micromissile.weapon" and edit its properties ... the most important one is the "Bullet" property, which should point to another prefab with a "bullet" component on it. Make a copy of "CustomBullet_micromissile.bullet" to use as an example. Every weapon needs a bullet to function at all and appear correctly in the GUI.

If you want to make a guided weapon, make sure its bullet has a "CustomGuidedMissile" component. Unguided weapons should delete this component.

"Ignition Delay" is the delay between firing a weapon and having its force applied to it: this will also cause it to drop from the aero before doing so. If it's set to 0, it will launch immediately and not be dropped.

"Acceleration Delay" is how long it takes for a bullet to get up to its top speed, this should only have an effect if "Continuous Force" is checked.

"Trigger Delay" is a delay before the bullet's collider is enabled. This is not necessary for the vast majority of bullets, but is very useful for things like flak bullets which have extremely large colliders which might hit something near the weapon before they get anywhere close to the target.

"Continuous Force" should be enabled for any sort of guided missile, unguided weapons don't need it.

"Aoe" determines if the weapon should have an Area of Effect. It's important that the "Boom Prefab" has a collider (with "is trigger" enabled), rigidbody, and a bullet component. When this is checked, the damage and other attributes of the bullet will be transferred to its boom.

"Multiply Drift By Recent Motion" should be enabled for any bomb-style weapons and disabled for everything else.
Environments (Beta 3)
Environments define the way the terrain, water, sky, etc look. Currently you can only use them in custom missions.

To choose an environment for your mission, set the "environmentName" key in the "site" section of your .misson.json.

{ "name" : "Example Custom Mission", "description" : "This is an example you can use as a basis for your own custom missions.\n\nFly right into the danger zone!", "site" : { "worldName" : "ExampleMission", "environmentName" : "MyCoolModEnvironment", "playerStartPosition" : [10, 500, -10], etc. etc.

The main game has four built-in environments. If you want to use them, these are their names:

  • "TemperateEnvironment" (blue sky)
  • "AridEnvironment" (red sky)
  • "SnowEnvironment" (purple sky)
  • "EndbossEnvironment" (green sky)

If you want to create your own Environment, do the following:

  • Create an "Environments" folder in your modpack
  • Create a folder for each environment (ex: "MyCoolModEnvironment")
  • Create four textures, or copy them from the Example Custom Mission mod available on the Workshop:
  • environment.png - a palette texture defining sun light, ambient light, fog colour, and cloud emissive colour
  • ground.png - a palette texture defining ground hex colours based on height, temperature, and moisture settings
  • skybox.png - skysphere texture; make it look however you want!
  • water.png - water texture; make it look however you want!

Here are keys for defining environment colours. The colours here are the ones in TemperateEnvironment.
*environment.png*


*ground.png*
Propellers (1.2.0+)
Propellers in asset bundle mods are supported in version 1.2.0 and above.

You can add them using the "Custom Propeller" component. You can attach this anywhere you like, but it's probably best to put it on an object which is a parent of the propeller you want to spin.

One Stage is required, but extra stages are optional. If you want to keep things simple, just copy the settings you see in the screenshot above.

  • Static Prop Mesh is the object which will be shown when the propeller isn't spinning, such as on the carrier menu.
  • Stages contains a list of propeller animation configurations which can swap meshes, speeds, etc when the player sets their throttle to a certain amount.
  • Prop Mesh - this object will be enabled while all of the Prop Mesh objects on other stages will be disabled. For example, you might want to have a solid propeller mesh at low throttles for the first stage, but at higher throttles it looks nicer to use a transparent, blurry disc, so you also have a second stage for a total of two mesh objects.
  • Begin Throttle - It is important to set Begin Throttle for each stage to a value greater than the stage before it. For example, you could use the solid propeller mesh for throttle 0.5-0.9, but the blurry disc mesh from throttle 0.9-1.5. In this case, the solid mesh stage would have Begin Throttle set to 0.5, and the blurry disc stage would be set to Begin Throttle 0.9.
  • Min Spin - When the player's throttle is equal to Begin Throttle, the propeller mesh rotation speed = Min Spin x Speed. Use a negative value if you want to spin this prop in a counter-clockwise direction.
  • Max Spin - When the player's throttle is equal to the next stage's Begin Throttle (or if this is the final stage, 100% (i.e. 1.5), the propeller mesh rotation speed = Max Spin x Speed.

When using a blurry disc, it might provide an interesting effect to use a negative Min Spin but a positive Max Spin. This is what the built-in BRONCO aero's propeller component does, which you can see below.
84 Comments
Mallard Ducc 1 Nov, 2024 @ 9:29am 
if you cant find the mod folder within the skyrogue directory its because its not in the folder steam opens, its in appdata > LocalLow > Fractal Phase > Sky Rogue

they mightve said that in the guide but i wasnt able to find it cuz im lazy
:steamhappy:
PettySpirit 2 Dec, 2023 @ 10:02am 
Would there be some way to mod the music of the main game without making a custom mission?
Garcia 21 Jun, 2022 @ 5:07am 
I love this game, I really wish I could change the sea texture though, it makes me dizzy
Orifan1 12 Oct, 2021 @ 9:39am 
pardon my stupod but where do i find "CustomWeapon_micromissile.weapon"?
NimrodAbsolution⁧⁧98 1 Apr, 2021 @ 4:26pm 
Is there anywhere with a full list of internal names for spawning stuff in missions?
chunk airbase spawns an aerodrome instead and dreadnought among others isn't listed
AppleMarine 27 Feb, 2021 @ 4:48pm 
Is it possible to extract a .aero file from a ModPack folder? I want to put the Arsenal Bird aero in a custom mission, but I can't figure out where to get the file, or what filename to put into the mission spawn.
Dead Planets and Live TV 27 Apr, 2020 @ 9:10am 
I'm having no end of trouble getting this to work, both with the .json file and with the unity project. Is that visual editor still in the works?

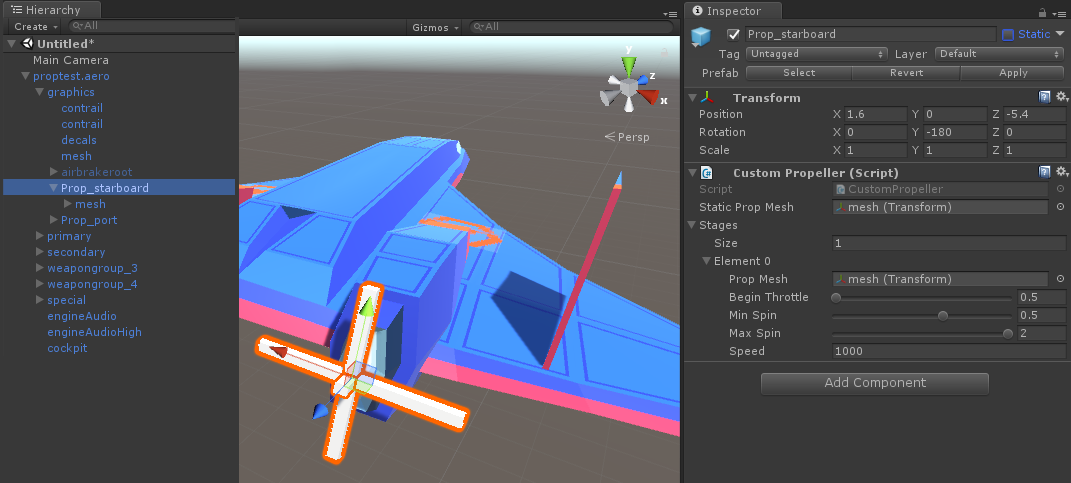
When editing files, the mod previewer from itch.io portraits the mesh correctly, but takes several minutes at a time to load the mod. When using the unity project, the mesh doesn't actually show up ingame (plus this guide doesn't mention how to add things like skins using an asset bundle).
openroadracer #TAIWAN #UKRAINE 28 Jul, 2019 @ 2:34pm 
Awesome, new guide for how to make propellers look right in this game.

This is going to be fun.
kaiokennyx20  [author] 1 Jun, 2018 @ 7:06pm 
Thanks for pointing it out! I'll make a note to take a look at it.
Magnymbus 31 May, 2018 @ 2:09pm 
I can't get the "MIRV spawner" component to work. Every time I try to include it in the .bullet or .weapon it breaks and weapon disappears from the GUI