Against the Storm

Against the Storm

375 ratings
Basic strategy (Prestige 20) - Frogs and 1.5 update!
By Deadlock
These are the general steps I follow every game and it has worked for me up to Prestige level 20.

Updated for base game version 1.5 and the Keepers of the Stone DLC!
23
14
8
2
13
6
3
6
3
2
2
2
   
Award
Favorite
Favorited
Unfavorite
Introduction
Against the Storm is mostly about surviving the storm. You win a game by gaining Reputation points and you'll notice that this becomes easier as the game progresses. In the early game, you're mainly focused on not losing the game.

Things that make you lose the game:

  • Low villager resolve → villagers leave → Queen's impatience goes up
  • Failing to produce enough food → too many stacks of hunger on villagers → villagers die → Queen's impatience goes up
  • Failing to complete glade events on time → villagers die → Queen's impatience goes up
  • Failing to deal with Blightrot → Ancient Hearth gets corrupted → villagers die → Queen's impatience goes up

To summarize, if you prioritize the "wrong" buildings or resources, your progress will stagnate and you won't gain enough reputation before the Queen's impatience runs out.

With every passing year and every glade you open, the game will give you more resources and buffs in the form of resource nodes, cornerstones, perks and blueprints. Randomness is still a big factor in this game and it is entirely possible that you lose a game because you are unable find the resources that you are looking for. However, the game gives you plenty of options to adapt your strategy and make things work with the hand that you're dealt.

After beating a map a few times, the game introduces extra challenges in the form of Prestige levels. As you make your way up the Prestige ladder, you will notice you will get less options for building blueprints and corner stones. Things you do will cost more time and resources. You can no longer build a bit of everything (crafting trade goods AND crafting tools AND crafting complex foods AND crafting goods for service buildings). This makes picking the "right" blueprints and production chains more important, based on the resources that are available to you.

Example


Here I'm playing on Scarlet Orchard, Prestige 16. I got the Scribe blueprint early and found Copper Ore, so my initial thought was to produce Copper Bars and Tools. However, after 6 years I still have no building that can produce Copper Bars. Instead, I completed a timed order that rewarded me with the Advanced Press perk, which gives +5 Scroll production (see the Scribe recipe). These scrolls can be used to fulfill the Eduction need for Beavers and Harpies, or be sold as Packs of Luxury Goods. The unused Copper Ore is used to build Reinforced Roads.
Companion app
I've built a website that shows you:
  • a graph to easily compare needs and services for your villagers.
  • a list of buildings with their recipes, to keep track of which you need/want.
The app can be found here: https://against-the-storm-companion.vercel.app/

Early game - basic production, housing
  • Start by setting up production of basic resources: wood, stone/clay, reed/plant fiber. I like to start with 2 Woodcutter camps, a Crude workstation and one other camp, depending on the available resources.
  • For the Woodcutter camps, tick the box "avoid opening glades (unless marked)" so you won't have to deal with glade events because you opened a glade accidentally.
  • From the starting blueprints, I usually pick 2 or 3 star buildings for making planks/bricks/fabric. However, I don't like the Workshop, specifically, since there is no faction bonus and it only takes 2 workers.
  • Pick the blueprints that synergize well with your species:
    • Prefer blueprints that can produce something that you settlement cannot yet produce. When hovering the blueprint, it will show the (+) symbol for that type of good.
    • You can pick a blueprint that produces goods with more stars than some other blueprint that you already own. More stars means it takes less ingredients and produces faster.
    • Look for symbols that match the specializations of your villagers.
    • You can pick a Service building, even if you don't have the goods required for the service they produce (e.g. Tavern needs Ale). Each Service building also offers a passive effect that might be very useful (e.g. Tavern gives +3 global resolve to villagers). At least try to pick one that offers services that you types of villagers need.
    • There is not much point in rerolling the offered blueprints in hope of getting the perfect building you are looking for. Only reroll if NONE of the offered blueprints are useful to you.
  • Upgrade the Ancient Hearth to Encampment by building 4 Decorations and housing for 8 villagers to. This will give +1 global resolve to villagers and +150 more corruption resistance in the Ancient Hearth (see "Blightrot" section below).

This should get you through the first year. The storm in year 1 should not cause negative resolve for villagers as long as you have housing. See what orders you can complete during the first few years, sometimes you get lucky and get some easy ones (opening glades, making 5 packs of trade goods).

A basic start of a game that you should be able to build in year 1.
  • 1 crude workstation
  • 2 woodcutters
  • 1 small foragers' camp (depends on available resource nodes)
  • 1 harvesters' camp (depends on available resource nodes)
  • 1 shelter - can be destroyed when you finish building specialized housing, get 15 wood in return
  • 1 human house
  • 4 wall decorations
  • Ancient Hearth upgraded to Encampment (level 1).


The Ancient Hearth
  • When you select the Ancient Hearth (and Small Hearths), you will see a highlighted area around it:
    • In order for a house to provide shelter to a villager, it needs to be built within the highlighted area and a fire needs to be burning in the hearth.
    • Houses can be moved for free by selecting one and then pressing [M], make sure to always place them inside the range of a hearth.
    • Service buildings and decorations need to be built within this range in order to count towards upgrades for the hearth.
    • Houses/decorations/service buildings need to be fully within the border of the highlighted area to gain the effect.
    • There aren't any other bonuses for building within this range, i.e. you can build production buildings inside or outside the hearth range, it does not make any difference. You can build service buildings outside the hearth range as well, but then it does not count towards the tier 3 Hearth upgrade requirement.

  • Each hearth has one worker spot. This "firekeeper" will take fuel (Wood/Coal/Oil) from the warehouse to the hearth.
  • I pick the Firekeeper of the Ancient Hearth in the following order:
    • Harpies - villagers can carry 5 extra items, which means less trips from buildings back to storage or to glade events. This is incredibly powerful as it saves a lot of time.
    • Humans - if the Queen's impatience is rising too fast and you struggle to gain Reputation, assign a human so impatience grows slower. Also useful if you plan to play a very long game.
    • Foxes - Only during the Storm if I have a problem with high Hostility - it lowers the Hostility level for every opened glade.
    • Lizards - Only assign them if you need the +1 villager resolve boost, during a storm or if a villager is almost leaving.
    • Beavers - I never use this, since I make sure to always have fuel to burn in the hearth. If fuel is a problem, focus on getting more Wood Cutter camps or start making Coal.
    • DLC: Frogs - newcomers arrive 50% quicker, this can be useful in the early game, when you need a lot of new workers to fill up your buildings.
  • When villagers take a break, they will walk to the nearest Hearth and consume food and use any available needs (Coats, complex food, services).
    • Humans and Beavers rest once every 2:00 minutes
    • Harpies and Lizards rest once very 1:40 minutes
    • DLC: Frogs every 2:30 minutes

    Specialized housing
    • It does not matter where you place houses, as long as it is inside the range of a Hearth. Workers will only walk to the nearest Hearth to rest, they never go to their house.
    • Build specialized housing for your villager types whenever you can (for example, Foxes need Fox Houses). If you lack resources, just build a (big) shelter and fix it later.
    • Specialized housing will give +1 resolve to each villager living in it.
    • You can upgrade a specialized house (after unlocking this at level 18 in the citadel) and pick from 2 bonuses (see the Species section). I prefer the +1 extra space for a villager, because spending 1 Pack of Building Materials is often easier than getting the resources to build another house. It also nicely scales with the level 2 upgrade.
    • DLC: Frog houses can be upgraded 4 times and cost Rain Water in addition to Building Materials.
  • Early to mid game - opening glades, upgrade the main base
    • Once your progression stagnates or you can't build any new things, open your first dangerous glade (probably around the start of year 3). Ignore the normal glades for now - they increase hostility and the dangerous ones have more resources. Completing the glade event should be doable, timing may be an issue, so open the glade in Drizzle season, right after a storm.
      The negative effect of "Hostility of the Forest" will increase by opening glades
    • I recommend that you only open regular glades if you are desperately looking for natural resources, such as fertile land, coal or copper.
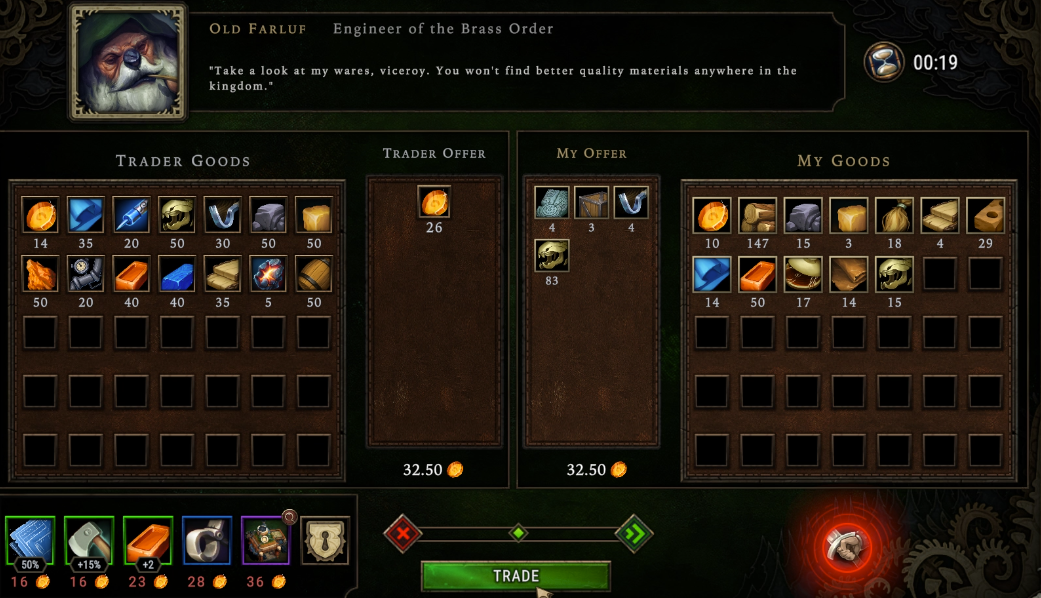
    • Build a Trading Post (if you have not already done so). Even if you have nothing to trade yet, you can buy powerful perks with the spare Amber that you have in stock. I usually only sell trade goods, rarely any regular goods. The only exception is Fabric, which has relatively good value (0.31 Amber before Prestige 9) for how easy it is to make and I often end up with a stack of 100+ unused Fabric later in game.
    • A trader will arrive immediately when you first build the Trading Post, you can use this to your advantage and wait until you have gathered some amber or trade goods.
    • Build a Makeshift Post, enable production of Pack of Building Materials and set a limit of 10. As the ingredient, use the type that you can easily produce. You can use these to upgrade your specialized housing (see below).
    • Upgrade the Ancient Hearth to Neighborhood level (14 housed villages, 8 Comfort decorations, 4 Aesthetics decorations).

    Selling a lot of goods so I have enough Amber to buy the Smithy blueprint (right most perk). I even sold some Tools, but I will make them back in no time.
    Mid game - dealing with the Storm
    • Right before the storm starts (when you hear the thunder sound), fill your Blight post with Harpies, Lizards or other villagers.
    • During the storm, your villagers resolve will drop, depending on the active effects during the storm and high hostility.
    • Carefully read the effects that are active during the storm due to high hostility. Sometimes they require you to have specific resources or offer specific services.
    • When the storm ends, stop burning wood/coal at the Ancient Hearth and reassign your woodcutters.
    • Leave one Harpy (or other worker) to produce Purging Fire in the Blight Post.
    • Build a Hydrant right next to buildings that are far away from your Blight Post, such as a Mine. The workers in the Blight Post will take Purging Fire from the Hydrant, so they don't need to walk all the way back to the Blight Post after clearing a cyst.
    • In the game options, set the game to pause at "Start of Drizzle Season" so you don't forget to disable burning fuel and reassign workers.

    Example of an effect that is active during the storm at Hostility level 5. Make sure to stay below Hostility 5 or offer services to your villages, because this effect will hurt a lot!

    Dealing with high Hostility
    • Start by removing workers from Woodcutter camps during the storm. (shift+right click to unassign all)
    • Build extra hearths, they give -30 hostility each
    • Assign a Fox as Firekeeper of the Ancient Hearth. This will reduce hostility from opened glades (Regular Glade 15->9, Dangerous/Forbidden Glade 30->24). The bonus is applied retroactively, meaning you do not need to have a Fox assigned at the exact moment you open a glade in order to get the bonus.
    • Build the Monastery, for -100 hostility when filled with workers.
    • The trader sells a perk that lowers hostility by 50.
    • Some cornerstones reduce hostility generated by woodcutters or lower hostility for the number of burnt blight cysts.
    • In small glades, you might find an Obelisk decoration that reduces hostility when you choose to solve the event by 'Making an offering'.

    Dealing with low villager Resolve
    • Click the hand icon next to portrait of a faction to favor that faction for a +5 resolve bonus. Beware of the 60 second cooldown on it, before it can be activated again.
    • The moment your villagers resolve becomes negative (but not earlier than that!), start burning Wood or Coal in the Ancient Hearth to lower hostility even further. You can stack this effect up to 3 times. Don't forget to disable burning after the storm, there is a checkbox in the Ancient Hearth menu that does this for you.
    • Coats give a +3 Resolve bonus during the storm, but they can only be used by Harpies, Humans and Beavers.
    • Set Lizards as the Firekeeper for +1 resolve bonus.
    • Assign villagers to buildings that give a resolve bonus to that type:
      • Engineering -> Beavers
      • Harpies -> Cloth
      • Lizards -> Warmth (also Small Hearths!)
      • Humans -> Brewing
      • Foxes -> Production buildings affected by Blightrot
      • DLC Frogs -> Rainwater
    • Workers will have a blue glow around their portrait to indicate their resolve is boosted.
    • Some service buildings give a bonus Resolve (Tavern, Explorers Lodge). Make sure to assign the maximum amount of workers to get the bonus.
    • Turn on Rain Engine 2 in a building, to raise resolve of those workers. This requires you to have an Engine installed in the building (5 pipes) and Rain Water of the matching type. See the section on Rainpunk below.
    • Build specialized housing (Beaver house for Beavers, etc) and upgrade it to level 2, the Stove upgrade gives +1 resolve for each villager living in that house. These upgrades can be unlocked around level 18 in the citadel.
    • Every Hearth can be upgraded three times for +1 global resolve each, up to a total of +3 global resolve.
    Mid game - Rainpunk and Blightrot
    To learn what changed since the Rainpunk update (January 19 2023), see the update tl;dr section below.

    Rainwater
    • Rain Water is produced by either a Rain Collector (rainwater type collected depends on the season) or Geyser Pump (collects only 1 type).
    • Both these buildings will have a tank that can store 50 rainwater. Each additional building increases the storage capacity of rain water by 50.
    • There are 3 types of Rain water:
      • Drizzle Water (green) is used to boost food production buildings
      • Clearance Water (yellow) is used to boost crafting-oriented buildings
      • Storm Water (blue) is used to boost industrial buildings.
    • You can build the Rain Collector (or Geyser Pump) early game, assign a worker and start collecting rain water (max 50) for later use.
    • The Rain Collector should be built close to a hearth, as the worker does not need to haul goods back to storage but does need to rest.
    • Once you find a geyser in a glade, check which type of water it can produce. Build a Geyser Pump on it and assign a worker to produce water of that type.
    • A worker in the Rain Collector produces 2 water every 15 seconds.
    • A worker in the Geyser Pump produces 2 water every 10 seconds.
    • In the Upgrades tab of a Geyser Pump, you can install an automaton worker: a robot worker that will occupy one workplace and continuously produce rainwater. An automaton does not need to rest, but does not get Rainwater specialization bonus (Foxes). This is a powerful upgrade which frees up one of your villagers to do other work.
    • The Advanced Rain Collector produces rainwater with 2 stars and has 3 workplaces. It has 100 storage capacity. It costs 8 Pipes, 5 Parts and 8 Planks to build, which can be pretty expensive.
    • DLC: The level 1 upgrade "Rainwater Storage" for the Frog house gives you +50 Rainwater stores for all types at the cost of 1 Pack of Building Materials. It seems incredibly powerful to have at least 1 Frog house with this upgrade.
    • DLC: Frogs working in a Rain Collector get a bonus to their resolve.

    Pipes
    • You start the game with 14 Pipes, which is enough for 1 Geyser Pump (6 Pipes) and installing the Rain Engine (4 Pipes) on 2 buildings.
    • You don't need a lot of Pipes, so set a production limit of 5-10 so you can always build a new Geyser Pump or install an engine and don't waste any metal bars.
    • Pipes can also be bought from some traders for 1 Amber.

    Rain engines
    • First of all, you can completely ignore the Rain Engine tab in buildings for as long as you like. This mechanic is not required to win a game, but it can be very helpful to boost production speed or villager resolve.
    • Before you start using engines, make sure to build a Blight Post to deal with Blight Cysts. You can also craft some Purging Fire beforehand.
    • Engine 1 is used to get a 100% production speed bonus and 25% chance of double production for that building.
    • Engine 2 is used to boost worker resolve of the workers assigned to that building. It gives about +0.5 resolve per worker per level, which can help you get out of a negative resolve during the storm or reach the resolve threshold.
    • After turning on an engine, the blight rot rate of the building goes up and 1 cyst is created for every 16 water used.
    • 1 Engine turned up to level 3 uses 1 water every 7 seconds and produces a cyst every 01:52 minutes. Using both engines at level 3 uses 1 water every 3 seconds.
    • A single worker in a Rain Collector should be able to sustain one Engine that is set to level 3.

    Press and hold Tab to see which buildings are using water and switch engines on or off

    Here I have the Toolshop with Engine 1 at maximum capacity, which increases production of Tools from 52 seconds to 35 seconds, plus a 20% chance to double production.

    Blight rot
    • The Blightrot mechanic is only active when playing on Veteran difficulty or above.
    • Keep an eye on the Blightrot corruption rate in the bottom right, next to the Queen's impatience. When it gets close to 100%, check if you have enough Purging Fire in your Blight Post
    • There is no maximum number of cysts produced by a building, as they will spread to nearby buildings.
    • When playing on Prestige level 2, your buildings will be infected with 10 Blightrot cysts every 3 years (also non-production buildings such as Houses).
    • During the storm, blight cysts will bloom and the corruption meter in the Ancient hearth starts filling up.
    • The Ancient Hearth (without upgrades) can take 1000 corruption before 3 villagers die. If you have 4 cysts that produce 90 corruption per minute each (= 360 corruption/minute), then the Ancient Hearth will be corrupted in about 3 minutes during the storm.
    • Upgrading a hearth will increase the maximum corruption by 150 per upgrade.
    • 3 Blightfighters can easily handle 10 cysts, assuming you crafted Purging Fire before the storm starts. Consider building a second Blight Post when you get near 20 cysts.
    • For every burned cyst, both the corruption and corruption rate will drop. Firefighters can only burn cysts during the storm.
    • Press and hold Z to see which buildings have cysts and will produce corruption.
    • Build a Hydrant near remote buildings. Firefighters will take Purging Fire from them, so they don't need to walk all the way back to the Blight Post.
    • The Blight Post can be upgraded in several ways. All upgrades cost Pipes. For example, you can add an Automaton worker to free up one of your Villagers. The "Triple Ignition System" seems most useful, which shortens burning a cyst by 5 seconds. It's nice to have the "Alchemical Forge" on one of your Blight Posts, which gives a chance of double Purging Fire production.
    Mid game - fix your food supply
    • Villagers have hunger tolerance, which is the number of meals they can miss before they die due to starvation.
      • Foxes: 3
      • Harpy: 4
      • Human: 6
      • Beaver: 6
      • Lizard: 12
      • DLC: Frogs: 5
    • Hover over the species portrait to check if any species has negative resolve due to Hunger. If this is the case, you may need to look for additional sources of food.
    • Villagers will consume food (and fulfill other needs) when they take a break.
    • Camps vs. Farms: Using Camps to pick berries/herbs/grain will give you those goods immediately and is a nice way to start, but they only have a limited number of resources. When using Farms, it takes multiple cycles of a year to fully grow and harvest the crops, but they will never run out.
    • Ponds for Fish or Algae work a little differently. Workers in the Fishing Hut will completely use up all charges of the Pond and then start moving goods back to storage.You can choose to craft bait out of Packs of Crops to double the yield. This process can take very long, but you can reel in the nets early at the cost of depleting the pond.
    • 1 Farm with 2 workers should be able to sow and harvest about 10 Fields (need to check).
    • It may be hard to find fertile soil, especially on the Marshlands biome.
    • When playing with the Human species, a patch of fertile soil will be revealed when the first human joins your colony.
    • The Field Kitchen can be built from the start of the game and can be used to craft complex foods early on in the game.

    • Crafting complex foods will multiply the number of food items (compared to the number of raw ingredients). This means your villagers will have more available meals, even if they don't have a need for that type of complex food. Make sure to disable consumption of raw ingredients used for crafting complex foods.
    • Also keep in mind that recipes might seem expensive, but there is also a chance of double production, if you have the chance of double yield bonus for that species or other bonuses.
      Here, the Butcher can turn 5 Meat into 18 Jerky, which in turn can be used to make (15x6=) 90 Skewers. Note: this game I had a 50% bonus to goods produced by the Butcher and a +2 bonus to Jerky.
    • In the Consumption menu, select which foods your villagers are allowed to eat. They will prefer complex food that gives them resolve bonus. If a complex food gives no bonus, they will only eat it if no other food is available. I still like to disable those types, as in the image below. Also disable types of raw food that you need to crafting recipes.
    • Production speed in camps and farms can not be boosted by Rain Engines (see section on Rain Water below), but they can be boosted by sacrificing Oil in the Ancient Hearth and some Perks/Cornerstones.
    • "Specialization" perks will increase production of an item by +1 every 25 times it's produced. So if you get the specialization perk in the early game, this can spiral out of control and give you huge piles of these items:
      • Fungal guide: +1 Mushroom production every 25 times it is produced
      • Meat Specialization: +1 Meat production every 25 times it is produced
      • Grain bags: +1 Grain production every 25 times it is produced
    Disabled food consumption of complex food types that don't give a resolve bonus.
    Mid game - optimize production
    • Place buildings with their entrance close to a Warehouse so your villagers spend less time walking back and forth.
    • In general, I only build 1 of every Industry type building (Workshop, Clothier, Brickyard, etc). You might need more than 1 of Camps (Woodcutter, Harvester, etc), Food (farms) and Blight Post. It's no use building multiple of the same Service building (Tavern, Forum, Monastry, etc), the effects of the same buildings don't stack.
    • When hovering a building in the menu build menu, it will show how many of that type you've built already. Pressing tab while hovering will take you to that building.
    • Goods can be moved directly from the source to production buildings (within a limited range), instead of moving the goods to a Warehouse first. This is indicated by a white dotted line. For example, a Woodcutter can move Wood to a Crude Workstation if it has storage capacity left.
    • Workers in a Warehouse will haul ingredients from a warehouse to production buildings and take produced goods the other way, within a limited range. This way workers in production buildings can keep producing goods.
    • Press and hold Control to see which recipes are active. This makes it easy to enable only those with the highest number of stars.

    • Disable recipes in buildings that you currently don't have a use for to prevent wasting resources. For example, if you don't have any service buildings then you probably don't need Incense, Training Gear, Wine yet.
    • Also check the Recipes menu and filter on some of the goods you are producing. Check that only the highest starred buildings are producing the goods that you need.
    • Make sure to set limits on production of goods, to prevent wasting raw materials on things you don't need. Especially on Coats and Boots since villagers only need a limited amount of those and you can't process them into trade goods. This also applies to trade goods and items used in service buildings (ale, incense, cosmetics, wine, dye, scrolls, training gear).
    • In the Produced Goods section, you can set a limit on the amount of stored goods in a building before they are moved to a warehouse. This is especially useful early game, e.g. for the Crude Workstation if you want to build a House as soon as you have 6 Bricks available.
    • Some buildings like houses can be moved for free, so build them close to a warehouse and then move them to their final destination so builders spend less time hauling goods.
    • Camps can be moved for free, so move them closer to the resource once in a while or move useless buildings out of the way.
    • For Woodcutter camps where I always assign 3 workers, in other buildings, start with one worker and adjust depending on your needs. If you are overproducing goods or workers are idling, simply remove one or two workers.
    • Check whether there are Coal or Copper resource nodes on the map (press Escape and hover over the icon next to the menu). Coal is a very efficient fuel and alternative to Wood. If there is no Copper Ore, you will need to focus on producing Crystalized Dew as ingredient for Tools, Pipes, Barrels and Training Gear.
    • If you have the Parts for it, build a Warehouse near production hubs that are remote from the main storage, I like to build it next to a Mine.
    • For your production buildings, make sure to use planks instead of wood for production of Tools and coal instead of wood for complex food and copper bars, since this is often more efficient than using wood.
    • If you find a Ruined building in a glade that you already have as a blueprint, it is often better to keep the goods instead. The cost of building it is similar and it is probably located far from a warehouse.

    Using 2 Planks instead of 8 Wood. If you can produce Planks with 1/2/3 Stars then this is more efficient in terms resources.

    These are the Plank recipes for all buildings:
    Building
    Stars
    Time
    Wood
    Planks
    Wood:Plank ratio
    Nr of workers
    Specialization
    Crude workstation
    -
    0:40
    8
    2
    4:1
    2
    -
    Carpenter
    ⭐⭐
    0:30
    5
    2
    2.5:1
    3
    Woodworking
    Supplier
    ⭐⭐
    0:30
    5
    2
    2.5:1
    2
    -
    Workshop
    ⭐⭐
    0:30
    5
    2
    2.5:1
    2
    -
    Lumbermill
    ⭐⭐⭐
    0:20
    3
    2
    1.5:1
    2
    Woodworking

    How to get more Parts
    These cogs are required for resource gathering buildings (camps), Small Warehouse, Blight Post, Mine and can be pretty hard to come by!
    • You can pick Parts as an Embarkation bonus when starting a new map.
    • As a reward from completing an Order.
    • Newcomers sometimes bring Parts.
    • You can buy them from some traders.
    • You can find them in some Abandoned Caches, select Keep Goods.
    • If you find a Ruined Camp (Trapper/Harvester/etc), you can rebuild it, then destroy it to get 5 Parts.

    Boosting production

    There are several ways to get extra goods or to speed up the production time in your production buildings.
    • The Effects & Upgrades section of a building will show all the bonuses that are active for that building.
    • There are effects that give a flat +1 (or +2, +3, etc) production bonus. That means if the recipe would prodcue 10 Coats and you have a +3 production bonus for Coats, then one production cycle would net you 13 coats.
    • Some effects give a chance for bonus yields, this will show as a "x2" next to the worker's portrait. These bonuses are additive and if the chance is more than 100%, there is a chance for x3 bonus yields.
    • Upgrading a Hearth to level 3 gives 10% bonus chance of double production yield.
    • Assigning a worker to a building that has a matching specialization will get a +10% chance of doubling their yield. For example, the Trapper's Camp has "Meat" specialization, so assigning a Lizard will give it the bonus yield chance.
    • Each satisfied need, that is complex food or service, will increase chance of this villager producing double yields by resp. 5% and 10%. Housing has no effect.

    • Bonuses that speed up time it takes to produce goods are listed as "increased production speed".
    • A lot of effects and upgrades have stacking bonuses for production speed.
      • Every Hearth you upgrade to level 2 gives +10% global production speed.
      • Burning Oil in the Ancient Hearth gives 25% production speed (can be stacked, this also boosts production of Oil itself!).
    • When getting bonus yields from camps, it does not consume extra stacks for the bonus yield.

    Mid to late game - branching out
    • After opening one or two glades, start building a Small Hearth near your remote production hub.
    • By upgrading Hearths you get an additional +1 Global Resolve per upgrade. Building a new Small Hearth and upgrading it to level 1 is probably easier than upgrading to level 3. Remember you can move houses from the Ancient Hearth to the Small Hearth as well to meet the upgrade requirements.
    • Workers will rest at the nearest hearth, so make sure they do not need to walk all the way back to the Ancient Hearth.
    • On Small Hearths, if you assign a Lizard as the fire keeper, then that Lizard gets a +5 resolve bonus (Fire specialization). Other species get no bonus.
    • Build additional houses near the Small Hearth in order to upgrade that hearth for additional bonuses. Remember that specialized housing will also increase the resolve of villagers. You can also move houses from one hearth to another, as long as you stay above the villager requirement limit.
    • If you have a ton of spare Stone or Copper Ore, consider upgrading roads that get a lot of traffic, such as those near the warehouse.
    Mid to late game - trade routes
    Trade routes are better than you think!

    The setup

    Early in the game (around year 2), you should build:

    • Makeshift post - only enable 'Pack of Provisions', set a limit of around 6 and use any resources that you have for it.
    • Trading post - the trader will arrive immediately after completing it

    In the first few years, you probably have nothing to trade yet. Don't worry, we're building this for the long run.

    Trade routes
    • Every now and then, look at the top of the screen to check if there are trade routes available.
    • If so, trade any goods that you don't immediately need.
    • Trade routes will always cost Packs of Provisions.
    • Tick the box for 'Only show available' and 'Auto collect', which makes it easier to quickly get things done.
    • By trading a lot with the same neighboring town, your standing with that town will level up and they will offer better prices. This really adds up in the long run.
    • Each neighboring town has their own types of goods they are interested in.
    • Your big stacks of Amber can then be used to buy anything you need (complex food, tools, etc) or Cornerstones from the trader.
    • Later in the game, if your Impatience is low, don't hesitate to "Call the trader immediately", which will only add 0.5 impatience points.


    Attacking the trader

    The following will happen when you attack the trader in the trader screen:

    • You get a part of their inventory, perks and/or blueprints.
    • Some villagers will die.
    • You get some impatience.
    • Next trader will arrive 50% slower.
    • Not all traders will come anymore (current map only).

    So attacking a trader is a bad idea if your impatience is already high or you plan on spending a lot of Amber on the current map.

    Dullahan Warlander

    The trader called Dullahan Warlander sells mystery boxes of varying cost and size. The bigger the box, the more goodies are inside. I think they're worth it, but your mileage may vary.


    Late game - Tools, complex food, services
    • After a few years, the Queen's Impatience is probably somewhere halfway or even further. Focus on completing a few orders, the rewards will make your life a lot easier (especially new blueprints, resolve bonuses and production bonuses).
    • You will probably have at least one blueprint for a service building by now.
      • A service building can satisfy 2 types needs for your villagers. You need to craft, buy or loot the required good in order to offer the service and assign a worker to the service building. E.g. in order to offer Treatment, you need to have Tea in your Warehouse.
      • A villager's need will be fulfilled if that service is available when they take a break.
      • Every service building also has an effect that is active when the required amount of workers is present.
      • Which service building you should pick depends on the needs of villagers and what type of service goods you can produce.
    • Having a high hostility level (4+) will put a lot of pressure on you. You should have built specialized housing by now and be able to produce 1 or 2 complex foods or services to keep the villager resolve high enough to compensate for high hostility during the storm.
    • The trader plays an important role in growing your settlement into late game, especially on higher Prestige levels.
      • Use spare Amber when a trader arrives at the Trade Post to buy new perks.
      • Don't forget you can also buy regular goods from a trader to complete orders or craft into other goods that you need.
      • Buying complex food is also relatively cheap, in order to give your villagers a temporary resolve boost (if you have a lot of spare Amber).
      • Selling trade goods is really overpowered until Prestige level 9 (trade goods are sold for half the price). Sometimes you can sell so many goods that you can buy out the entire trader.
    • Upgrade the Ancient Hearth to level 3 - District (20 housed villagers, 1 service building, 16 Comfort decorations, 8 Aesthetics decorations, 4 Harmony decorations).
    • If you can't meet the requirements for a level 3 Hearth (if you have no service building blueprint), you can always upgrade multiple Hearths to level 2.
    Late game - Victory
    • There are six ways to gain Reputation:
      • Completing Orders
      • Glade events
      • Opening caches - select "Send to capitol"
      • High villager resolve
      • Buying 0.5 Reputation as a perk from a trader
      • Trade hub cornerstone - gain 1 reputation for every time you sell goods 60 Amber (but Orders give 50% less reputation)
    • Once the industry of your settlement is up and running, start focusing on gaining Reputation points.
      • Completing orders and opening caches are the most reliable ways of gaining reputation directly.
      • High villager resolve (gained through complex foods and service buildings) is a more indirect way of gaining reputation and is an automatic result of building an advanced settlement. It is less reliable because your resolve can dip at any moment (glade events, low food, etc).
      • You should now reach the tipping point where your Reputation points are higher than the Queen's Impatience. From here the game usually gets a lot easier.
    • Once you have enough Tools or Training Gear, you can start opening caches that you find in glades. Sometimes the "Keep Goods" (left option) have powerful Cornerstones or a lot of goods that you need (Copper / Copper Bars that can be used to make more Tools).
    • A Forbidden Glade will contain a more dangerous event that requires immediate attention when opened, but you can also find better resources, such as large resource nodes and rare ruined buildings. It's a good idea to have at least 15 Tools and some spare resources available, such as Sea Marrow to burn in the Ancient Hearth to speed up event completion.
    • For Glade Event and Cache rewards: Picking the left option rewards you with the listed goods, while the right option gives you Amber and Reputation points.
      • Sometimes you can make a choice which resource you want to spend on solving the glade event, either some type of goods OR tools. The reward you get is tied to the choice you make.
      • Go for Reputation points and Amber if you are running out of time (Queen's impatience is high). If you have enough time left, you can pick the left option and invest more into growing your settlement.
      • Some events reward you with "Loyalty", "Corruption" or "Empathy" points. These points are pseudo-resources that can influence later perks, cornerstones and orders.
    • If you are running out of time and need to finish the game immediately:
      • Start opening Glades, multiple if you have to.
      • Look for the easiest way to gain Reputation quickly, either by completing events or caches. Assign Foxes to the event if you have them and burn Sea Marrow in the Ancient Hearth to speed up event working times.
      • You can also summon the trader immediately and he will appear in 15 seconds, at the cost of 0.5 Impatience points (incremental). Sell goods you are not using, buy Complex Foods and goods that are used in Service buildings.
      • If you want to boost villager resolve quickly, you can unassign Woodcutters and start burning Wood/Coal in the Ancient Hearth. This will lower Hostility and therefore increase villager resolve, but it should be used as a last resort, because you will burn through your resources in no time.

      This event will reward you with a Loyalty point. Some cornerstones, perks and orders will depend on the number of times you completed an event of this type.

    • It is possible to win a game by gaining reputation through high villager resolve.
      • Click the arrow next to the villager portrait to see what needs your villagers have and hover over one to see how many of those villagers have that need met.
      • Next to the portrait you'll see a blue line: the resolve threshold. If resolve is higher than the threshold, that faction starts generating some Reputation per minute and the portrait will turn blue.
      • The more villagers that have their needs met, the more reputation is gained per minute.
      • Remember that you can favor one faction (Lighter Treatment) for a +5 bonus resolve or crank up Rain Engine 2 in industry buildings in order to reach the threshold.
      • Harpies can easily reach the Resolve threshold early game after building Harpy housing and favoring them, it will only grant about 0.1 reputation per minute, but you can get it basically for free.

    • Check out the Consumption menu to learn which complex foods and services you should be focusing on.
      In this case, it would make sense to focus on getting either Jerky, Skewers, Pie and/or Pickled Goods since those give bonuses to multiple species. The same for Brawling and Treatment services.


      Here I disabled all consumption until I had farmed a lot of resources, then turned all consumption back on for a whopping 2.51 reputation per minute.
    Species
    Statistics

    Species
    Base Resolve
    Break interval
    Resilient
    Demanding
    Decadent
    Hunger tolerance
    Passive effect
    Human
    15
    02:00
    Low
    High
    Medium
    6
    Reveal 2 fertile soil patches
    Beaver
    10
    02:00
    Low
    High
    Low
    6
    +1 trade offer
    Lizard
    5
    01:40
    High
    Medium
    High
    12
    10 tools
    Foxes
    5
    02:00
    Low
    Low
    Medium
    3
    Reveal 2 geysers
    Harpy
    5
    01:40
    Low
    Low
    Low
    4
    50 coats
    DLC: Frog
    10
    02:30
    Medium
    Low
    Low
    5
    Reveal a ruin in an undiscovered glade

    Base resolve: the resolve of the species, when they don't have positive/negative effects.
    Resilient: High resolve means resolve will drop slower.
    Demanding: Highly demanding means that species requires more resolve to gain reputation.
    Decadent: High decadence makes the reputation threshold move higher after gaining reputation.
    Hunger tolerance: Maximum stacks of hunger before a villager dies.
    Passive effect: Rewarded when this species joins your settlement for the first time.

    Needs

    Here you can easily see which needs are shared between different factions. For example, Humans, Lizards and Frogs all need Pie!

    Specialization

    Every species has one specialization that gives them a production bonus and one that gives them bonus resolve.

    Beaver
    Specialization
    Type
    Notes
    Woodworking
    Production
    Carpenter, Cooperage, Foresters Hut, Grove, Guild House, Lumbermill, Woodcutters Camp
    Engineering
    Resolve
    Mine, Press, Rain Mill, Rainpunk Foundry, Smithy, Stamping Mill, Tinkerer, Toolshop


    House upgrade bonus

    Note: Frogs won't live in basic housing (shelter), so you need to build Frog Houses for them!

    Houses can be upgraded (this needs to be unlocked in the Citadel). The level 2 tier has an upgrade that is unique for every species. The upgrades cost 2 Packs of Building Materials + a species specific resource.

    • Human: Toolshed (2 Crops) - Planting/harvesting speed increased by 5% for every villager in this house.
    • Beaver: Writing desk (5 Amber/3 Packs of Trade Goods) - Trade routes are 5% faster for every villager in this house.
    • Lizard: Cellar (10 Jerky/10 Skewers) - Bonus 5% global gathering speed for every villager in this house.
    • Fox: Lichen (2 Resin) - Scouts work 2% faster on Glade Events for every Fox that lives in this house.
    • Harpy: Canopy (10 Dye) - 3% shorter break time for villagers living in this house.
    • DLC: Frog:
      • (I) Rainwater storage: 50 extra rainwater storage for all three types of rainwater.
      • (I) Extra room: room for 1 extra Frog
      • (II) Drafting table: +3% faster production of building materials per Frog in this house.
      • (II) Indoor pool: +2 Resolve to each Frog living in this house.
      • (III) Storage room: at the start of Drizzle season, gain 1 Pack of Building Materials for each Frog in this house.
      • (III) Atrium: each group of newcomers has 1 extra villager for every 2 Frogs in this house.
      • (IV) Workbench: Building material recipes have +3% chance of producing extra resources per Frog in this house.
      • (IV) Water pipeline: Rain engine 2 grants +1 resolve for every 2 frogs in this house.
    Notes for specific buildings
    • Field Kitchen - You start the game with this blueprint unlocked, that can produce Biscuits and Skewers without any stars.
    • Clay Pit - Build it on fertile soil. Turns Clearance Water into Clay and/or Reed. This pretty much gives you an infinite supply of Bricks and Pottery, which can be hard to come by. It also does not require any Parts to build.
    • Kiln - If there is no Coal as a natural resource on the map, use this building to turn 10 Wood into 3 Coal. This may seem expensive, but coal is the most efficient fuel. For example: it's cheaper to use coal instead of wood for producing copper bars. It's always nice to have some extra coal that you can burn in the hearth when hostility gets out of hand.
    • Press and Druids Hut - these both produce 5 Oil (3 stars) and costs only 2 Grain/Meat/Vegetable/Plant fiber. If you have a Farm, you will probably have spare Grain at some point. Burning oil in the hearth increases production speed by 25% per charge for all your production buildings, including the building that produces oil!
    • Ranch - Turns Algae/Reed/Grain/Vegetables into Meat, Leather or Eggs! The only building that can produce Leather. Especially noteworthy is that it takes only 5 Vegetables to produce 10 Meat, whereas the other ingredients cost 8 units. A great pick if you have a farm or Vegetable resource nodes and a scavenger's camp.
    • Supplier - Combines nicely with the Ranch. The Ranch can turn plant materials in to Leather and Meat, that can both be used by the Supplier to craft Waterskins.
    • Toolshop - The only building that produces Tools with 3 stars. Using the Tinkerer or Smithy (2 stars) is also fine, but the recipe will cost 1 extra bar.
    Notes for specific biomes
    Royal Woodlands

    • Effect: Gift of the Woodlands - Trees give more wood
    • Lush trees - 2 charges - Wood, Resin, Plant Fiber, Eggs
    • Resources: Roots, Vegetables, Plant fiber, Berries, Mushrooms, Clay, Sea marrow, Meat, Eggs, Scales
    • Starting out with one or two Woodcutter Camps should be enough, since trees give more wood on that map.
    • There is no natural Copper on the map, so use Crystalized Dew and collect Storm Water to create Tools.

    Cursed Royal Woodlands
    • Every glade will have either a blue or red spirit that demands multiple things. You should have a lot of time to complete these events.
    • Blue spirits are not dangerous and can be ignored.
    • Red spirits can be more dangerous.
    • Contrary to the regular Woodlands, this map does contain Copper resources nodes.

    Marshlands
    • Effect:
      • Gathering knowledge - 10% increased gathering speed for every 2 workers in camps
      • Giant organisms - Chance of finding giant resource nodes in Forbidden Glades.
    • Mushwood trees - 2 charges - Wood, Mushrooms, Leather
    • Resources: Grain, Mushrooms, Stone, Meat, Eggs, Leather, Algae, Copper ore, Coal
    • For every 2 workers in any camps, those workers get a stacking(!) 10% gathering speed bonus. E.g. having 2 full Woodcutter camps will give workers in all camps 30% production speed increase. This makes it more attractive to pick large camp blueprints.
    • Forbidden Glades will contain giant resource nodes, which combines nicely with the gathering bonus.
    • Trees have a chance of giving Mushrooms, which can be used for (complex) food, Flour, Wine and Packs of Crops.
    • There is less fertile soil available, so farming is a less viable option (but still possible). If you find fertile soil early, picking the Clay Pit or Greenhouse blueprint is a good option. Having a Drizzle Geyser (green) will also be convenient.
    • There is lots of Meat and Eggs, so the Trapper camp is a good option (also available as embarkation blueprint).

    Scarlet Orchard

    • Effect:
      • Royal Archaeologists - can build the Archaeologists Office, used to help locate excavation sites and gain upgrades
      • Buried mysteries - ancient excavation sites can be found on this map.
    • Coppervein trees - 2 charges - Wood, Copper ore, Dye, Plant fiber
    • Resources: Grain, Roots, Reed, Leather, Herbs, Berries, Sea marrow, Stone, Eggs, Fish, Copper ore
    • Random glades may contain archeological sites, which are multi-stage events.
    • The Archeologist Office building is enabled that allows you to buy powerful upgrades or reveal the location of archeology sites.
    • Ancient Tablets should be kept, because give stacking bonuses for archeology upgrades.

    Coral Forest
    • There is no natural Copper on the map, so use Crystalized Dew and collect Storm Water to create Tools.
    • Trees give different types of resources, if you are in desperate need for some of these, mark those trees for harvesting:
      • Plateleaf - 30% Plantfiber
      • Crimsonreach - 40% stone, 20% incense
      • Musselsprout - 40% meat, 20% crystalized dew

    Sealed Forest

    The Sealed Forest is a special biome that can be found around "Seals" on the world map. To enter the Sealed Forest, you need a number of Seal Fragments, depending on the type of Seal. These Seal Fragments can be earned by playing "regular" maps and as reward from playing next to modifier tiles on the map. This means you need to collect Seal Fragments and plan your route towards a Seal on the world map, all within a single cycle.

    Seal
    Bronze
    Lead
    Silver
    Gold
    Platinum
    Cobalt
    Titanium
    Adamantine
    Minimum Difficulty
    -
    Pioneer
    Veteran
    Viceroy
    P5
    P10
    P15
    P20
    Seal Fragments
    4
    12
    20
    35
    45
    60
    75
    105

    • Trees are different:
      • Woodcutters don't increase hostility but you gain 2 hostility points by for every 10 felled trees.
      • Overgrown Abyssal Trees: 20 stacks (instead of 2)
      • Abyssal trees resources: 100% wood, 10% meat, 10% sea marrow, 10% leather
      • For Woodcutter's Camps, you probably want to select Only marked trees, so you can focus on Overgrown Abyssal Trees first.
    • Natural resources: Copper ore, Berries, mushrooms, roots, meat, insects, reeds, clay, sea marrow
    • In some glades you will find a guidance stone, pointing in the direction of the Seal.
    • You can destroy a Guidance Stone for 15 Stone and 8 Resin!

    • Every year, during the storm, one of 13 plagues will be activated, adding a negative effect during the storm.
    • The Beacon Tower building can be built on this map, allows the player to pick 5 out of 9 positive effects.

    • Every Sealed Forest map contains a broken Ancient Seal that you need to close using Ancient Guardian parts.

    • Ancient Guardian parts are: Heart, Blood, Feathers, Life Essence. You need to collect all four and each can be collected in 3 different ways.
    • Collecting an Ancient Guardian part will reward you with an epic cornerstone.
    • After reaching the Reputation goal (like a normal game) and collecting all four Guardian parts, the game will end and reward you with citadel resources. Next cycle will be prolonged and have the next seal unlocked.

    DLC: Coastal Grove

    • Effect:
      • Gift of the Depths - After using 150 bait in Fishing huts, you can burn Algae in the Ancient Hearth.
      • Strider Port - Start with the Strider Port. Spend food to find Blueprints and treasure.
    • Kelpwoood trees - Algae, Vegetables, Salt
    • Resources: Berries, Insects, Roots, Clay, Reed, Pond (Fish/Scales/Algae), Coal

    DLC: Ashen Thicket

    • Effect:
      • Deeply Hidden Riches - Earn 1 Thunderblight for every 40 vein resources mined.
      • Cornerstone Forge - Create custom cornerstones, but receive no Epic cornerstone in year 3, 5 and 7.
      • Royal Mining Operation - You gain one automated rainpunk cart for every 80 units of Coal/Copper ore/Salt used in crafting.
    • Ashen trees - 2 charges - Wood, Resin, Berries, Sea marrow
    • Resources: Eggs, Fish, Vegetables, Roots, Mushrooms, Salt, Copper ore, Clay, Plant fiber, Algae, Leather, Coal

    The Cornerstone Forge allows you to craft up to 3 cornerstones. These can get pretty good!

    Notes on Difficulty & Prestige levels
    Veteran:
    Introduces the Blightrot mechanic. You will need to build a Blightpost and produce Purging fire to remove blight cysts during the storm (see section on Blightrot).

    Viceroy:
    Increases maximum hostility, which will make your villagers more unhappy. This means you need to fulfill more of their needs to keep resolve high enough.

    Prestige I. Extra 4 Reputation needed to win:
    Makes your game last a little longer and you will need to diversify a little more between doing orders, villager resolve and glade events.

    Prestige II. Storm lasts longer:
    You will need to deal with low villager resolve longer and blight cysts will be active for a longer duration.

    Prestige III. 10 Blight cysts will spawn every 3rd Clearance:
    You need to build a Blight Post before the end of year 3 and craft some Purging Fire.

    Prestige VI. Buildings costs 50% extra:
    This one will probably hurt the first time you play it. You will run out of Parts (for building camps) in no time, but remember you can destroy unused camps and you get the Parts back! Specialized housing will also be super expensive (12 Planks for a Beaver house), so don't feel ashamed to build a Large Shelter early game.

    Prestige IX. -33% Glade event speed:
    You will need to be a bit more careful opening dangerous glades, since the time required to solve a glade event might come close to the time limit before the bad stuff happens. To ensure you have enough time, either open the glade right after a storm finishes or have some Sea Marrow in stock.

    Prestige X. Trade goods are only worth half price:
    RIP trade goods. They are no longer the cookie cutter build, but rather an extra income that allows you to scrape some extra Amber to buy perks from the trader.

    Prestige XI. Blightrot power increased:
    Increases corruption rate from 60 to 90 per cyst per minute. Having about 6 active blight cysts will fill up the blight rot meter during a storm and kill 3 villagers!

    Prestige XVIII. Increased cost of sacrificing in the Hearth:
    By now, I've learned to avoid burning wood/coal in the Hearth if possible. Keeping hostility at level 2/3 becomes one of your main concerns to avoid the negative forest mysteries. I only burn wood/coal as a last resort, instead I use Rain Engines to bump resolve and micromanage workers into buildings that give resolve boosts.

    Prestige XIX. Pay 5 Amber for each opened glade:
    Otherwise, 2 villagers leave. Taking 28 Amber as an embarkation bonus seems like a good option. Try to open Dangerous Glades only.

    Other tips
    • As Embarkation bonus I usually pick Training Gear delivery line (3/min), so when you find a cache in your first opened glade, you can immediately open the cache and keep the goods.
    • Other Embarkation bonuses to pick will depend on your starting villager types and Prestige level.
      • You could pick a delivery line for a good that is a special need for multiple species.
      • 3 extra villagers is a nice jumpstart for your industry.
      • 42 coal can provide fuel for a single hearth for 28 minutes (= start of clearance season of year 3 on Prestige level 2)!
      • 21 Packs of Provisions allow you to start trade routes immediately.
      • 7 Parts is a good option too since they can be hard to come after Prestige VI.
      • 28 Amber is useful on Prestige XIX and XX, since opening glades will cost Amber.
    • Always read the "bad stuff" that will happen if you don't complete a glade event on time. Sometimes the bad stuff has no effect on you and you can choose to ignore the event if you don't have the resources for it.


    Keeping track of resources
    • To run your settlement efficiently, you need to keep track of how many resources you are producing and where they are used. If you produce a lot goods that are never used, you are wasting workers and time that could have been spent on other things.
    • In the main warehouse, you can click on an item to create a custom resource group which shows only the items you selected. A crate icon will be shown on the top left where the resources are shown.

    • The Trends panel shows you exactly how many good are produced and consumed.
      • By clicking on the blue line, you can see exactly which building is using that type of good.
      • This also gives you an idea how many items you produce per minute. This can help you figure out whether timed orders are doable, or how much time it takes to produce a certain amount of good.


    For the Calming Water cornerstone, I would like to know how long it takes to consume 150 rain water. Using the Trends panel, I can figure out that I used 20 Storm water and 24 Drizzle water in the last 5 minutes. ~50 water per 5 minutes ≈ 10 water per minute.

    At the current rate it would take about 15 minutes to use 150 water. If the game would last another hour, I would expect to gain a total of -40 Hostility from this cornerstone.

    At the time of writing I am in Year 3, and only 2 buildings have Rain Engines installed. I would be using a lot more rain water by the end of the game, making this cornerstone even more valuable.


    Setup for playing a very long game (low hostiliy)
    Start by assigning a human as firekeeper of the Ancient Hearth, which will reduce the rate at which you gain impatience.

    Hostility will be your biggest problem when playing long games, this will make your villager resolve dive deep into the negative during the storm. Hostility will rise due to the number of opened glades and number of villagers. To bring it back down again, you can do the following:
    • Start producing Oil (Press/Butcher/Druid's Hut)
    • Produce ingredients for Oil, such as Grain/Vegetables from Farms or Meat from the Ranch.
    • Find the Temple service building blueprint.
    • If you want to prevent gaining Reputation points because your villager resolve is too high, you can disable consumption of all complex food, clothing and services in the consumption panel.

    For every 200 seconds of sacrificing Oil in the hearth, hostility is reduced by 25. This can stack up rather quickly:


    Game update tl;dr
    Summary of gameplay related changes introduced in recent updates. Only the "need to know" things are listed here, I will not mention balance changes.

    Queen's Hand Trials & 1.0 RELEASE (Dec 8 2023)
    • Queen's Hand Trials: special iron man mode where you get one chance to reach the adamantine seal in a single cycle.
    • You start with a new profile on lvl 18. Citadel upgrades are randomized.
    • Available after beating the adamantine seal for the first time.

    Tutorials & Tips (Nov 9)
    • New tutorials
    • Slight rebalance in glade resources/forest mysteries

    Guidance & Lore 2 (Oct 26)
    • Additional lore added
    • New deeds for Ancient Seals
    • Option to show idle farmers

    Guidance & Lore (Oct 12)
    • New lore and interactive helper.
    • Buildings can be deactivated to pause production.

    Logistics (Sept 28)
    • Hauler buildings removed.
    • Warehouses now function as Hauler station.

    Hauler Station (Sept 14)
    • 2 new buildings: small/big hauler station. Unlocks at lvl 12. Assigned workers move goods between industry buildings and warehouses in a limited range.
    • Small hauler station can be found in glades
    • Big hauler station blueprint, costs 4 wood + 4 brick
    • Longer storm duration moved from Viceroy to Prestige lvl 2
    • Option to set fixed camera to align with roads.

    Sealed Forest (Aug 31)
    • New mechanics for Sealed Forest biome (see Biomes section above)

    Seal Contracts (Aug 17)
    • At end of cycle, players can pick type of seals for next cycle
    • Viceroy difficulty = longer storm duration
    • Custom goods category in HUD

    Upgraded Living (Aug 3)
    • Houses can now be upgraded
      • Cost: Packs of Building Materials + other material
      • Tier 1: more space OR movement speed
      • Tier 2: resolve bonus OR a unique species bonus
    • new Citadel upgrades, new Cornerstones

    Payments Planner (July 20)
    • New interface panel that helps with managing "tax" effect
    • New glade layouts
    • New Forest Mystery

    World Events (July 6)
    • Added 5 new World Events to the World Map.

    Cycles Reforged (June 22)
    • This update changes the world map: you now need to plan your settlements in the direction of an Ancient Seal and gather Seal Fragments during 1 cycle.
    • When starting for the first time, the game will asks if you want to start from the beginning or with all lower level seals unlocked up to Prestige level 15.
    • Sealed Forest biome (finished in later update, see above)
    • Caravan changes
      • You now embark from a single point and a caravan is shown on the world map, which means you need to plan your route through the world map.
      • Playing near negative modifiers will reward you with bonus embarkation points, bonus embarkation range or seal fragments.
    • Playing further away from the Citadel requires you to play on higher difficulty.
    • Factions are removed from the world map. Replaced by Faction trade routes, every faction prefers a specific type of good.

    Quality of Life (June 8)
    • 1 New glade event
    • 8 New haunted ruins
    • 15 perks for the Forsaken Altar (replaces old perks)
    • Service buildings rebalanced (specializations/worker count)
    • Temple passive effect: permanent -20 hostility for every 300 seconds you sacrifice goods in the Ancient Hearth
    • When you decline the yearly Cornerstone, you now get Amber
    • Button to remove all woodcutters and add 1 random woodcutter
    • You can set keybindings for specific buildings

    Fishman soothsayer (May 25)
    • New Forbidden Glade Event
    • Packs of Trade goods are worth more to merchants
    • Ore will always spawn inside a 3x3 grid,
    • Ore and Fertile Soil will no longer spawn under trees

    Forest Treasures (May 11)
    • 3 New glade events
    • 4 new Perks
    • New timed order
    • Brickyard recipe: Bricks ⭐⭐ ➡⭐⭐⭐, Crystalized Dew ⭐⭐ ➡⭐

    Merchant Shipwreck (April 27)
    • New Shipwreck glade event
    • Living Matter event replaced by Blood Flower (only graphical?).
    • 8 new deeds, all of the type "Win a game near the X modifier"

    Sentinels of the Forest (April 13)
    • New species: Foxes!
      • Foxes as Firekeeper: Opening a glade gives 2 less Hostility (scales with difficulty)
      • Foxes needs: Porridge, Skewers, Pickled Goods, Brawling, Luxury, Treatment
      • Foxes don’t get a Resolve penalty for Hostility of the Forest - but they do acquire a penalty from the Storm
    • "Cleanliness" need replaced by "Treatment"
    • "Cosmetics" item replaced by "Tea"
    • New food item "Porridge" (Field Kitchen, Beanery, Teahouse, Distillery)
    • Humans: Jerky -> Porridge
    • Harpies: Brawling -> Clothes
    • New buildings
      • Fox house
      • Tea house (⭐⭐⭐Tea, ⭐⭐Porridge, ⭐ Waterskins)
      • Distillery (⭐⭐Wine, ⭐⭐Porridge, ⭐⭐Barrels)
      • Beanery (⭐⭐⭐Porridge, ⭐⭐Pickled Goods , ⭐Crystalized Dew)
      • Tea Doctor (Service building - Treatment, Brawling - Vitality effect: bonus global resolve for every 100 complex food consumed)
    • Species now have passive abilities that is triggered when that species joins the game.
      • Humans: Reveals 2 nearest fertile soil patches
      • Beavers: +1 trade offers
      • Lizards: Start with 10 tools
      • Harpies: Start with 50 coats
      • Foxes: Reveal 2 nearest geysers
    • New perks
    • Rebalance Coral Forest and Scarlet Orchard

    Explorer's Choice Update (March 30)
    • Infused tools are removed.
    • Glade event rewards system is reworked
      • The requirement for many glade events are rebalanced, less reliant on tools (cost more tools overall)
      • New pseudo-resources "Empathy", "Loyalty" and "Corruption" points as rewards for glade events. These points can influence later perks and orders.
      • You now make one choice for both the requirement + the reward that is tied to it. Previously, you could pick the requirement separately from the reward.
      • Time before threat triggers is overall increased by +30%.
    • Orders now clearly indicate what you need to do with the required goods (e.g. whether you need to deliver, produce, sacrifice goods).

    Favouring (Feb 16)
    • Toggling "Lighter treatment" for one type of villager (+5 resolve bonus) now has a 60 second cooldown.
    • Production buildings can take goods from nearby buildings that have relevant goods in their storage. This prevents the need to first take the goods back to a warehouse and then to the production building.


    Rainpunk update (Jan 19 / Feb 2)
    Before the update, Blightrot was a constant tax that you needed to deal with as soon as you build industry buildings.

    After the patch:
    • The impact of Blightrot is significantly reduced as Blightrot cysts will no longer spawn automatically for production buildings.
    • Blightrot Cysts are produced as soon as you start using Rain water in the new Rain Engine system and related to some Glade Events. On Prestige level 2, you get 10 cysts every 3 years.
    • Sparkdew no longer exists and is replaced by 3 types or Rain Water (also in recipes).
    • The Rain Collector now collects a type of rain water depending on the season.
    • Water storage capacity depends on the number of Rain Collectors and Geyser Pumps built.

    This update changes the dynamics of the game a lot, since you are no longer in a rush to build a Blight Post and gather fuel to craft Purging Fire.
    10 Comments
    Drazhya 14 Nov, 2023 @ 5:53am 
    might be worth putting in a note that you can demolish guidance stones for resources. I forget what the resources are though.
    Qman123 30 Oct, 2023 @ 3:52pm 
    Hey @Deadlock, is the source code open at all / are you interested in contributors to your companion app?
    Mivo 27 Aug, 2023 @ 3:03pm 
    Fantastic guide, thank you! It's really well formatted and structured, too!
    Anthony 30 Apr, 2023 @ 2:31am 
    Thanks for the detailed guide.

    Note there is a typo at the "Mid game - fix your food supply" section, you have a duplicate harpy in there.

    Villagers have hunger tolerance, which is the number of meals they can miss before they die due to starvation.
    Foxes: 3
    Harpy: 4
    Human: 6
    Harpy: 6
    Lizard: 12

    The 6 should be beaver.
    FBTroy 18 Apr, 2023 @ 7:44am 
    Thank you so much for the detail you put into this guide. I have returned to it time and time again as I struggle to clear yet another Prestige Level, up to 11 now. Greatly appreciated!
    Yoakin 16 Apr, 2023 @ 4:54am 
    Congrats and thank you for this guide! I just played the demo and I loved the game. Then I discovered this guide and I will use it to start my adventure.
    Essex 19 Feb, 2023 @ 10:38am 
    Awesome guide. Thank you!
    sigmaorionis1150 14 Feb, 2023 @ 3:52am 
    That's quite an improvement! :APTraven:
    wolford171 6 Feb, 2023 @ 2:05pm 
    thanks for putting this together. Nicely laid out.
    rizzla 4 Feb, 2023 @ 5:32am 
    pretty good :steamthumbsup: