FINAL FANTASY

FINAL FANTASY

1,088 ratings
FINAL FANTASY | Walkthrough & Achievement Guide
By lylat and 2 collaborators
67
17
106
11
29
23
4
14
3
5
5
7
5
4
4
4
4
2
   
Award
Favorite
Favorited
Unfavorite
Introduction
  • This guide is based on the reference classes: Warrior, Thief, White Mage, and Black Mage.
  • Only first/easiest appearance of Monsters will be listed in the guide; repeats might be mentioned but only for rare encounters.
  • There's no missable achievements and you can go back to any place at any given time.

  • Hold Backspace to run.
  • Press Q to auto-play during battles.
  • Press Q to open the map and TAB to switch between locations.
    Chest progress can also be checked here.
  • Bestiary progress can be only checked from main menu: ExtrasBestiary.

The Item Shop is the same for all the towns in the game:

Item Shop
Item
Cost
Potion
40
Hi-Potion
150
Eher
150
Phoenix Down
500
Antidote
50
Eye Drops
50
Echo Grass
50
Gold Needle
500
Remedy
1500
Sleeping Bag
50
Tent
160
Cottage
2000
Prologue
Overworld
  • Once you gain control over your character, enter the castle just above you.

Castle Cornelia - 1F
  • Go all the way north and head upstairs.

Castle Cornelia - 2F
  • Go up and speak to the guard.
  • Back in control, go all the way south until reaching the Overworld.
  • Enter the Village to purchase some equipment and spells.


Cornelia

Weapon Shop
Item
Cost
Nunchaku
8
Knife
4
Staff
4
Raiper
8
Hammer
8

Armor Shop
Item
Cost
Clothes
8
Leather Armor
40
Chain Mail
65

White Magic Shop
Item
LV.
Cost
Cure
1
50
Dia
1
50
Protect
1
50
Blink
1
50

Black Magic Shop
Item
LV.
Cost
Fire
1
50
Sleep
1
50
Focus
1
50
Thunder
1
50

Inn
Service
Cost
Rest
30

  • Go back to the Overworld once you're done.


Overworld
  • Make sure to defeat all monster to complete the bestiary (required for an achievement later).
  • Bestiary can be checked any time from Main MenuExtrasBestiary.

ㅤ  ㅤ        ㅤ BESTIARY: OUTSIDE CORNELIAㅤ       ㅤ ㅤ
ID
MONSTER
HP
ATK
DEF
GIL
EXP
001
Goblin
8
4
0
6
6
003
Wolf
20
8
0
6
24

  • I'd say don't bother hunting monsters outside Chaos Shrine as all monsters will show up inside the dungeon anyway.

  ㅤ                    BESTIARY: OUTSIDE CHAOS SHRINE                ㅤ      
ID
MONSTER
HP
ATK
DEF
GIL
EXP
002
Goblin Guard
16
8
0
18
18
005
Skeleton
10
10
0
3
9
007
Gigas Worm
56
17
0
15
63

  • Feel free to farm a few levels before venturing into the next dungeon.
  • I personally got to level 5.
  • Can rest at the Inn of Cornelia for 30G to refill HP and MP.
  • I bought 10 potions and 10 antidotes with the earned Gil. Sleeping bags are also a decent investment.
  • When you're ready, go all the way north of the Overworld to reach a destroyed Castle.
  • Head inside.


Chaos Shrine

ㅤㅤ      ㅤ   ㅤ  BESTIARY: CHAOS SHRINEㅤ          ㅤㅤㅤ
ID
MONSTER
HP
ATK
DEF
GIL
EXP
004
Crazy Horse
64
10
0
15
63
005
Skeleton
10
10
0
3
9
006
Black Widow
28
10
0
8
30
008
Warg Wolf
72
14
0
22
93
009
Werewolf
68
14
6
67
135
010
Zombie
20
10
0
12
24
011
Ghoul
48
8
6
50
93

  • Crazy Horse is kinda rare here, so I highly recommend leaving that one for the next chapter.
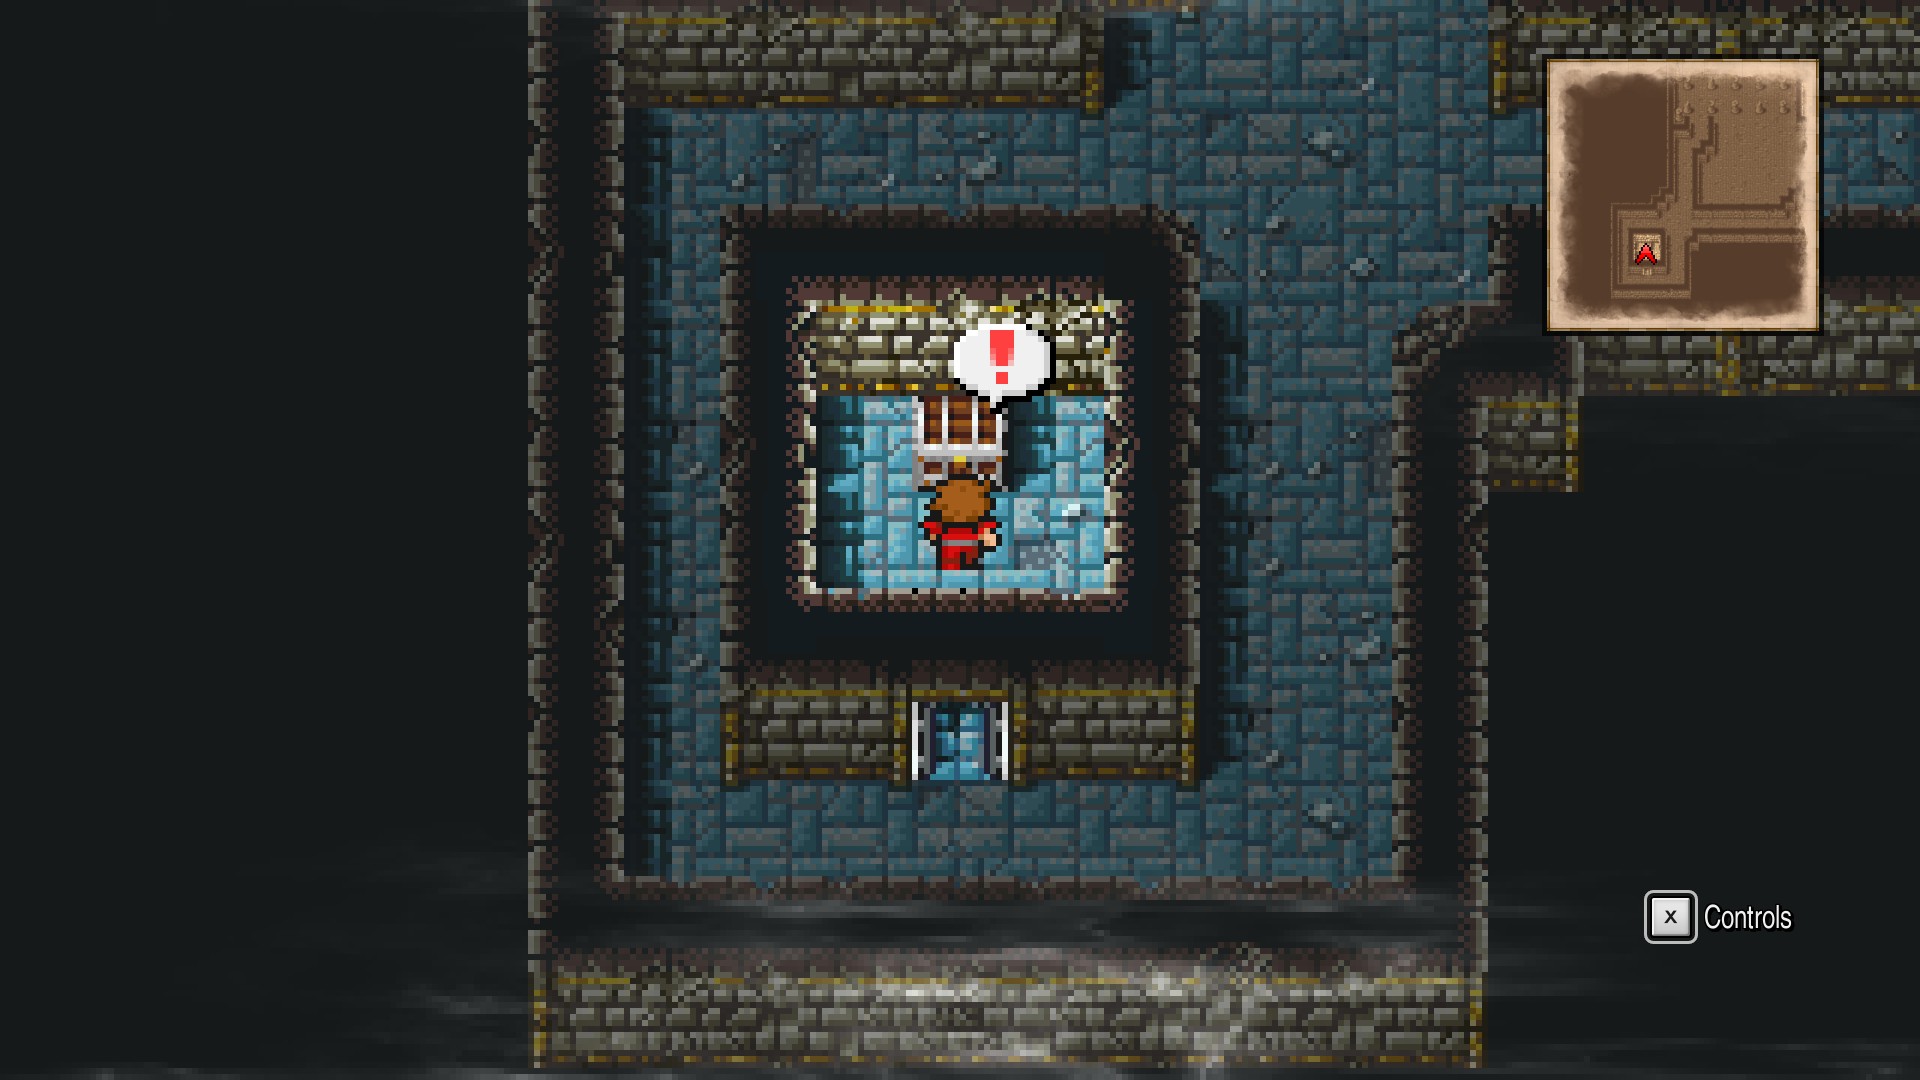
  • From the entrance, take the left path and enter the bottom left room to find the first chest with Leather Cap. [1/249]


  • Leave the room and go all the way north and then northwest to find another two chests containing a Potion and a Tent. [3/249]


  • That's all the loot you can get from this dungeon at the moment.
  • Go back to the entrance and then head north. Enter the room.
  • Talk to Garland to fight the boss.


       Garland      
ID
HP
ATK
DEF
ACC
M.DEF
EVA
AGI
INT
WEAK.
RESIST.
GIL
EXP
DROPS
012
212
15
8
27
64
12
6
12
None
None
250
130
Longsword

  • This boss fight is pretty easy, just attack with your Warrior/Thief, heal with the White Mage, and cast Fire/Thunder with the Black Mage.
  • You'll be teleported back to Castle Cornelia after winning.
  • After the scenes, leave the castle and go to the Overworld to trigger a scene.
  • Approach the bridge to finish the chapter.

A Hero's Journey Saved Princess Sarah by defeating Garland.
Ship
Overworld
  • Go across the bridge to reach another continent.

BESTIARY: OUTSIDE MATOYA'S CAVE
ID
MONSTER
HP
ATK
DEF
GIL
EXP
014
Ogre
100
18
10
195
195

  • Go all the way north until reaching a split.
  • Take the top path and go all the way north through the forest until reaching a cave.
  • Head inside.


Matoya's Cave
  • Go left and enter the room to trigger a cutscene.
  • After the scene, open the three chests on the left side for 2x potions and 1x antidote. [6/249]


  • Exit the cave.


Overworld
  • Follow the world map all the way to the right and then south to reach another town.
  • This is Pravoka.
  • Feel free to fill your bestiary before going in.

BESTIARY: OUTSIDE PRAVOKA
ID
MONSTER
HP
ATK
DEF
GIL
EXP
16
Lizard
92
18
12
50
153


Pravoka

Weapon Shop
Item
Cost
Hammer
8
Broadsword
450
Battle Axe
450
Scimitar
160

Armor Shop
Item
Cost
Leather Armor
40
Chain Mail
65
Iron Armor
640
Leather Shield
15
Leather Gloves
50

White Magic Shop
Item
LV.
Cost
Blinda
2
250
Recommended purchase
Silence
2
250
Recommended purchase
NulShock
2
250
Recommended purchase
Invis
2
250

Black Magic Shop
Item
LV.
Cost
Blizzard
2
250
Recommended purchase
Dark
2
250
Recommended purchase
Temper
2
250
Recommended purchase
Slow
2
250

  • Feel free to grind some more Gils outside the town if needed.

Inn
Service
Cost
Rest
50

  • Once ready, save and talk to the leader of the Pirates at the left side of the town.
  • This will start a boss fight.

Pirates (x9)
ID
HP
ATK
DEF
ACC
M.DEF
EVA
AGI
INT
WEAK.
RESIST.
GIL
EXP
DROPS
17
24
10
0
2
35
12
6
3
None
None
90
360
Leather Shield

  • Easy boss fight.
  • Can cast Sleep on the Pirates to make it easier, but auto-attacking should be more than enough.
  • Leave the town after the fight.


Overworld
  • Take the ship.
  • Hold confirm [ENTER] and spam cancel [BACKSPACE] very quickly.
  • You should get the following achievement if you were fast enough to enter the mini-game:

Hidden Game Played the 15 Puzzle game.


  • If you didn't get the achievement, leave the mini-game and play a battle to force its trigger.

BESTIARY: SEA MONSTERS
ID
MONSTER
HP
ATK
DEF
GIL
EXP
18
Sahagin
28
10
4
30
30
19
Sahagin Chief
64
15
8
105
105
20
Buccaneers
50
14
6
120
60
21
Shark
120
22
0
66
267
22
Big Eyes
10
4
0
10
42

  • Took me a while to get an encounter with the Buccaneers.
  • They showed up for me near the location screenshotted below.
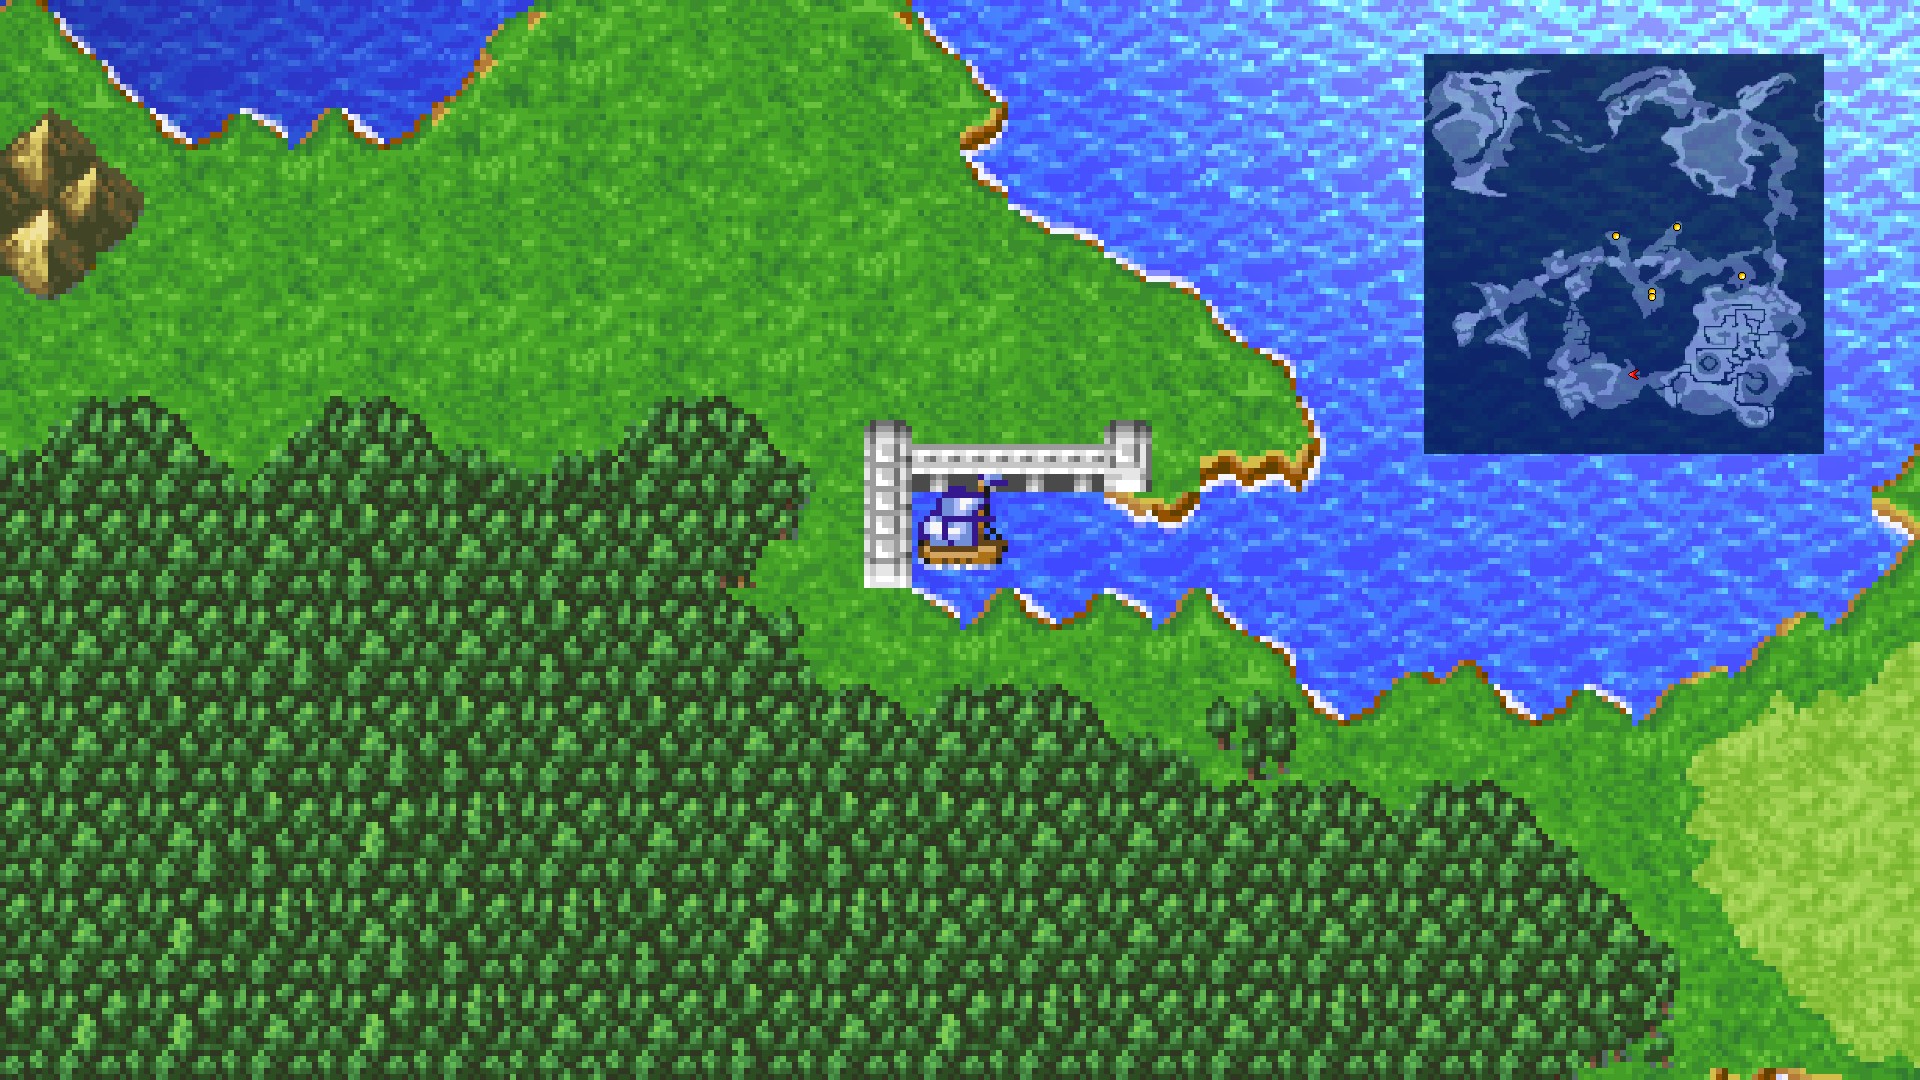
  • Reach this location to continue with your adventure:


  • Walk a few steps down to find your next destination.
  • Go into the town.

Elfheim
Elfheim

Weapon Shop
Item
Cost
Iron Nunchaku
160
Dagger
140
Crosier
160
Saber
360

Armor Shop
Item
Cost
Iron Armor
640
Copper Armlet
800
Iron Shield
80
Leather Cap
65
Helm
80

  • Stock up on Potions and Antidotes. You'll need them later.

White Magic Shop (LV. 3)
Item
LV.
Cost
Cura
3
1000
Recommended purchase
Diara
3
1000
Recommended purchase
NulBlaze
3
1000
Heal
3
1000
Recommended purchase

Black Magic Shop (LV. 3)
Item
LV.
Cost
Fira
3
1000
Recommended purchase
Hold
3
1000
Recommended purchase
Thundara
3
1000
Recommended purchase
Focara
3
1000

  • Ignore White and Black Magic Shops LV 4. They're too expensive atm.

White Magic Shop (LV. 4)
Item
LV.
Cost
Poisona
4
2500
Fear
4
2500
NulFrost
4
2500
Vox
4
2500

Black Magic Shop (LV. 4)
Item
LV.
Cost
Sleepra
4
2500
Haste
4
2500
Confuse
4
2500
Blizzara
4
2500

Inn
Service
Cost
Rest
100

  • Leave the town once done with your purchases and head to the west towards the mountains.
  • Your next stop is Western Keep, but you might want to grind some levels outside and update your bestiary before heading in.

BESTIARY: OUTSIDE WESTERN KEEP
ID
MONSTER
HP
ATK
DEF
GIL
EXP
013
Cobra
56
6
6
50
123
015
Ogre Chief
132
23
14
300
282
024
Ghast
56
8
10
117
117

  • Ghast shows up on the way to this location.
  • Head inside and enter the north door.
  • Talk to the King to receive your next quest, then leave the castle.
  • From here, head south until finding a hole on the floor. This is your next stop: Marsh Cave.
  • Make sure you have a lot of antidotes. If you don't, head back to Elfheim to stock up.

Marsh Cave
Marsh Cave

BESTIARY: MARSH CAVE
ID
MONSTER
HP
ATK
DEF
GIL
EXP
023
Tarantula
64
5
12
50
141
025
Scorpion
84
22
10
70
225
026
Shadow
50
10
0
45
90
027
Green Slime
24
1
255
20
84
028
Crawler
84
1
8
200
186
029
Gray Ooze
76
30
7
70
255
030
Gargoyle
80
12
8
80
130
031
Bloodbones
144
26
12
378
378


Marsh Cave - B1
  • Go north and down the stairs.


Marsh Cave - B2
  • From here, head east to find a chest with a Dagger. [7/249]


  • Go back to the stairs and head west to find another door.
  • Enter the room and open the chest for 1180 Gil. [8/249]


  • Head south and enter the room at the bottom to find two chests with Potion and 1120 GIl. [10/249]


  • Take the stairs back to the first floor.


Marsh Cave - B1
  • Head back to the entrance and go all the way south to find a room.
  • Go inside and use the ladder.


Marsh Cave - B2
  • Exit from the leftmost door and head southwest all the way to find a room.
  • Enter and open the chest to find a potion. [11/249]


  • Enter the room to the right to find another chest with a Broadsword. [12/249]


  • Enter the next room to the right again to find yet another chest with a Potion. [13/249]


  • Now enter the rightmost door and exit through the door beside.
  • Go down the stairs.


Marsh Cave - B3
  • You'll reach a maze of rooms.

1
2
3
4
5
6
7
8
9
10
11
12
13
14
15
16

  • Taking the table above as example, enter the important rooms:

  • Room 1: Chest with Phoenix Down [14/249]
  • Room 2: Empty
  • Room 3: Empty
  • Room 4: Chest with 1045 Gil [15/249]

  • Room 5: Chest with Copper Armlet [16/249]
  • Room 6: Two chests with Cottage and Potion respectively [18/249]
  • Room 7: Empty
  • Room 8: Empty

  • Room 9: Empty
  • Room 10: Chest with boss fight, ignore it for now.
  • Room 11: Chest with 1135 Gil [19/249]
  • Room 12: Chest with Potion [20/249]
  • Room 13-16: Inaccessible for now

  • Once done, enter the room 10 and open the chest to start a boss fight. [21/249]


       Psicodemon (x4)      
ID
HP
ATK
DEF
ACC
M.DEF
EVA
AGI
INT
WEAK.
RESIST.
GIL
EXP
DROPS
032
84
30
16
21
98
66
33
18
None
None
1200
1104
None

  • Easy fight. Cast Thunder-based spells to quickly take the bosses down.
  • After winning, exit the cave. Don't forget to update your bestiary if you want.
  • Either way, you'll come back here later for chest cleanup.

Western Keep
  • Your next stop is Western Keep (to the north), but I highly recommend paying a visit to Elfheim to purchase LV.4 spells if you have the Gils, or replenish items.
  • Level 17-18 is recommended for the next boss fight.

Western Keep
  • Once you're ready, enter the castle and speak to the King.

       Astos      
ID
HP
ATK
DEF
ACC
M.DEF
EVA
AGI
INT
WEAK.
RESIST.
GIL
EXP
DROPS
033
420
30
18
42
170
78
39
24
None
None
2000
2250
Mythril Sword

  • Another easy boss fight. Guess they nerfed this compared to the NES/GBA version.


Overworld
  • Make your way back to the Elfheim area and take the ship back to Cornelia.
  • Once there, don't dock, instead, go north and under the bridge.
  • Dock at the following location:


  • Head north and enter Matoya's Cave.


Matoya's Cave
  • Go to Matoya's Room and speak to her. You'll receive the key item Jolt Tonic.
  • Leave the cave.


Overworld
  • Take the ship and sail to Elfheim Region.
  • Enter Elven Castle.


Elven Castle
  • Go northwest and enter the Prince bedroom.
  • Speak to the Healer. After a scene, you'll receive the key item Mystic Key.
  • Go back to the entrance, right hugging the outer wall, and north to find a secret room with four chests.


  • They contain Mythril Hammer, 800 Gil, 700 Gil, and Bronze Gloves respectively. [25/249]

Rookie Treasure Hunter Collected treasure from 10% of the chests.


  • Leave the castle.

Mystic Key Cleanup
Overworld
  • Go to Marsh Cave.


Marsh Cave
  • Remember the room maze and the four bottom rooms we couldn't enter when we first visited here? Well, we can now.
  • Make your way to the B3 and enter all the relevant rooms.


  • Room 13: Monsters! (Anaconda x6: ID 036) → Silver Armlet once enemies defeated [26/249]
  • Interacting with the Wizard will get you into a battle with four Psicodemons.
  • Room 14: Monsters! (Psicodemon x4; open from the right side if you want to avoid the battle) → Antidote [27/249]
  • Room 15: Empty
  • Room 16: Monsters! (Psicodemon x4; open from the right side if you want to avoid the battle) → 1020 Gil [28/249]
  • Press Q then TAB and make sure you have all 18 chests before leaving.
  • Once confirmed, leave the cave.


Overworld
  • Go to Western Keep.


Western Keep
  • Make your way through the maze to reach the leftmost room.


  • You'll find three chests inside:

    • Chest 1: Monsters (Mummy x5: ID 034; Dia should one-hit them all) → Power Staff [29/249]
    • Chest 2: Monsters (Wraith x6: ID 035; annoying enemies but can easily take them down with Dia) → Falchion [30/249]
    • Chest 3: Monsters (Mummy x5: ID 034; Dia should one-hit them all) → Steel Gloves [31/249]

  • Once done, leave the castle.


Overworld
  • Make your way to the Chaos Shrine: Go back to Elfheim → Get into the ship → Go north to Cornelia.


Chaos Shrine
  • From the entrance, go east and then south to find a room.


  • Open the chest to find Rune Blade [32/249]
  • From here, head all the way north to find yet another two chests containing Werebuster and Gold Needle respectively. [34/249]


  • That's all you can do here yet. Leave the location.


Overworld
  • Go to the Castle Cornelia.


Castle Cornelia - 1F
  • Make your way to the top right section, then left, then down, then clockwise to find two rooms.


  • Room 1: Iron Armor, Tent, and the key item: Nitro Powder. [37/249]
  • Room 2: Cottage, Saber, Mythril Knife. [40/249]
  • We're done here. Leave the castle.
Melmond
Overworld
  • Get into the ship and travel northwest. Dock at the following location:


  • From here, go southwest until finding a cave and head inside.


Mount Duergar
  • From the entrance, go up and open both chests to find 575 Gil and 450 Gil respectively. [42/249]


  • Exit the room.
  • Go west, then south, then west at the split, then south and enter the room to find 8 chests.


  • Their contents from left to right:

    • Tent
    • Great Helm
    • Wyrmkiller
    • Ether
    • Potion
    • Mythril Mail
    • 575 Gil
    • Cottage. [50/249]

  • Leave the room and talk to the gnome with the green hat.
  • You'll give him the Nitro Powder to blow an island and open a path to the rest of the world.
  • After the scene, leave the cave.


Overworld
  • Go back to your ship.
  • Once at the ship, go through the canal the gnome opened and all the way west until finding a port. Dock there.


  • Enter the town.


Melmond

Weapon Shop
Item
Cost
Crossier
160
Saber
360
Longsword
1200
Falchion
360

Armor Shop
Item
Cost
Knights Armor
36000
Silver Armlet
4000
Great Helm
360
Bronze Gloves
160
Steel Gloves
600

White Magic Shop
Item
LV.
Cost
Curaga
5
4000
Recommended purchase
Life
5
4000
Recommended purchase (must have)
Diaga
5
4000
Healara
5
4000
Recommended purchase

Black Magic Shop
Item
LV.
Cost
Firaga
5
4000
Recommended purchase
Scourge
5
4000
Recommended purchase
Teleport
5
4000
Slowra
5
4000
Recommended purchase (if you have Gil enough)

Inn
Service
Cost
Rest
100

  • Leave the town once done.


Overworld

BESTIARY: OUTSIDE MELMOND / OUTSIDE CAVERN OF EARTH
ID
MONSTER
HP
ATK
DEF
GIL
EXP
037
Hyenadon
120
22
4
72
288
038
Lesser Tiger
132
22
8
108
438

  • Head southwest always staying close to the water, then take east at the split to reach this location:


  • Enter the cave.
┌ The Earth Crystal: Part I
Cavern of Earth - B1

BESTIARY: CAVERN OF EARTH
ID
MONSTER
HP
ATK
DEF
GIL
EXP
034
Mummy
80
30
20
300
300
039
Minotaur
164
22
4
489
489
040
Hill Gigas
240
38
12
879
879
041
Earth Elemental
288
66
20
768
1536
042
Troll
184
24
12
621
621
043
Wight
52
20
12
150
150
044
Ochre Jelly
76
32
6
70
252
045
Cockatrice
50
1
4
200
186

  • You should already have Mummy from the loot rampage done before, but here it's again in case if you missed it.
  • Go north, then east, then around the room and enter to find one chest.


  • Open the chest for a fight against Earth Elemental and then to receive 1975 Gil after winning. [51/249]
  • Go back to the entrance.

  • Now, head west and interact with the wizards to face three Lizards and two Hill Gigas (good experience + Hill Gigas entry in Bestiary).
  • Once done, head back to the entrance.

  • Back at the entrance, go east and then south at the split.
  • You'll find yet another split. Take the left path to end in a room with two chests.


  • Left chest: 880 Gil [52/249]
  • Right chest: Monsters! (Earth Elemental) → Potion [53/249]

  • Go back to the previous split and take the right path this time.
  • Another room with two chests will be found at the end.
  • Open both chests again.


  • Left chest: Monsters! (Earth Elemental) → Antidote [54/249]
  • Right chest: Monsters! (Earth Elemental) → 795 Gil [55/249]

  • Backtrack to the first split.
  • Once there, take the east path and follow it to reach a stairs leading down.


Cavern of Earth - B2
  • From the stairs, go down, then right, then up, then right, then down.
  • Once you reach the next split with two rocks, go right past the rocks, then immediately south.


  • Follow the path all the way south, then left to a door.
  • Interact with the wizard for a fight against Earth Elemental for extra EXP.
  • After the fight, loot all three chests.


  • Left chest: 5000 Gil [56/249]
  • Middle chest: Leather Shield [57/249]
  • Right chest: 575 Gil [58/249]

  • Make your way back to the split with the two rocks.
  • Go right, then up, then right, then up to find another room with three chests inside.


  • Left Chest: Coral Sword [59/249]
  • Middle Chest: Tent [60/249]
  • Right Chest: 330 Gil [61/249]

  • Leave the room, then go down all the way past the split to reach a set of stairs.
  • Take them down.


Cavern of Earth - B3
  • Go east all the way to find a door. Head inside.


  • Open the chest to get a Sleeping Bag. [62/249]
  • Now exit the room and continue through the only path north.
  • At the split, continue north, then take the split south. You'll reach a room at the end.


  • Open the chest for Monsters! (Earth Elemental) → Gold Needle [63/249]
  • Make your way back to the split.
  • Go west, then west at the next split.
  • Enter the first door you see for a chest with 3400 Gil. [64/249]


  • Leave the room and go all the way west.
  • You'll see a door, there's no chests inside but a wizard with a Earth Elemental fight.
  • Do it if you want the extra EXP.

  • Now head south, then east to find a door.
  • Go inside and open the chest for Monsters! (Earth Elemental) → 1020 Gil [65/249]


  • Leave the room and go south, then east all the way to find a door. Head inside.
  • Save and then interact with the blue bat to start a boss fight.


       Vampire      
ID
HP
ATK
DEF
ACC
M.DEF
EVA
AGI
INT
WEAK.
RESIST.
GIL
EXP
DROPS
046
280
76
26
39
75
72
36
26
Fire, Dia
Blizzard
2000
1200
None

  • Extremely easy fight. Just spam attack and you should take the boss down in no time.
  • If you have issues, use Dia/Fire based spells.
  • After winning, open the chest just behind the boss. [66/249]


  • That's all we can do here for now.
  • Leave the cave backtracking all the way to the surface or use Teleport if you bought it during you visit to Melmond.

└ The Earth Crystal: Part II
Overworld

  • Pay a visit to Melmond if you need to heal and feel free to purchase the Knight's Armor if you have the funds.
  • You'll need to take the ship back to Cornelia or another town with Item Shop if you want to refill supplies.
  • Anyway, head to this location to continue with your adventure:


Giant's Cave
  • From the entrance, head up and talk to the Giant. He will eat your Star Ruby and let you pass.
  • Go through the now open path and head south to find a room with four chests.


  • Contents from left to right: Mythril Helm, 450 Gil, 620 Gil, Great Axe. [70/249]
  • Leave the room and now head all the way north to the exit.


Overworld
  • Go around the only possible path to find another cave at the end.


Sage's Cave
  • Head north and then west, ignore the top door and there's nothing inside.
  • Talk to the Sage to receive the Key Item: Earth Rod.
  • Leave the cave and backtrack all the way to the Cavern of Earth (southwest from Melmond; east from Giant's Cave)


Cavern Of Earth
  • Now make your way back to the Vampire Chamber (where you fought the boss).

    • B-1: All the way east.
    • B-2: Down, right, up, down until the double rock, all the way right, down, right, and up.
    • B-3: North, west at the split, then follow the way until the next split and go right.

  • Exit through the east door and interact with the stone plate.
  • Take the stairs down.


Cavern Of Earth - B4
  • Go north towards the open area and then continue north at the split.
  • Enter the room to find five chests.


  • Chest 1: Monsters! (Sphinx x2: ID 048) → 5450 Gil [71/249]
  • Chest 2: 1520 Gil [72/249]
  • Chest 3: Monsters! (Hyenadon x2, Ogre Chief, Ogre Mage: ID 047) → Staff [73/249]
  • Chest 4: Monsters! (Hyenadon x2, Ogre Chief, Ogre Mage) → 3400 Gil [74/249]
  • Chest 5: Monsters! (Sphinx x2) → 1455 Gil [75/249]

  • Make your way back to the open area and take the west path this time.
  • Continue until reaching another split going north and south.


  • Go south and then west at the next split.
  • You'll reach yet another split. Go south to find a room with three chests.


  • Top chest: Monsters! (Hyenadon x2, Ogre Chief, Ogre Mage) → 1250 Gil [76/249]
  • Middle chest: Monsters! (Hyenadon x2, Ogre Chief, Ogre Mage) → Mythril Shield [77/249]
  • Bottom chest: Monsters! (Hyenadon x2, Ogre Chief, Ogre Mage) → Tent [78/249]

  • That should be the last chest for this cave. Check with QTAB to see if you have 24/24.
  • Now go back to the previous split and continue northwest all the way through to reach a set of stairs leading down. Head down.


Cavern Of Earth - B5
  • Go right, then north all the way, then west, then south and left to find a door.
  • Heal up and quick save before interacting with the orb.

       Lich      
ID
HP
ATK
DEF
ACC
M.DEF
EVA
AGI
INT
WEAK.
RESIST.
GIL
EXP
DROPS
049
1200
40
40
49
120
24
12
30
Fire, Dia
Blizzard
3000
2200
Dry Ether

  • Abuse Dia and Fire based spells to take the boss down quick.

Earth's Blessing Restored the Earth Crystal's light.


  • After winning the battle, stand on the shining ground to get teleported back to the overworld.

┌ The Fire Crystal: Part I
Overworld
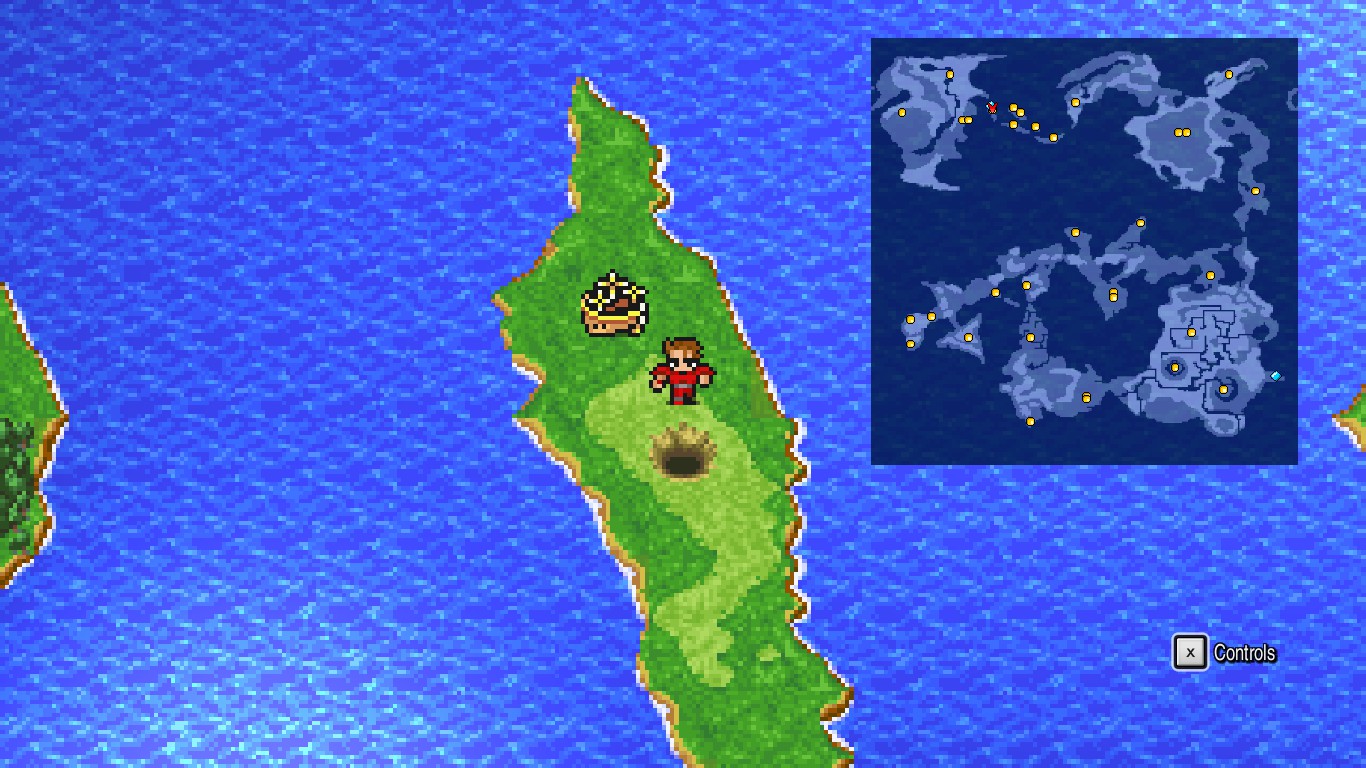
  • Make your way back to the ship and sail away to the crescent lake island! (located at the southeast portion of the map; refer to the screenshot below for the exact location).


 BESTIARY: OUTSIDE   CRESCENT LAKE   
ID
MONSTER
HP
ATK
DEF
GIL
EXP
036
Anaconda
80
22
10
50
165
050
Ankheg
222
39
20
300
1194

  • Here's another good location to find Anaconda for your bestiary if you missed it during Marsh Cave.
  • Ankheg also shows up here, but it's a kinda rare encounter so I highly recommend saving it for a later location where it's way more common.
  • After docking, head west and walk in clockwise direction to find the entrance of the town.


Crescent Lake

Weapon Shop
Item
Cost
Mythril Knife
640
Mythril Sword
3200
Mythril Hammer
2000
Mythril Axe
3600

Armor Shop
Item
Cost
Mythril Armor
6000
Mythril Shield
2000
Buckler
2000
Mythril Helm
2000
Mythril Gloves
2000

White Magic Shop
Item
LV.
Cost
Stona
6
13000
Recommended purchase
Exit
6
13000
Protera
6
13000
Recommended purchase
Invisira
6
13000
Recommended purchase

Black Magic Shop
Item
LV.
Cost
Thundaga
6
13000
Recommended purchase
Death
6
13000
Recommended purchase
Quake
6
13000
Recommended purchase
Stun
6
13000

Inn
Service
Cost
Rest
200

  • After finishing your purchases, head to the northeast portion of the town and follow the path.
  • Talk to all wizards to receive the Key Item: Canoe.
  • Leave the town.


Overworld
  • Step on the shallow water to activate the Canoe.

BESTIARY: SHALLOW WATERS 
ID
MONSTER
HP
ATK
DEF
GIL
EXP
051
Piranha
92
22
0
20
240
052
Red Piranha
172
37
20
46
546
053
Crocodile
184
42
16
900
816
054
White Croc
288
56
20
2000
1896
055
Ochu
208
20
24
102
1224
056
Neochu
344
35
32
500
3189
057
Hydra
212
30
14
150
915

  • Travel northwest from Crescent Lake.
  • Then go west, then north, then northeast, and finally northwest.
  • Follow the river all the way west until reaching this location:


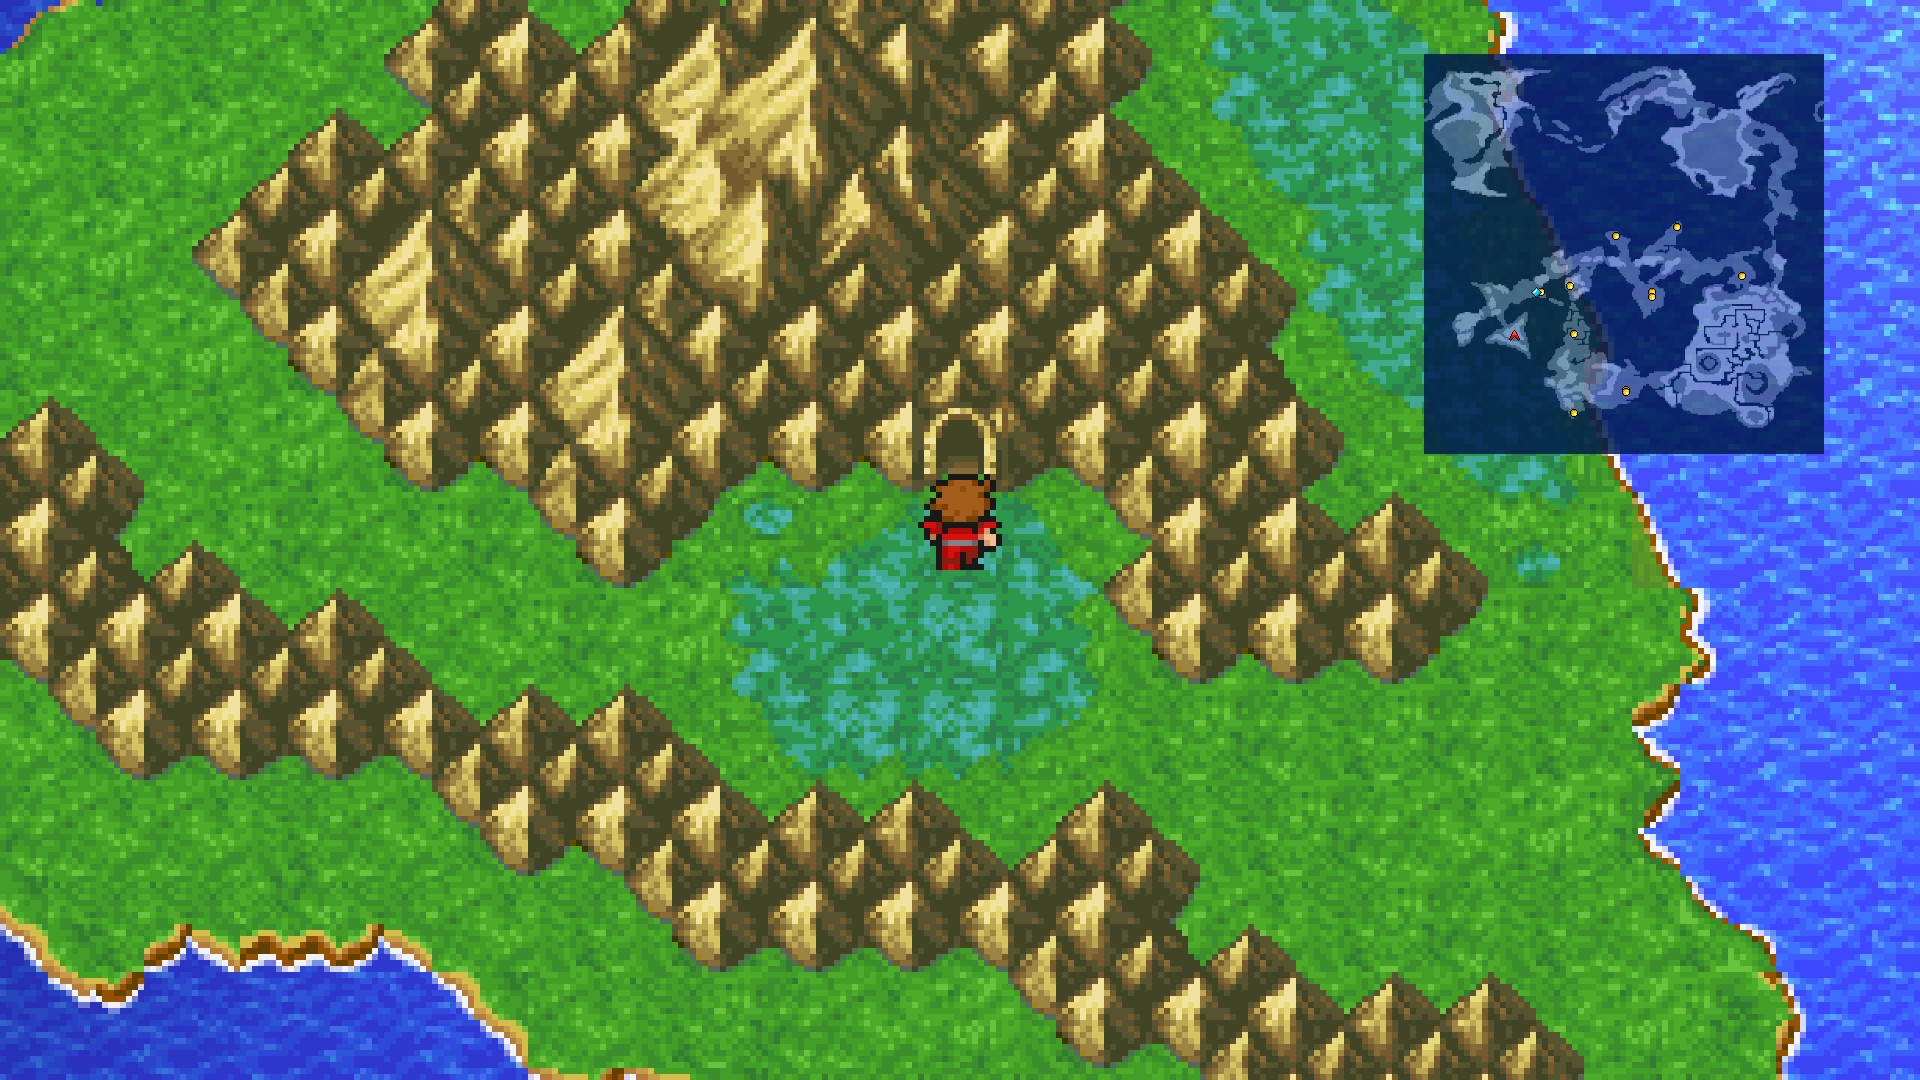
  • You'll see a volcano at the distance. Head there.

├ The Fire Crystal: Part II
Mount Gulg - B1

 BESTIARY: MOUNT GULG
ID
MONSTER
HP
ATK
DEF
GIL
EXP
047
Ogre Mage
144
23
10
723
723
048
Sphinx
228
23
12
1160
1160
050
Ankheg
222
39
20
300
1194
059
Fire Elemental
276
50
20
800
1620
060
Pyrolisk
44
20
4
500
423
061
Fire Hydra
182
20
14
400
1215
062
Lava Worm
280
50
31
400
1671
063
Hellhound
192
30
8
600
1182
064
Fire Lizard
296
31
18
1200
2472
065
Fire Gigas
300
73
20
1506
1506
066
Red Dragon
248
75
30
4000
2904

  • Here you can find Ogre Mage and Sphinx as normal encounters as opposed to Cavern of Earth.
  • Also, this is a good place to get common encounters with Ankheg if you didn't farm it before near Crescent Lake.
  • Horned Devil also seems to spawn at this location but it's kinda rare so I recommended waiting for a later dungeon. I'll mention it when we get there.

  • From the entrance, head northwest to find the stairs to the next floor.
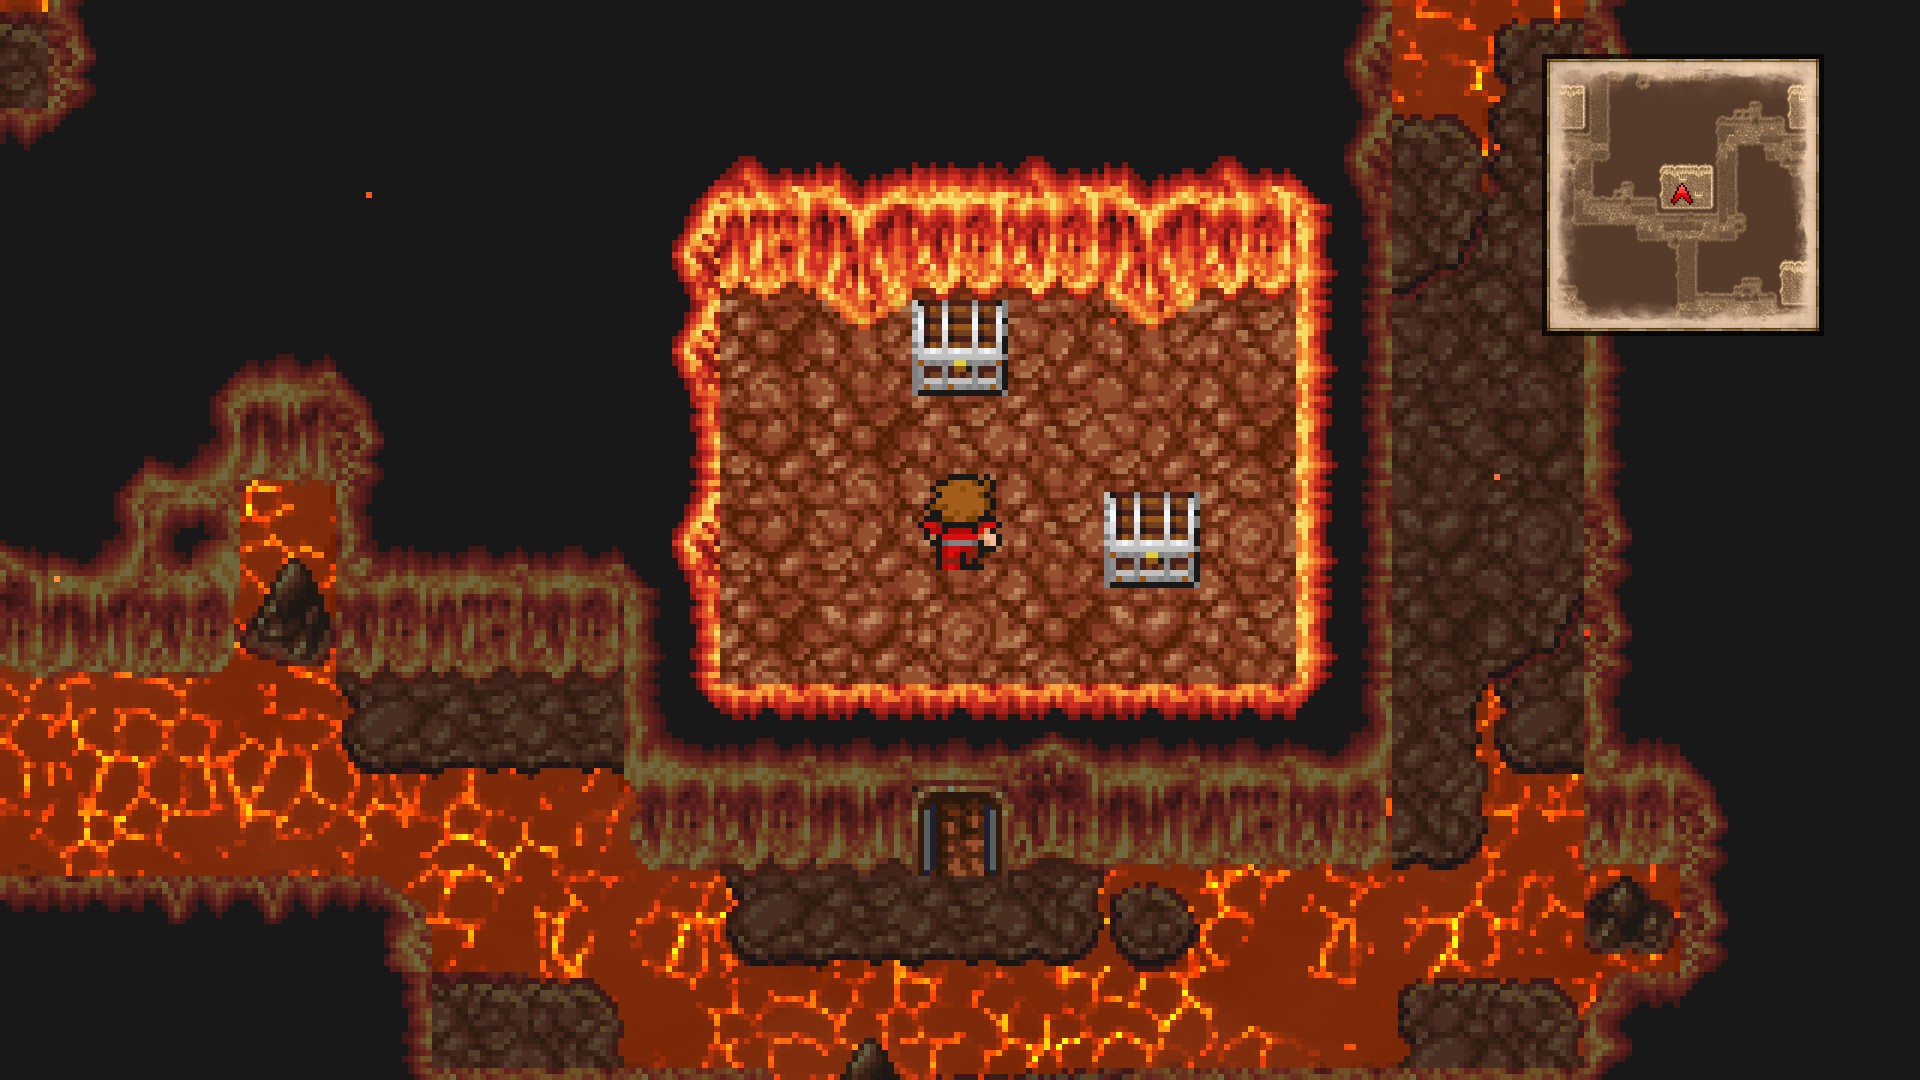
  • You can step on the lava but be aware that it will take 1 HP from your whole party per tick.


Mount Gulg - B2
  • Take the door just by the stairs.
  • Go up, then west at the first split.


  • Open the chest for an encounter against Fire Elemental (x2): ID 059.
  • You'll get Mythril Helm after the battle. [79/249]
  • Head south from this location to find another chest.


  • Open it for Monsters! (Fire Elemental x2) → 1520 Gil. [80/249]
  • Backtrack to the previous chest and head north.
  • At the split, head west first for a chest.


  • Open it for Monsters! (Fire Elemental x2) → Great Sword. [81/249]
  • Backtrack to the split and head east this time.
  • Open the chest on the way for 4150 Gil. [82/249]


  • Follow the linear path north, then all the way west.
  • Go down and then up to find two more chests with 1295 Gil and Monsters! (Fire Elemental x2) → 1250 Gil respectively. [84/249]


  • From here go south all the way, then through the zig-zag corridor to find a lot of chests.
  • Interact with the wizard for a battle with two Fire Elementals.


  • Contents from left to right and top to bottom:

    • Chest 1: Mythril Gloves [85/249]
    • Chest 2: 1760 Gil [86/249]
    • Chest 3: Mythril helm [87/249]
    • Chest 4: Monsters! (Lava Worm) → 1520 Gil [88/249]
    • Chest 5: Mythril Shield [89/249]
    • Chest 6: Monsters! (Lava Worm) → 1455 Gil [90/249]

    • Chest 7: Mythril Axe [91/249]
    • Chest 8: Hi-Potion [92/249]
    • Chest 9: Tent [93/249]
    • Chest 10: 1975 Gil [94/249]
    • Chest 11: Monsters! (Lava Worm) → Antidote [95/249]
    • Chest 12: Phoenix Down [96/249]

  • Make your way out of this maze and head southwest to find the stairs down.


Mount Gulg - B3
  • Head to the far east end to find the stairs leading down.


Mount Gulg - B4
  • Fire Gigas and Fire Lizard start appearing on this floor. Stairs up are located at the southeast corner of this room.


Mount Gulg - B3
  • We're back at the B3 but in a different area.
  • Go south, then west, then south, then all the way west to find the stairs down.


Mount Gulg - B4
  • Go through the door near the stairs to find two chests.


  • Top chest: Monsters! (Fire Lizard) → 2750 Gil [97/249]
  • Bottom chest: Monsters! (Lava Worm) → Gold Needle [98/249]
  • Leave the room and go west.
  • Follow the linear path until a split. You'll see a door here.
  • Go in to find a chest with 1760 Gil. [99/249]


  • Exit the room and head west.
  • Follow the path to find yet another room with five more chests.


  • Contents from left to right and top to bottom:

    • Chest 1: Monsters! (Lava Worm) → 7340 Gil [100/249]
    • Chest 2: Monsters! (Lava Worm) → Flame Shield [101/249]
    • Chest 3: Ice Brand [102/249]
    • Chest 4: Antidote [103/249]
    • Chest 5: 1380 Gil [104/249]

  • Backtrack to the previous split and head south this time.
  • You'll come across another door.
  • Go in to find an unavoidable battle against a Lava Worm and two chests.


  • Top chest: 1150 Gil [105/249]
  • Bottom chest: 1155 Gil [106/249]
  • Leave and go east at the split to find three more chests.


  • Left chest: Cottage [107/249]
  • Middle chest: 2000 Gil [108/249]
  • Right chest: Potion [109/249]

  • Exit the room and backtrack to the split.
  • Go south.
  • You'll soon reach another door. Head inside to find two chests.


  • Top chest: Monsters! (Fire Lizard) → Staff [110/249]
  • Bottom chest: Monsters! (Fire Lizard) → 1250 Gil [111/249]
  • Leave the room, go south, and take the stairs down to the next floor.

└ The Fire Crystal: Part III
Mount Gulg - B5
  • From the entrance, go immediately west and follow the path to its end to find a door.
  • Head inside.


  • Here you'll find a wizard (Fire Lizard) and a chest with Monsters! (Red Dragon) → Flame Mail. [112/249]
  • Backtrack to the entrance.
  • From there, go north and immediately turn right at the lava pool.
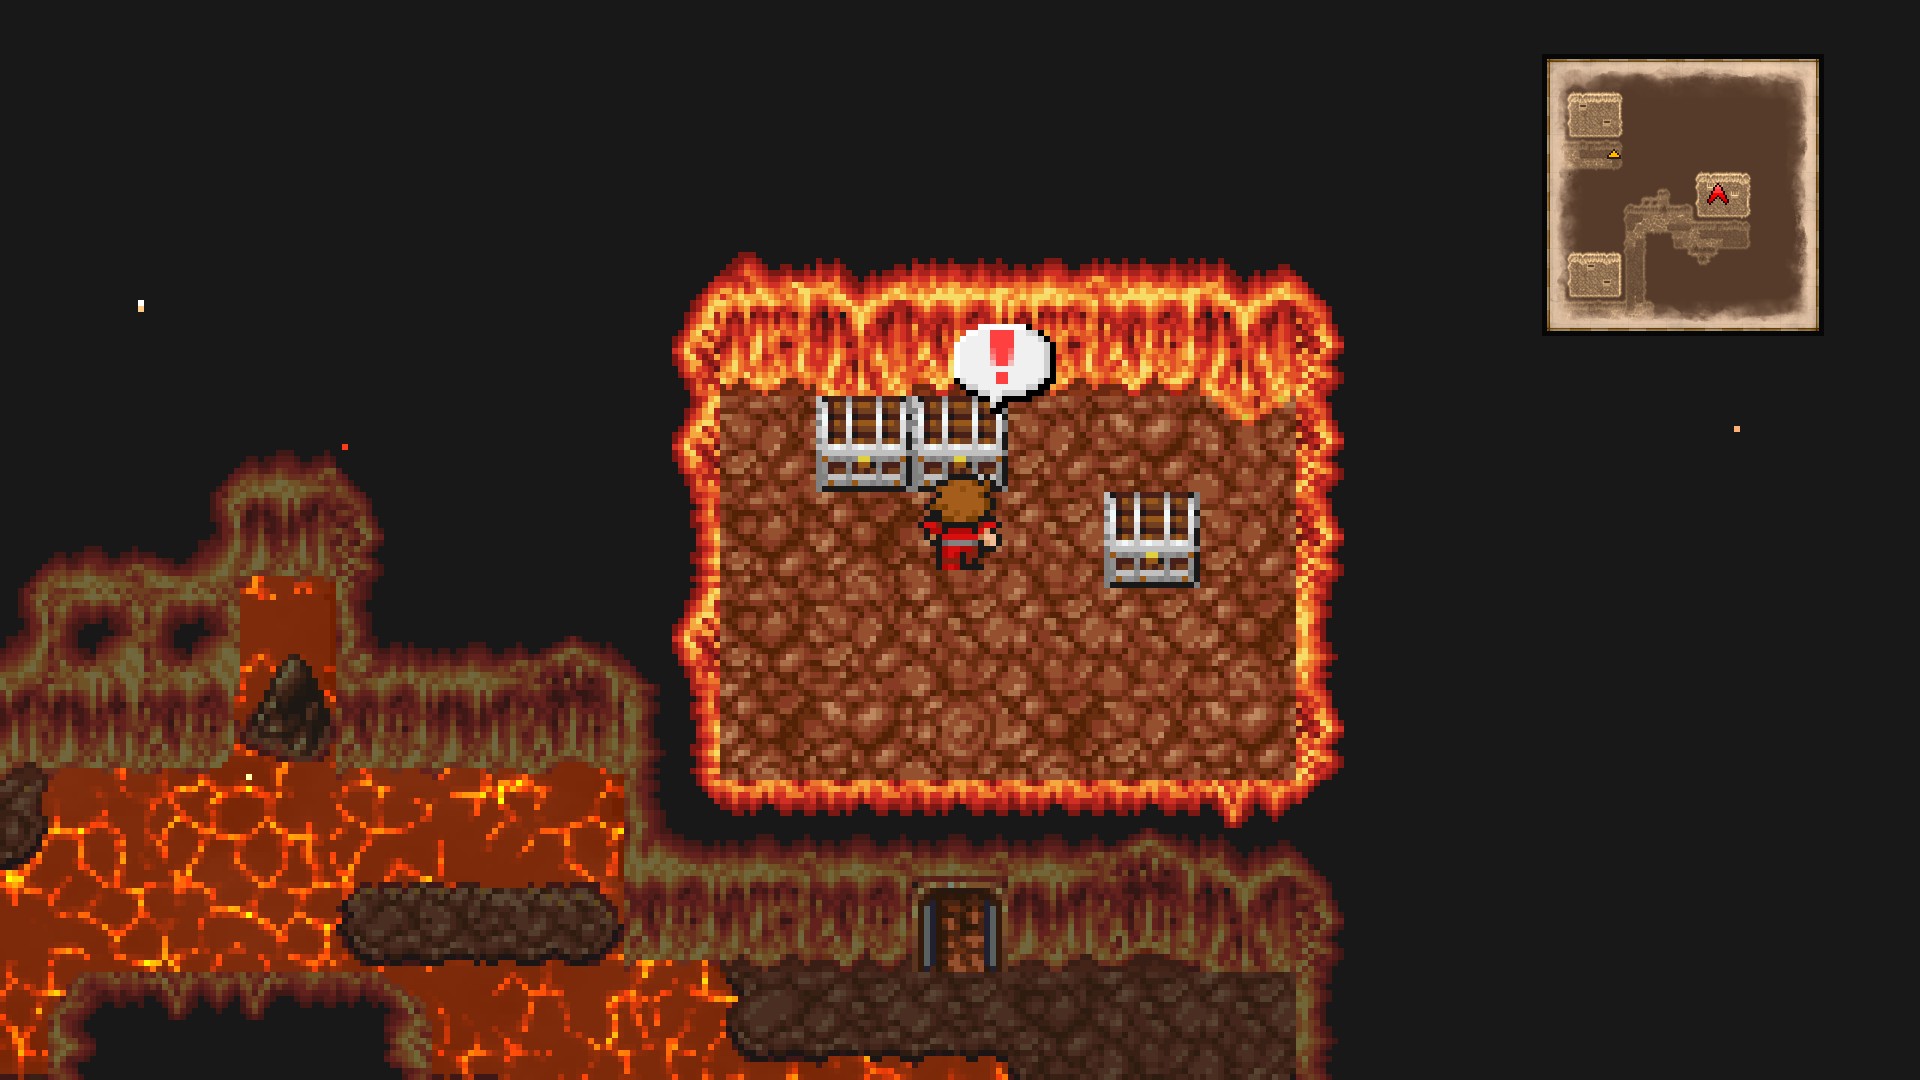
  • Reach the southeast room to find a chest containing a Potion. [113/249]


  • Leave and go immediately south through the lava pool.
  • Turn right at the split and enter the room for another chest with yet another Potion. [114/249]


  • Leave the room and go south once again.
  • You'll find a room at the southeast area containing the last chest for this dungeon.


  • Yeah, it's another Potion... [115/249]
  • Now make your way to the southwest area to find the boss.
  • Heal up and quick save beforehand, just in case. Interact with the red orb to start the battle.

       Maralith      
ID
HP
ATK
DEF
ACC
M.DEF
EVA
AGI
INT
WEAK.
RESIST.
GIL
EXP
DROPS
067
1440
40
50
63
183
48
21
43
None
Fire, Thunder
3000
2475
Golden Apple

  • Use Blizzard-based spells against the boss and heal your team from time to time with the White Mage. This boss is definitely harder than the others, but still shouldn't be much of a problem.

Rekindled Flame Restored the Fire Crystal's light.


  • After winning the battle, step on the shining ground to get teleported back to the overworld.

Cavern of Ice
Overworld
  • From the volcano, make your way back to your ship.
  • It should be at the east coast of Crescent Lake (blue dot on mini-map).
  • From there, head north hugging the west shore until finding a little gap between the islands.
  • Go through it.
  • After that, go west and approach the shallow water to switch to the Canoe.


  • At the split, go north, then north again until the next split.
  • Here, go west all the way and follow the linear path to a cave.
  • This is your destination:


  • Enter the cave.

Cavern of Ice - B1

 BESTIARY: CAVERN OF ICE
ID
MONSTER
HP
ATK
DEF
GIL
EXP
035
Wraith
86
22
4
231
231
068
White Dragon
200
53
8
2000
1701
069
Winter Wolf
92
25
0
200
402
070
Mindflayer
112
1
12
999
822
071
Ice Gigas
336
60
16
1752
1752
072
Specter
114
40
12
432
432
073
Remorazz
320
73
24
1000
2244
074
Dark Wizard
105
26
40
1095
1095

  • Wraith shows up here again in case if you missed it during Western Keep.
  • Remorazz shows up on B3. It's a rare encounter.
  • Mindflayer also shows up here but it's way too rate that isn't worth it the hassle.
  • It will be more common in a later dungeon so don't worry just yet.

  • From the entrance, follow the linear past to find the stairs.
  • The path south the stairs is a dead end.


Cavern of Ice - B2
  • Go west and then south all the way to the stairs leading down.


Cavern of Ice - B3
  • The next stairs are obvious. Take them up.


Cavern of Ice - B2
  • Follow the path in counter-clockwise direction until finding a door. Go through it.
  • Here, you'll find two chests.
  • Be extremely careful as the cracked floor breaks and leads you to another part of B3.
  • Quick save just in case.


  • Left chest: Flame Sword [116/249]
  • Right chest: Monsters! (Dark Wizard x4) → Clothes [117/249]
  • The Diamond isn't accessible yet.
  • After collecting both chests, step on any cracked tile to fall down.


Cavern of Ice - B3
  • You'll get into a battle pretty much automatically as the wizard is blocking your path (2 Ghast, 2 Wight, 2 Wraith, 3 Specter).
  • Beat the monsters and exit the room.
  • At the split, go west through the cracked ice to find a door (it deals 1HP to all your party on each tick).
  • Enter the room.
  • Inside, you'll find two chests.


  • Left chest: Mythril Gloves [118/249]
  • Right chest: Monsters! (White Dragon x2) → Ice Armor [119/249]
  • Backtrack to the split.
  • From there, go southeast, then south, then southwest until reaching a door. Head inside.
  • This room contains six chests.


  • Top left chest: 7900 Gil [120/249]
  • Top middle chest: 5454 Gil [121/249]
  • Top right chest: Monsters! (Winter Wolf x7) → 1180 Gil [122/249]
  • Bottom left chest: 9900 Gil [123/249]
  • Bottom middle chest: 5000 Gil [124/249]
  • Bottom right chest: Monsters! (Winter Wolf x7) → 12350 Gil [125/249]

Veteran Treasure Hunter Collected treasure from 50% of the chests.


  • Leave the room and backtrack to the split.
  • From the split, head southeast to find the stairs leading up. Go up.


Cavern of Ice - B1
  • Go through the door and head south to find a chest with Ether. [126/249]


  • Leave through the southeast door.
  • Head south and enter through the other door to find a chest with 10000 Gil. [127/249]


  • Go back to the previous door.
  • From there, go east and then south.
  • You'll find a door. Go through it but be extremely careful as there's a crack on the floor.
  • Make sure to loot all three chests before stepping over the cracked tile.


  • Left chest: 9500 Gil [128/249]
  • Middle chest: Sleeping Bag [129/249]
  • Right chest: Ice Shield [130/249]

  • That's all the chests for this place.
  • Now, stand on the cracked tile to fall down.


Cavern of Ice - B2
  • Heal up and quick-save before touching the crystal.
  • Don't step on cracked tiles or you'll have to walk a lot to get here again.
  • Touch the crystal once you're ready.

       Evil Eye      
ID
HP
ATK
DEF
ACC
M.DEF
EVA
AGI
INT
WEAK.
RESIST.
GIL
EXP
DROPS
075
162
30
30
42
92
12
6
20
None
None
3225
3225
None

  • No words, this is an extremely easy boss fight that can be finishing within 1 turn.
  • You'll receive Levistone after winning.
  • Now, fall down any crack to get back to B3.


Cavern of Ice - B3
  • Make your way back to B1.
  • B3: Go south, then southeast, then south, then southeast.
  • B2: Go through the door, then leave through the southeast door, then go northeast.
  • Lastly, take the stairs up.

Citadel of Trials
Overworld
  • Make your way back to the ship: Follow the path, north, east, south, and east.
  • Now, go back to the Crescent Lake area.
  • Don't enter the town, instead, go south to find shallow water.
  • Continue southwards until finding a desert between the mountains (refer to the screenshot below for the exact location).


  • Step into the desert to trigger a scene.
  • You can now travel around the world with the airship!
  • Using the airship to land on this location:


BESTIARY: OUTSIDE CITADAL OF TRAILS 
ID
MONSTER
HP
ATK
DEF
GIL
EXP
073
Remorazz
320
73
24
1000
2244
076
Desert Baretta
352
98
48
1
2610
077
Sabertooth
200
24
8
500
843
078
Wyvern
212
30
12
50
1173
079
Wyrm
260
40
22
503
1218
081
Baretta
256
60
38
300
1428
082
Basilisk
196
30
20
658
1977
083
Allosaurus
480
65
10
502
3387
084
Weretiger
160
30
16
780
780
085
Sand Worm
200
46
14
900
2683
103
Tyrannosaur
600
115
10
600
7200

  • Remorazz shows up here again if you missed it in Cavern of Ice.
  • Sabertooth showed up for me near the landing area.
  • Go through the linear path until reaching a desert.
  • Head inside to find creatures such as:

    • Baretta
    • Desert Baretta
    • Wyvern
    • Allosaurus
    • Sand Worm
    • Tyrannosaur (extremely rare)

  • Once done with the bestiary, head west and go across the shallow water.
  • Don't worry if you couldn't find some entries such as Desert Barreta and Tyrannosaur. You can find them easier in another large Desert area by utilizing the Bestiary search function on the Main Menu (Menu>Extras>Bestiary).
  • Then, go around the mountains to reach this location:


  • Head inside.


Citadel of Trials - 1F

BESTIARY: CITADAL OF TRIALS
ID
MONSTER
HP
ATK
DEF
GIL
EXP
058
Horned Devil
94
10
32
387
387
070
Mindflayer
112
1
12
999
822
086
Minotaur Zombie
224
40
14
1050
1050
087
King Mummy
188
43
24
1000
984
088
Medusa
68
20
10
699
699
089
Rakshasa
110
20
30
800
603
090
Clay Golem
176
64
7
800
1257
091
Nightmare
200
30
24
700
1272
092
Dragon Zombie
268
56
30
999
2331

  • Rakshasa is kinda rare and can be a real pain in the ass to defeat.
  • Spam Fire-based spells if you're having issues. They showed up on 3F for me.
  • No encounters on 1F.
  • Go north and talk to the old man.
  • Head northwest, go through the door, and sit on the throne.
  • You'll be teleported to 2F.


Citadel of Trials - 2F
  • Horned Devil and Mindflayers can be found here if you missed them before.
  • Don't worry, they were rare encounters so it's fine if you didn't have them in your bestiary
    at this point.

  • Exit the room and step on the teleporter.
  • Take the teleporter to the north.
  • Take the bottom left teleporter.
  • Take the teleporter to the south.

  • Take the bottom right teleporter.
  • Take the teleporter to the south.
  • Take the right teleporter.
  • From here, head east to find a door.
  • Go in.


  • Open the chest for a Potion. [131/249]
  • Go out and through the southwest passage.
  • Here, you'll find two teleporters. Take the bottom left one.
  • Head up the stairs.


Citadel of Trials - 3F
  • From the entrance, head north and through the door.
  • Interact with the wizard for an unavoidable battle against two Nightmares.
  • After the fight, open the chest at the top right corner for a Healing Staff. [132/249]


  • Now head west to find three more chests.


  • Top chest: Ruby Armlet [133/249]
  • Middle chest: Ice Brand [134/249]
  • Bottom chest: Steel Gloves [135/249]
  • Now go south to find four more chests!


  • Chest 1: Monsters! (Clay Golem x3) → Gauntlets [136/249]
  • Chest 2: Cottage [137/249]
  • Chest 3: 1455 Gil [138/249]
  • Chest 4: 7340 Gil [139/249]
  • Lastly, head east to find a last chest. Open it for the Key Item: Rat's Tail. [140/249]


  • Interact with the wizard for a fight with two Dragon Zombie.
  • Sit at the throne to get teleported back to the entrance.
  • Go back to the overworld.


Overworld
  • Make your way back to the airship.

Bahamut
Overworld
  • From the Citadel of Trials, go southwest to find a set of islands with holes.
  • Land on the one surrounded by a forest.


  • Enter the hole.


Dragon Caves - B1
  • Enter the room just above the entrance to find three chests.


  • Contents from top to bottom: 1455 Gil, 2000 Gil, and 2750 Gil. [143/249]
  • Enter the room on the west side to find four more chests.


  • Contents from left to right and top to bottom: X-Potion, 9500 Gil, 2750 Gil, and 1520 Gil. [147/249]
  • Go back to the airship.


Overworld
  • Land on this island and enter the hole:


Dragon Caves - B1
  • Head west, south, and go through the door to find three chests.


  • Contents from left to right: Elixir, Cottage, and 1000 Gil. [150/249]
  • Leave the cave.


Overworld
  • Now land on the leftmost island and enter the hole.


  • Go into the north room to find a chest with Tent. [151/249]


  • Leave and enter the south room for two more chests.
  • Dry Ether and Gold Needle. [153/249]


Overworld
  • Get on the airship and land on the island with the two holes.
  • Enter the right one.


Dragon Caves - B1
  • Go all the way south and take the stairs down.


Dragon Caves - B2
  • Head through the north door and continue all the way until finding a giant dragon.
  • Speak to him.

Token of Courage Gained titles of courage from Bahamut.


  • After a small scene, you'll notice that your classes got 'improved'.
  • Now it's a good moment to revisit some towns to get well equipped.
  • Just make sure to leave 40k unspent Gil required for the next section.

Class changes:
  • Warrior → Knight
  • Thief → Ninja
  • Monk → Master
  • White Mage → White Wizard
  • Black Mage → Black Wizard
  • Red Mage → Red Wizard

  • Leave the dungeon.

Bottled Faerie, Oxyale, and Warp Cube
Overworld
  • Pay a visit to Crescent Lake and get the Exit spell for your White Wizard.
  • After that, take your airship and travel to this location:


  • Land on the green plains.
  • Now go walking to the desert area until reaching this location:


  • Go one step up to enter a Caravan.


Caravan
  • Enter the tent and talk to the man inside. Purchase the Bottled Faerie for 40000 Gil.
  • Leave the location and go back to the airship. It's time to visit a new town.


Overworld
  • Head to this location and enter the town:


Gaia
  • A scene will occur after entering the town. Don't follow the faerie just yet, instead, make your purchases and get ready.

Weapon Shop
Item
Cost
Cat Claws
52000

Armor Shop
Item
Cost
Ruby Armlet
40000
Protect Ring
16000

White Magic Shop (LV. 7)
Item
LV.
Cost
Curaja
7
30000
Diara
7
30000

Black Magic Shop ((LV. 7)
Item
LV.
Cost
Blizzaga
7
30000
Break
7
30000

White Magic Shop (LV. 8)
Item
LV.
Cost
Holy
8
40000
NulAll
8
40000
Dispel
8
40000

Black Magic Shop ((LV. 8)
Item
LV.
Cost
Stop
8
40000
Warp
8
40000
Kill
8
40000

Inn
Service
Cost
Rest
200

  • Once ready, head west towards the Item Shop, then follow the path behind to reach the church.
  • Don't enter, instead go east through the only path (see the screenshot below for the exact location).


  • Talk to the faerie to receive the Key Item: Oxyale.
  • Leave the town and board the airship.


Overworld
  • Head and land on this place:


  • From here, head east until the shallow waters.
  • Once there, go north to see a waterfall. Head inside.


Waterfall Cavern

BESTIARY: WATERFALL CAVERN
ID
MONSTER
HP
ATK
DEF
GIL
EXP
108
Green Dragon
354
72
16
5000
4068

  • From the entrance, go north until the split, then change to west and then north again.
  • You'll reach another split, go west here.
  • Yet another split, but a 5-way this time. Take the northwest exit.
  • One last split. Go all the way south here until reaching a door.
  • Head inside.
  • Interact with the wizard for an unavoidable battle against Mummy x2, King Mummy, 3 Pyrolisk, and 3 Cockatrice.
  • After the fight, interact with the Robot to get the Key Item: Warp Cube.


  • Also open all six chests for Wizard's Staff, Ribbon, 13450 Gil, 6400 Gil, 5000 Gil, and Defender. [159/249]
  • Leave the dungeon: North until the split, southeast, southeast, south, east.


Overworld
  • With the Canoe, head south and then east at the split.
  • Enter this town:


Onrac

White Magic Shop (LV. 7)
Item
LV.
Cost
NulDeath
7
30000
Healaga
7
30000

Black Magic Shop ((LV. 7)
Item
LV.
Cost
Saber
7
30000
Blind
7
30000

Inn
Service
Cost
Rest
200

  • Once done with your purchases, head to the southeast end of the town and talk to the girl.


  • Interact with the barrel to access the next dungeon.

┌ The Water Crystal: Part I
Sunken Shrine - 3F

BESTIARY: SUNKEN SHRINE
ID
MONSTER
HP
ATK
DEF
GIL
EXP
093
Sahagin Prince
204
47
20
882
882
094
White Shark
344
50
8
600
2361
095
Deepeyes
304
30
16
3591
3591
096
Sea Snake
224
35
12
600
957
097
Sea Scorpion
148
35
18
300
639
098
Sea Troll
216
40
20
852
852
099
Ghost
180
93
30
990
990
100
Water Elemental
300
69
20
800
1962
101
Water Naga
356
9
8
2355
2355

  • All bestiary entries here are relatively easy to find so don't sweat too much and try to complete the location first.
  • Climb up the stairs and then head north once and then east to find a door. Go inside.


  • Open the chest for 2000 Gil. [160/249]
  • Backtrack to the split. Head west and then north for another door. Go inside.


  • Open the chest for 9900 Gil. [161/249]
  • Leave the room.
  • Go east and then north until a split.
  • Go east here and then north to find the stairs leading up. Go up.


Sunken Shrine - 4F
  • From the stairs, go south and then west until hitting a wall.
  • Then south, then west again, then north, the east.
  • You'll find a door. Go inside.


  • Open the chest for 1300 Gil. [162/249]
  • Leave the room and go north, then west, then northeast to a door. Go inside.


  • Open the chest for Diamond Armor [163/249]
  • Backtrack to the previous split and head west, then all the way south to find a door.


  • Open the chest for Light Axe. [164/249]
  • Exit the room and go east until a northeast/southeast split.
  • Take the top path for a room with a chest.


  • Open the chest for Mage's Staff. [165/249]
  • Return to the split and take the bottom path now for yet another door.
  • Head inside and open the chest for 12350 Gil. [166/249]


  • Leave the room and take the stairs leading up.


Sunken Shrine - 5F
  • No encounters on this floor.
  • From the entrance, go up and enter the north room.


  • Open the chests for 9000 Gil, 1760 Gil, and Diamond Armlet respectively. [169/249]
  • Leave the room and go northwest, then east to find another room with a chest.


  • Open the chest for 2750 Gil. [170/249]
  • Leave the room and go southeast for a room with a mermaid and a chest.


  • Open the chest for 4150 Gil. [171/249]
  • Leave the room and enter the one just to the right of this one.


  • Open the chest for 5000 Gil. [172/249]
  • Leave the room and go north through the left passage to find a room with two chests and a mermaid.


  • Open the chests for 10000 and 1150 Gil. [174/249]
  • Leave and go back to the previous room.
  • From here, go all the way southeast to find a room with a lonely chest.


  • Open the chest for Diamond Shield. [175/249]
  • Leave and enter the room just to the left of this one for another chest.


  • Open the chest for Antidote. [176/249]
  • Leave and now head all the way northwest and through the narrow path to find a semi-open area. Go south and enter the first room for three more chests.


  • Open them for Diamond Helm, Diamond Gloves, and the Key Item: Rosseta Stone. [179/249]
  • Use the Exit spell or backtrack your way back to the entrance.
  • Either way is fine.

└ The Water Crystal: Part II
Overworld
  • Re-enter Onrac and the Sunken Shrine.


Sunken Shrine - 3F
  • Go to the northwest end of the room to find a set of stairs leading down. Go down.


Sunken Shrine - 2F
  • Go left and follow all the path north until the next set of stairs leading up.


Sunken Shrine - 3F
  • Take the stairs up.


Sunken Shrine - 4F
  • Go east then south, then take the stairs down.


Sunken Shrine - 3F
  • Go through the door and open both chests for 1110 Gil and 1450 Gil respectively. [181/249]


  • Exit through the south door and go down the stairs.


Sunken Shrine - 2F
  • From the stairs, go west and then south.


  • Left chest: Monsters! (Water Elemental x3) → 7690 Gil [182/249]
  • Right chest: 8135 Gil [183/249]
  • Leave the room and go west to find a room containing three chests.


  • Left chest: 5450 Gil [184/249]
  • Middle chest: Monsters! (Water Elemental x3) → 1385 Gil [185/249]
  • Right chest: Monsters! (Mummy x2, King Mummy, Pyrolisk x3, Cockatrice x3) → Giant's Gloves [186/249]
  • Leave the room and go north to another room.


  • Open the chest for Monsters! (Sea Snake x3, Sea Scorpion x3, Sea Troll x2) → Light Axe [187/249]
  • Exit the room and go east for one more room containing four chests.


  • Top left chest: Ribbon [188/249]
  • Top middle chest: 9900 Gil [189/249]
  • Top right chest: 2750 Gil [190/249]
  • Bottom right chest: 7340 Gil [191/249]

  • We're done with the chests for this dungeon.
  • Interact with the wizard for a forced battle against two White Sharks and a Sahagin Prince.
  • Exit the room and head northwest to find the stairs leading down. Go down.


Sunken Shrine - 1F
  • From the stairs, go west, then north, then west, then south, then west to find a door.
  • Go through it.
  • Head north, then west, then exit through the south door.
  • Follow the linear path and then enter the first door you see.
  • Heal up and quick-save just in case and then touch the blue orb to start a boss fight.

       Kraken      
ID
HP
ATK
DEF
ACC
M.DEF
EVA
AGI
INT
WEAK.
RESIST.
GIL
EXP
DROPS
102
1800
50
60
90
160
84
42
32
Thunder
Fire
4245
5000
Kikuichimonji

  • Thunder-based spells are devastating against this boss;
  • Use those (3x Thundaga and the boss is pretty much out.
  • You should already be used to the easy boss fights at this point of the game.

Revitalizing Waters Restored the Water Crystal's light.


  • Step on the blue light to get teleported back to the Overworld.

Mirage Tower
Overworld
  • Feel free to revisit Gaia to purchase remaining spells.
  • Once ready, head to Melmond and enter the town.


  • Go northeast and talk to the person next to the graves. You can speak Lufenian now!
  • Leave the town and head to this location:


  • Land here.
  • Now, make your way to the southeast town and enter it.


Lufenia

White Magic Shop
Item
LV.
Cost
Full-Life
8
45000

Black Magic Shop
Item
LV.
Cost
Flare
8
45000

  • Shops are at the northeast portion of the town, outside the walls.
  • After your purchases, head back to the town and speak to the following NPC:


  • You'll receive the key item: Chime.


Overworld
  • Go back to the airship, head south and then land on this zone:


  • Head to the middle of the big desert to find a tower. Go inside.


Mirage Tower - 1F

BESTIARY: MIRAGE TOWER
ID
MONSTER
HP
ATK
DEF
GIL
EXP
104
Black Knight
260
44
38
1800
1263
105
Chimera
300
30
20
2500
2064
106
Guardian
200
25
40
400
1224
107
Blue Dragon
454
92
20
2000
3274

  • From the entrance, go though the north door and make your way to the middle to find 8 chests.


  • Top chest: 1300 Gil [192/249]
  • Leftmost chest: Tent [193/249]
  • Rightmost chest: Healing Helm [194/249]
  • Middle chests - Top row: Aegis Shield, 2750 Gil, and 3400 Gil [197/249]
  • Middle chests - Middle row: 18010 Gil [198/249]
  • Middle chests - Bottom row: Vorpal Sword [199/249]

  • Leave the middle area and exit through the bottom left door.
  • Take the stairs up.


Mirage Tower - 2F
  • Follow the straightforward path until reaching a split.
  • Take the northeast path, then east, then through the clockwise path to find a door.
  • Head inside to find 10 chests!


  • Left side: 13000 Gil, 12350 Gil, Thor's Hammer, 7900 Gil, and 8135 Gil. [204/249]
  • Right side: Cottage, 7600 Gil, Sun Blade, 10000 Gil, and Dragon Mail. [209/249]
  • That's all the chests for this location.
  • Leave from where you came and head upstairs.


Mirage Tower - 3F
  • Take any split and enter the door at the bottom.
  • Interact with the wizard for a fight against Blue Dragon.
  • Step on the teleport pad to get warped to the sky.

The Wind Crystal
Flying Fortress - 1F

BESTIARY: MIRAGE TOWER
ID
MONSTER
HP
ATK
DEF
GIL
EXP
070
Mindflayer
112
1
12
999
822
080
Manticore
164
22
8
650
1317
089
Rakshasa
110
20
30
800
603
109
Stone Golem
200
70
16
1000
2485
110
Air Elemental
358
53
4
807
1614
111
Spirit Naga
420
7
16
4000
3489
112
Death Knight
190
55
32
3000
2700
113
Earth Medusa
96
11
12
1218
1218
114
Black Flan
156
49
255
900
1101
115
Soldier
400
102
48
2000
4000
116
Vampire Lord
300
90
28
3000
2385
117
Dark Fighter
200
40
38
3420
3420
118
Warmech
2000
128
80
32000
32000

  • Finally! Mindflayer shows up here if you missed it in the Cavern of Ice.
  • Also Rakshasa shows up here if you had issues finding it in The Cavern of Ice.
  • The following achievement should automatically unlock when exploring this dungeon:

Adventurous Wayfarer Traveled to all the map locations.


  • Leave through the south door and head south.
  • Enter the room to find a chest containing Razer. [210/249]


  • Backtrack to the middle area and head to the west.
  • Enter the room to find four chests containing 9900 Gil, Potion, 4150 Gil, and 7900 Gil. [214/249]


  • Backtrack to the middle area and head east.


  • Enter the room to find five more chests.
  • Contents from left to right: 5000 Gil, Protect Ring, 6720 Gil, Healing Helm, and 1180 Gil. [219/249]
  • Leave the room and head to the middle area one last time. Go north.
  • Step on the teleporter to access the next floor.


Flying Fortress - 2F
  • Walk south to reach the middle area. We'll call it like that for better orientation.
  • From the middle, go northwest to find a room containing two chests.


  • Open both for Mythril Helm and Cottage. [221/249]
  • Back at the middle, go west and enter the room.
  • Two more chests can be found here. 1380 and 13000 Gil. [223/249]


  • From the middle, go southwest to find the Key Item: Adamantite! (required for an achievement later).


  • Back at the middle, head northeast.
  • Enter the room to find a chest with Diamond Gloves. [224/249]


  • Go back to the middle and head east.
  • Two more chests for our collection. Ribbon and Diamond Shield. [226/249]


  • Return to the middle and head southeast for the last two chests of this floor.
  • White Robe and Black Robe can be found inside. [228/249]


  • Travel one last time to the middle area and head south to find the warp to the next floor.


Flying Fortress - 3F
  • From the warp, head immediately north to find a room containing four chests.
  • Open them for 9000 Gil, Protect Ring, Potion, and 5450 Gil. [232/249]


  • Now go east for another room with a whooping pack of six chests.


  • Left column: 6400 Gil, Clothes, and Protect Cloak. [235/249]
  • Right column: Gold Needle, 9500 Gil, and 8135 Gil [238/249]
  • Lastly, head back to the middle and to the west area for the last four chests of this dungeon.


  • Contents from left to right: Gold Needle, 4150 Gil, 3400 Gil, and Sasuke's Blade. [242/249]
  • Leave the room and head just south from here to find the next warp.


Flying Fortress - 4F
  • This floor is a maze. Head west twice, then south twice to find the warp pad.


Flying Fortress - 5F
  • Warmech shows up here.
  • Be aware that it's an extremely rare encounter (1/64) and can obliterate your team in seconds.
  • Features an attack called Nuke that deals 300 points of damage to all your party members, so I highly recommend having your team fully healed at all times.
  • After updating your bestiary, heal up and quick-save.
  • Go north and approach the green orb to start a boss fight.

       Tiamat      
ID
HP
ATK
DEF
ACC
M.DEF
EVA
AGI
INT
WEAK.
RESIST.
GIL
EXP
DROPS
119
2400
53
80
80
200
72
36
45
None
Fire, Thunder, and Blizzard
6000
5496
None

  • Challenging boss.
  • I attacked with both my Knight and Ninja, healed with my White Wizard, and used Flare with my Black Mage. Took the boss down in ~10 or so turns.
  • Step on the green light to get teleported back to the overworld.

Wind's Caress Restored the Wind Crystal's light.

┌ Chaos Shrine: Part I
Overworld
  • Back at the overworld, head southeast and board the airship.
  • Once at the airship, go to the Mount Duergar area and head inside.


Mount Duergar
  • Enter the northwest room and speak to the Dwarf with the red cap.
  • You'll receive the second most powerful weapon in the game: Excalibur.

Sword of Myth Obtained Excalibur.

  • Leave the cave.


Overworld
  • Now get prepared for the last dungeon.
  • Purchase anything you need and clean up all the remaining locations if you missed anything.
  • Once ready, head to the Chaos Shrine.


Chaos Shrine
  • Go north into the room and interact with the purple orb.


Chaos Shrine - 1F

BESTIARY: CHAOS SHRINE
ID
MONSTER
HP
ATK
DEF
GIL
EXP
120
Rhyos
350
40
18
5000
4584
121
Death Eye
360
120
60
1
1
122
Purple Worm
448
65
10
1000
4344
123
Iron Golem
304
93
100
3000
6717

  • Leave the room through the south door and head southeast to find the stairs leading up.
  • Go up.


Chaos Shrine - 2F
  • Head right and up the stairs.


Chaos Shrine - 3F
  • From the stairs, go all the way south, then east until about the middle, then north.
  • Head through the door.
  • Interact with the wizard for a battle against Death Eye.


  • Now, open both chests before interacting with the stone tablet.
  • Left chest: Dry Ether [243/249]
  • Right chest: Elixir [244/249]
  • Interact with the stone tablet to automatically use the Lute.
  • This will open a path to the next floor.


Chaos Shrine - 2F
  • Leave the room and head south, then go west and north to find the next staircase.


Chaos Shrine - 1F
  • Go all the way west to find the stairs down.


Chaos Shrine - B1
  • Follow the linear path all the way through: North, then east, then south. Don't take splits.
  • Heal up and quick-save before touching the yellow orb.
  • Once ready, touch the yellow orb for a boss fight.

       Lich      
ID
HP
ATK
DEF
ACC
M.DEF
EVA
AGI
INT
WEAK.
RESIST.
GIL
EXP
DROPS
124
2800
50
80
64
140
48
24
34
Dia
Blizzard
1
2000
None

  • Abuse your high end spells - especially Dia-based ones - and the boss should be down within a few turns.
  • Head downstairs after winning.


Chaos Shrine - B2
  • From the stairs, head out and take the left exit.
  • Now go north and through the door.
  • Head east until almost the end and then go south through the door.
  • Approach the red orb area but don't touch it yet. Instead, go south.
  • At the split, enter the left room for a chest containing Protect Ring. [245/249]


  • Go southwest and exit through the door.
  • Follow the linear path for another door with a chest at the end.


  • Open the chest for Sasuke's Blade. [246/249]
  • Backtrack to the split.
  • Enter the right door this time to find a chest with Protect Cloak inside. [247/249]


  • Leave through the southeast door.
  • Enter the door to the right to find yet another chest containing an Elixir. [248/249]


  • Now backtrack to the split and go north.
  • Heal up and quick-save before touching the red orb.
  • Once ready, touch the red orb for yet another boss fight.

       Maralith      
ID
HP
ATK
DEF
ACC
M.DEF
EVA
AGI
INT
WEAK.
RESIST.
GIL
EXP
DROPS
125
3400
60
80
63
183
60
30
41
None
Fire, Thunder, and Blizzard
1
2000
None

  • Head downstairs after the fight.

└ Chaos Shrine: Part II
Chaos Shrine - B3
  • Go through the door on the right and exit from the other door.
  • Head south and enter the door, then go through the path and exit through yet, another door.
  • Enter the door north and go west until you see three tombstones. Exit through the south door.
  • From here, continue south and then take the split east to find the next orb.
  • Heal up and quick-save.
  • Touch the blue orb once you're prepared.

       Kraken      
ID
HP
ATK
DEF
ACC
M.DEF
EVA
AGI
INT
WEAK.
RESIST.
GIL
EXP
DROPS
126
3600
60
80
114
200
98
49
41
None
Fire
1
2000
Eye Drops

  • This boss is built like a tank, but still shouldn't be a problem with a relatively leveled team.
  • I pretty much auto-attack while my White Wizard was healing the party.
  • Head downstairs after winning.


Chaos Shrine - B4
  • Iron Golem shows up here.
  • From the entrance, go south, then east, then southeast all the way through to find a room.


  • Open the chest to receive the best weapon in the game: Masamune. [249/249]
  • Achievement might not unlock until you win another battle.

Legendary Treasure Hunter Collected treasure from 100% of the chests.


  • Backtrack to the stairs.
  • Now, go east to find the next orb.
  • Heal up, quick-save, and touch the green orb once you're ready to start the boss fight.

       Tiamat      
ID
HP
ATK
DEF
ACC
M.DEF
EVA
AGI
INT
WEAK.
RESIST.
GIL
EXP
DROPS
127
5500
75
90
85
200
90
45
38
None
Fire, Thunder, and Blizzard
1
2000
Rune Staff

  • This boss has lots of HP. Besides that, it's not much harder or different than the previous ones.
  • Go downstairs after the fight.


Chaos Shrine - B5
  • Go south through any path and enter the room.
  • Heal up and quick-save. This is the last boss.
  • Interact with Garland once you're ready.

       Chaos     
ID
HP
ATK
DEF
ACC
M.DEF
EVA
AGI
INT
WEAK.
RESIST.
GIL
EXP
DROPS
128
20000
170
100
200
200
100
50
40
None
Fire, Thunder, and Blizzard
0
0
None

  • Finally, the only hard boss in the whole game.
  • I basically buffed all my party members with Haste and my attackers with Temper multiple times to raise their ATK power. I went mostly offensive.
  • My White Wizard had Full-Life to get me out of those hard moments and Curaja to constantly heal my party up.
  • Be aware that boss' physical attacks can be extremely devastating.
  • Magical attacks ain't that hard to survive, but physical is another story.

So this is a summary of my turns:
  • Knight: attacks
  • Ninja: attacks
  • White Wizard: Heals up and Holy when the team is fine.
  • Black Wizard: Haste on all four party members first, then Temper several times to raise ATK power.

And that is. Good luck!
If you were lucky/skilled enough to win, take my congratulations!
Also enjoy the long ass credits and your last achievements!

Prophecy Foretold Defeated Chaos and restored peace to the world.
Field Research- Professional Completed 100% of the Bestiary entries.
Master of I Earned all achievements.
88 Comments
Neminary 15 Dec, 2024 @ 11:23am 
Fantastic guide, I completed the game 100%! Thank you! :mog:

I would like to mention a few points:
1) After unlocking chest number 125, I did not receive the "Veteran Treasure Hunter" achievement. The achievement unlocked after I saved the game and reloaded.
2) Knight class can use White Magic up to level 3, and the Ninja class can use Black Magic up to level 4. This is visible in the character sheet, but it is not displayed in shops.
3) In the "Chaos Shrine: Part II" section (Chaos Shrine - B3), there is an error: Enter the door north and go *east* until you see three tombstones.
SonnieSlim 2 Oct, 2024 @ 6:18pm 
I just need to say this is a fantastic guide. I used it to 100% the steam version and Im using it again now that the game is on Xbox. Thank you!
Ran_Sophia 8 May, 2024 @ 4:19am 
👏👏👍🏻
Juan of the Dead 28 Apr, 2024 @ 1:22pm 
Great guide! Small mistake I noticed though for the fire cavern.

"From there, go north and immediately turn right at the lava pool.
Reach the southeast northeast room to find a chest containing a Potion. [113/249]"
Monseur 28 Mar, 2024 @ 2:31am 
Best guide I've used in a while. Greatly appreciated.
Khriz134 29 Feb, 2024 @ 6:27pm 
Im going bind atm but i have a question. Do you know if after the beating the Main Boss the save ends or can i go back to finish the achievements i missed?
wolfwood316 22 Feb, 2024 @ 7:07am 
Great guide. Very straightforward and right to the point. Thanks much!
Olomith 20 Feb, 2024 @ 5:11pm 
<3
ElWeyMisterioso 20 Feb, 2024 @ 2:13pm 
Thanks for this great guide. I wonder if youll do the second game. That would be great.
Vallyyn - Live <3 6 Feb, 2024 @ 3:59am 
Yeah the edition of being able to see the Bestiary in the config. menu definitely helped. Beat the game this morning, and the guide was so helpful!