61 ratings
Guide for Dead of the Night
By FreeMetal
Complete guide for the Black Ops 4 zombie map Dead of the Night, you will eventually find everything you need over here.

Make sure to read the introduction.
5
   
Award
Favorite
Favorited
Unfavorite
Introduction
Welcome fellow zombie slayers, thank you for coming in.

Black Ops 4 being a battle.net game instead of steam, it obviously does not support Steam guides. However the zombies maps have much secrets and complexity requiring .. a cheatsheet guide. So i'm making this. As the guide is not linked to any steam game hub, make sure to share it if you have friends playing Black Ops 4 zombie.

Also, make sure to add the game as a Non-steam game, so you could open the guide with in the game overlay, if you do not have a second screen or a phone available.


As a quick side note on how to add BO IIII as a non-steam game:
  • Open Steam, on the bottom left click on add a game then Add a non-steam game.
  • Browse your computer and select Battle.net launcher.exe
  • Launch "Battle.net" in your Steam library, then play the game you want
  • Steam overlay should recognize the game


    You will be shown as playing Battle.net launcher.exe on steam, go to your steam Library, find the Properties tab. You can change the name and game icon there.


About the guide itself, you will find everything note worthy gameplay-wise, this will include:
  • How to turn on the power and access the Pack-a-Punch
  • All locations of parts to get craftable items
  • Main quest steps
  • Secondary easter eggs such as hidden cosmetics or music.
  • Achievements
  • Full Gauntlet mode breakdown
All of this coming with lots of detailed explanations as well as all necessary screenshots you came to love in my previous BO III guides :)

Heck i might even add the TL;DR Cheatsheet i added to the other game's guides.

If you want to use any of my Screenshots or Diagrams or whatever, please at the very least ask and credit me.

Have a nice reading.

Preparation - Accessing Pack-a-Punch
Concerning the map layout, the central part is the Mansion itself, it has two floors and a basement (which is actually just one room). The East part of the map is an outside area called the Greenhouse Laboratory with the Gardens.

The South part of the map is not much accessible, there is only one room on the upper floor of the manor (Entrance hall).

The West part of the map is an outside area called the Graveyard and it's upper level, the Mausoleum.

Finally the North part is comprised of the Forest. (Pack-a-Punch)


(Colors i chose for the areas are relevant to point out the general location of the Alistair's Folly' symbols, except the black)


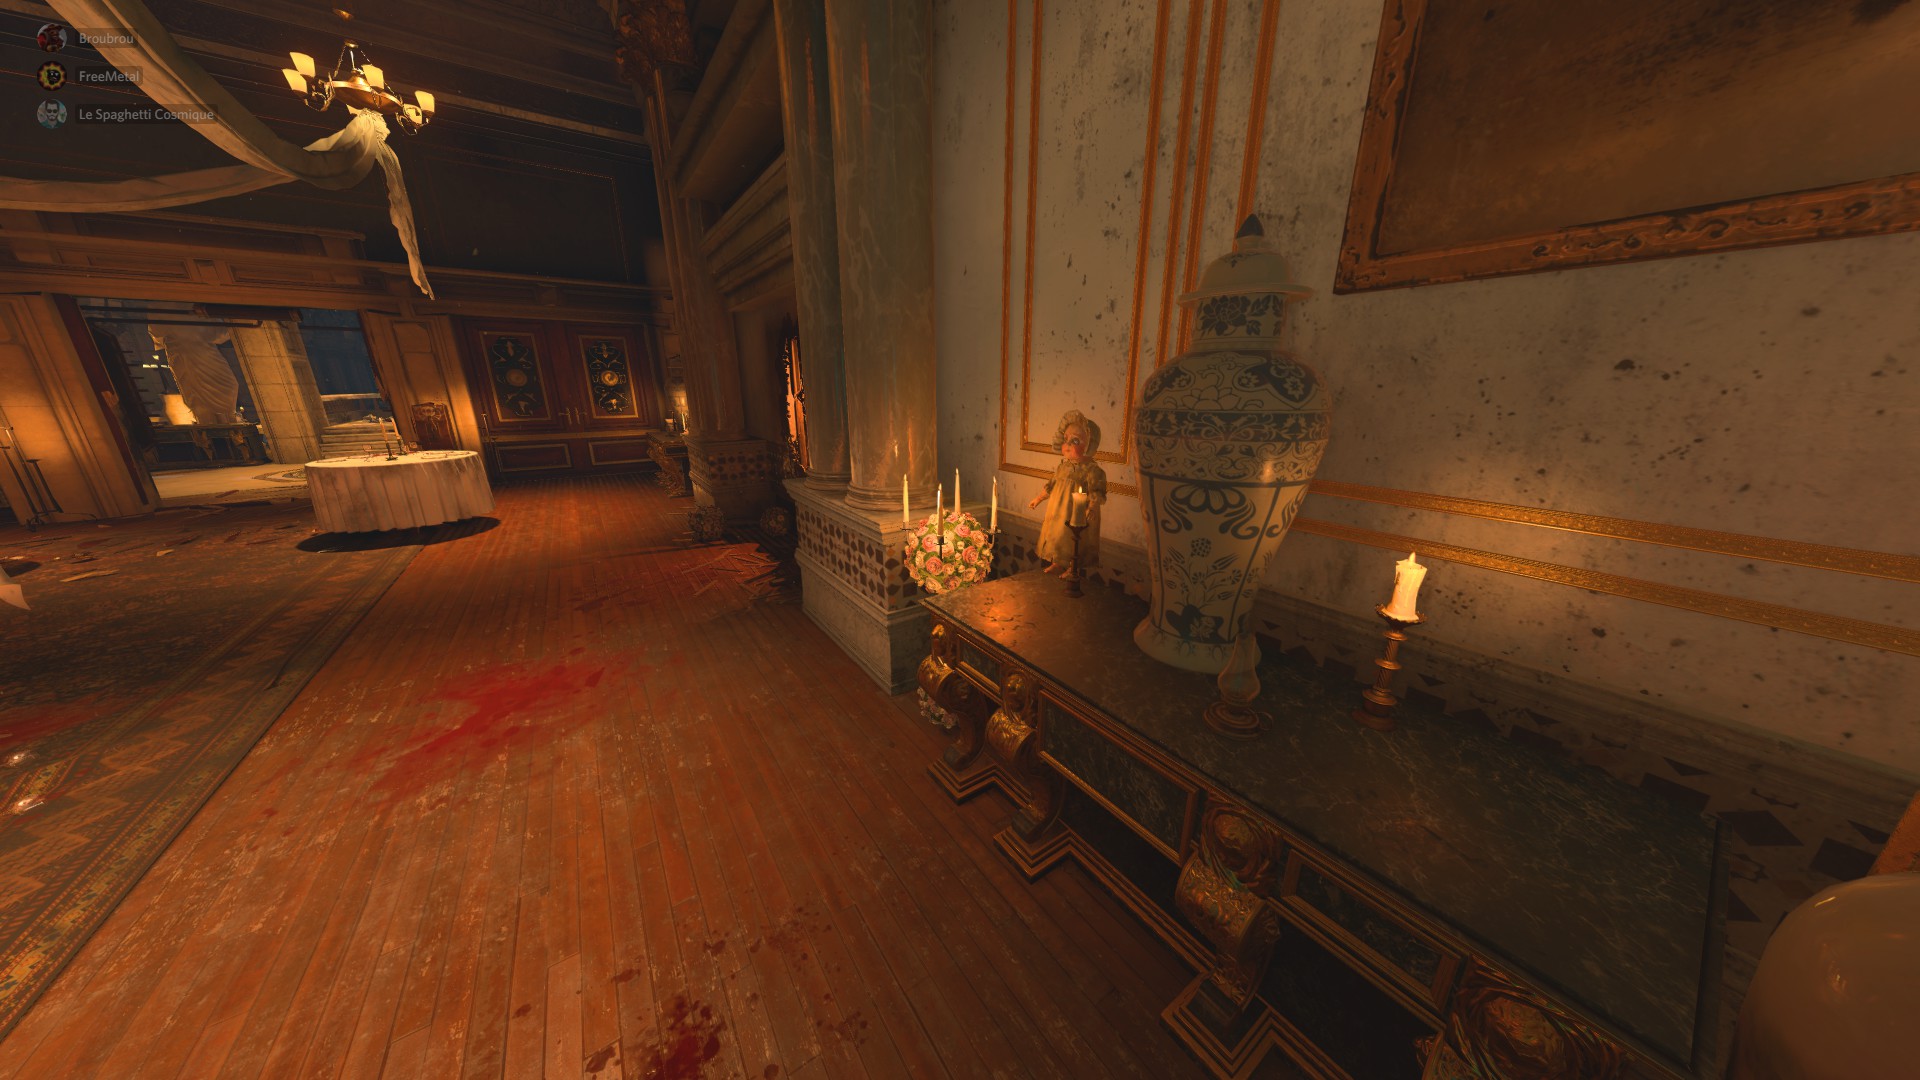
First and foremost, you must get to the Sentinel artifact. This works kinda like the power lever from the Aether maps, unlocking doors and stuff. It is located in the main hall balcony, simply open the 2 doors from the spawn to get to it.


Now, you must find three crystals hidden in jars and feed them with a few zombies. Each crystal has three different locations, if a jar has glowing particles floating away from it, knife it to reveal the crystal.

The blue crystal is located either:
  • On a table in front of the right stairs, in the Wine cellar


  • On a wooden crate next to a large barrel, in front of the left stairs, in the Wine cellar


The green crystal is located either:
  • On a table above the Library


  • On a desk next to a white statue in the Library


  • Or on a table next to a gramophone, on the left of the stairs in the Library


The purple crystal is located either:
  • On a table on your right when going to the Bedroom from the Spawnroom.


  • On a chest in front of the bed, in the Bedroom


  • Or on a table in the Trophy room, next to the Bedroom


Once the crystal has been fed with a few zombies, you can interact with it, giving you a little vision. An item will be shown to you, you will then have to find it to start a little quest. The goal is to go a Tuning fork from each crystals.


The possible quests are:
  • A Grandfather clock: There are three clocks in the map, you will be able to interact with one of them, find the correct one.


    - In the Main hall, next to the Mozu


    - In the Dining room


    - In the Billiards room


    Once activated a circle will appear, you must stand inside for about a minute. Zombies will appear. At the end of the timer, the clock will open revealing the Tuning fork.


  • A Doll: It is located in the Entrance room, next to the Danu Perk machine. Interact with it to trigger a ghost. Follow him until he stops and give you the Tuning fork.


  • A Painting:


    Simply find the painting you saw in the vision, interact with it and follow the ghost until he gives you the Tuning fork.

    Paintings are located:
    - In the East galery


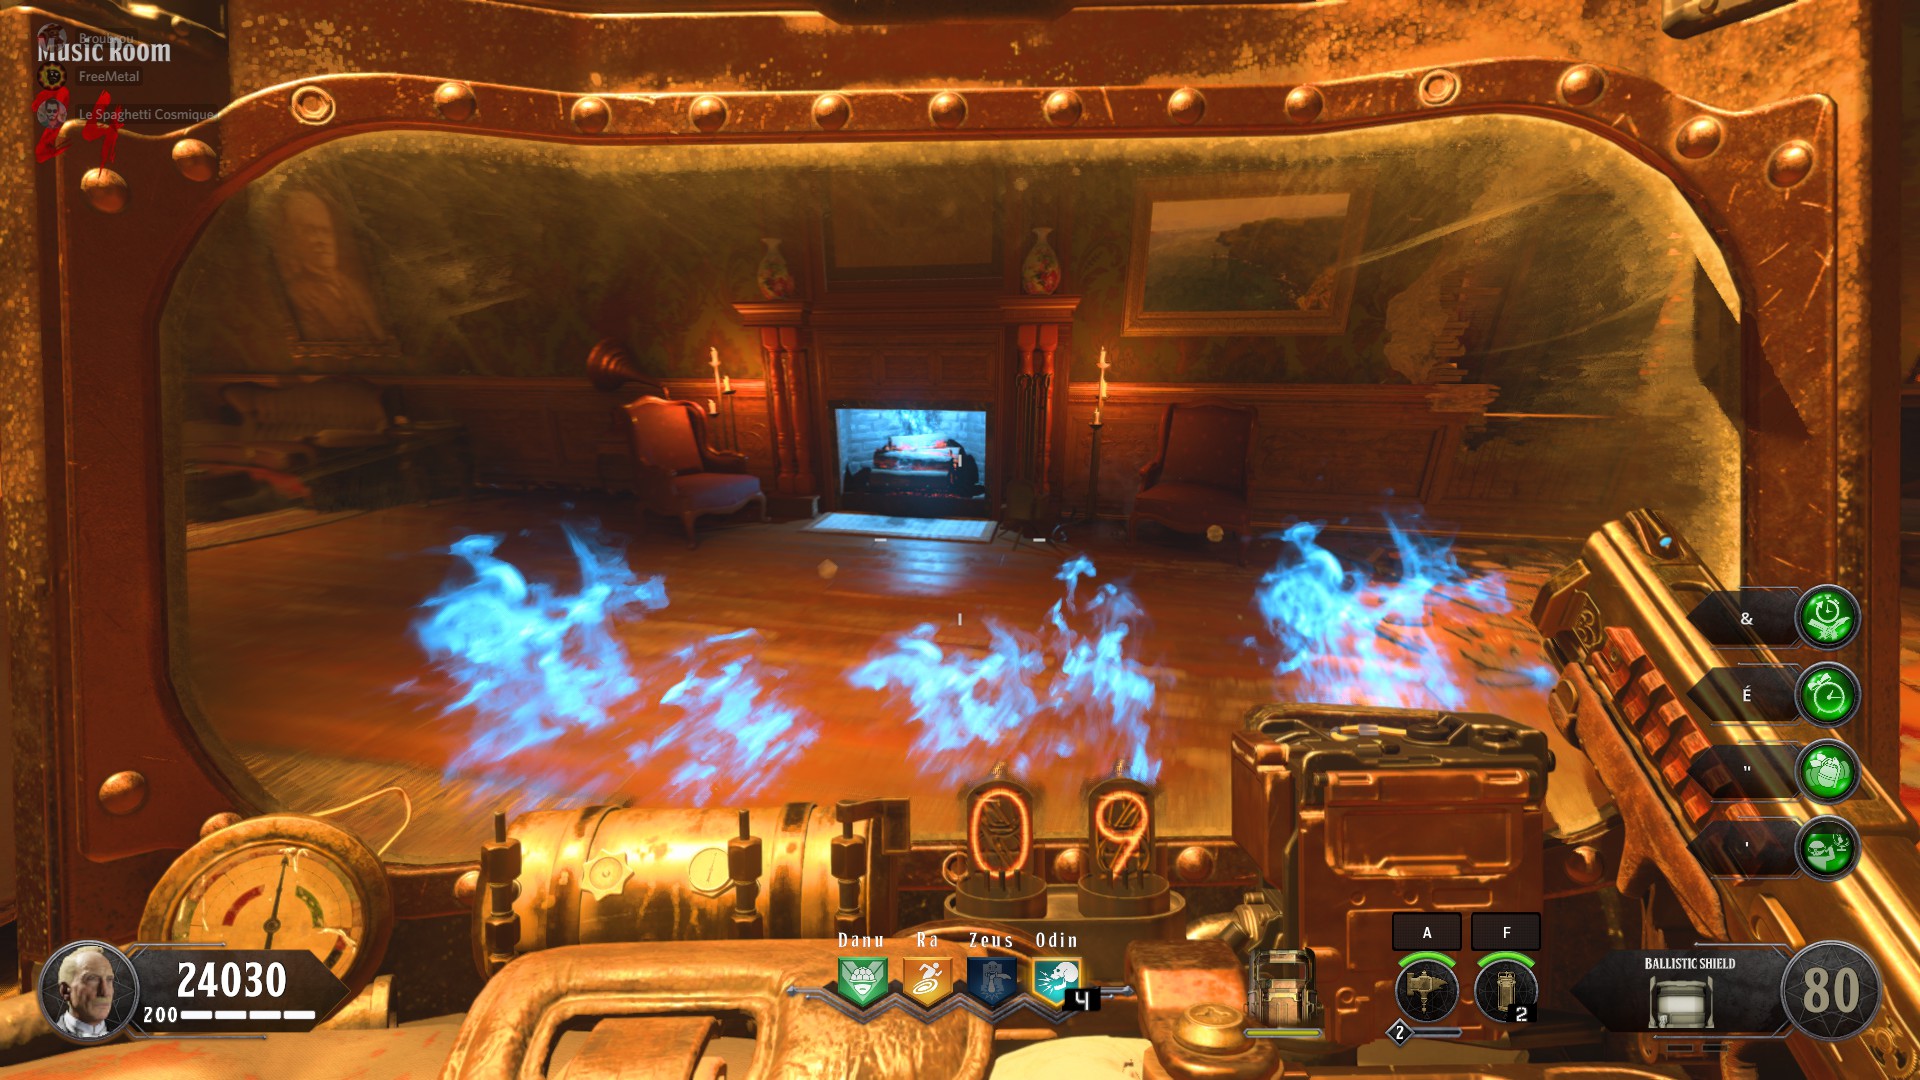
    - In the Music room


    - In the Lounge next to the Essex


    - In the Smoking room, on the right of the door leading to the Billiards room


  • A Perk machine:
    Find and approach the perk machine you've seen. Mist will appear as well as vampires. Once all 5 are killed, pick up the Tuning fork.


    Perk machines can be:
    - In the Entrance room, in front of the sentinel artifact
    - In the Wine cellar next to a barrel
    - At the back of the Graveyard
    - In the Gardens, on your right when coming from the Dining room


  • A Rope:
    Located in the Wine cellar, on a chair. Interact with it to reveal a ghost, follow him until he gives you the Tuning fork.


  • Alistair's testament:
    Go to the room above the Library. A small container on a shelf can be activated. Follow the ghost until he gives you the Tuning fork.


Now that you possess all 3 Tuning fork, head to the Forest terrace (Door is located bellow the spawn) and interact with the large Dark matter mass. Pack-a-Punch will be located at the very end of the newly opened Forest.


Note that doing this will summon a Zombie Werewolf.
Main easter egg quest
The goal of this quest is simply to retrieve the Sentinel artifact that has been activated during the intro cutscene and to tame the spirit of the Celtic Mythology, very present in this map. (Vampire, werewolves ..)

Pragmatically speaking, the goal is to complete three lines of quest, each giving you a key, to open the hidden door leading to the boss arena.

Dead of the Night's main easter egg can be completed from 1 to 4 players. You will need:
  • The Pack-a-Punch opened up
  • Silver Bullets crafted
  • One Alistair's Annihilator (For later stages)

First step:

In order to begin the quest lines, head back to the 3 crystals you used to open Pack-a-Punch and interact with them again. (Around Basement, Dining room and Library) You should see the three following items, a Knight armor, a Telescopic lens and a Wooden effigy.

Those items represents three quest lines that are independant, you can do them in any order, you just have to complete all of them to keep going.

You don't need to activate all the crystals yet, Blue crystal's activation unlocks Blue crystal quest line, etc ..


Second step - Telescopic lens quest line:


- First of all, every players must head towards the Graveyard and shoot an antenna that is on the roof of the Mausoleum. Players must shoot all at the same time with silver bullets.


If done correctly the antenna will disappear and a ray of light will burst towards the Mansion.


- In a second time, head to the North Atrium (Spawn area). You will notice three pannels you can interact with. Those pannels control the rings over the Atlas statue's head and you must use them in order to line them up correctly.


Fortunately the community figured out a very easy way to solve the thing quickly:
  • Turn the middle wheel on the left until the green light is lighted up
  • Turn the left wheel on the left until the blue light is lighted up
  • Turn the right wheel on the left until the red light is lighted up
  • Repeat these three steps in the same order until the puzzle is solved


If done correctly, the crystal at the center should be lighted up by all 3 colors and explode. The light beam will now be reflected towards the Greenhouse Lab lens.


- Third step will require some investigation. You will now need to locate 3 Zodiac symbols scattered around the map. There are 7 possible rooms, if the Symbol is not in a room, you can go to the next.

However if you find a symbol in a room, you will need to search in this very room for 3 scratching marks. You will need to count how much scratches there are for each marks and add them up to get a number you need to link with the Zodiac symbol you found.


I will now go throught the 7 rooms with their Symbol and 3 marks locations:
  • Billiards Room
    • The symbol is under the Chess table


      Scratches can be
    • On the wall, on the left of a wooden bookcase


    • On the wall, above a Cabinet


    • Under a table, on your gith when entering from Smoking room


  • Dining room
    • The symbol is on the right side of the doorframe leading to the outside, right next to a green couch


      Scratches can be
    • On the redish ceilling, at the bottom of the stairs


    • On the table, in the corner where you can find a Silver item


    • On the wall at the very opposite of the room from the Grandfather Clock


  • Entrance hall
    • The symbol is under the table on the left of Danu's perk machine and on the right of the Doll


      Scratches can be
    • On a the shield of the statue, on the right of Danu's perk machine


    • On the corner of the wall, on the right of the portal


    • On your very left when entering, above a painting


  • Library
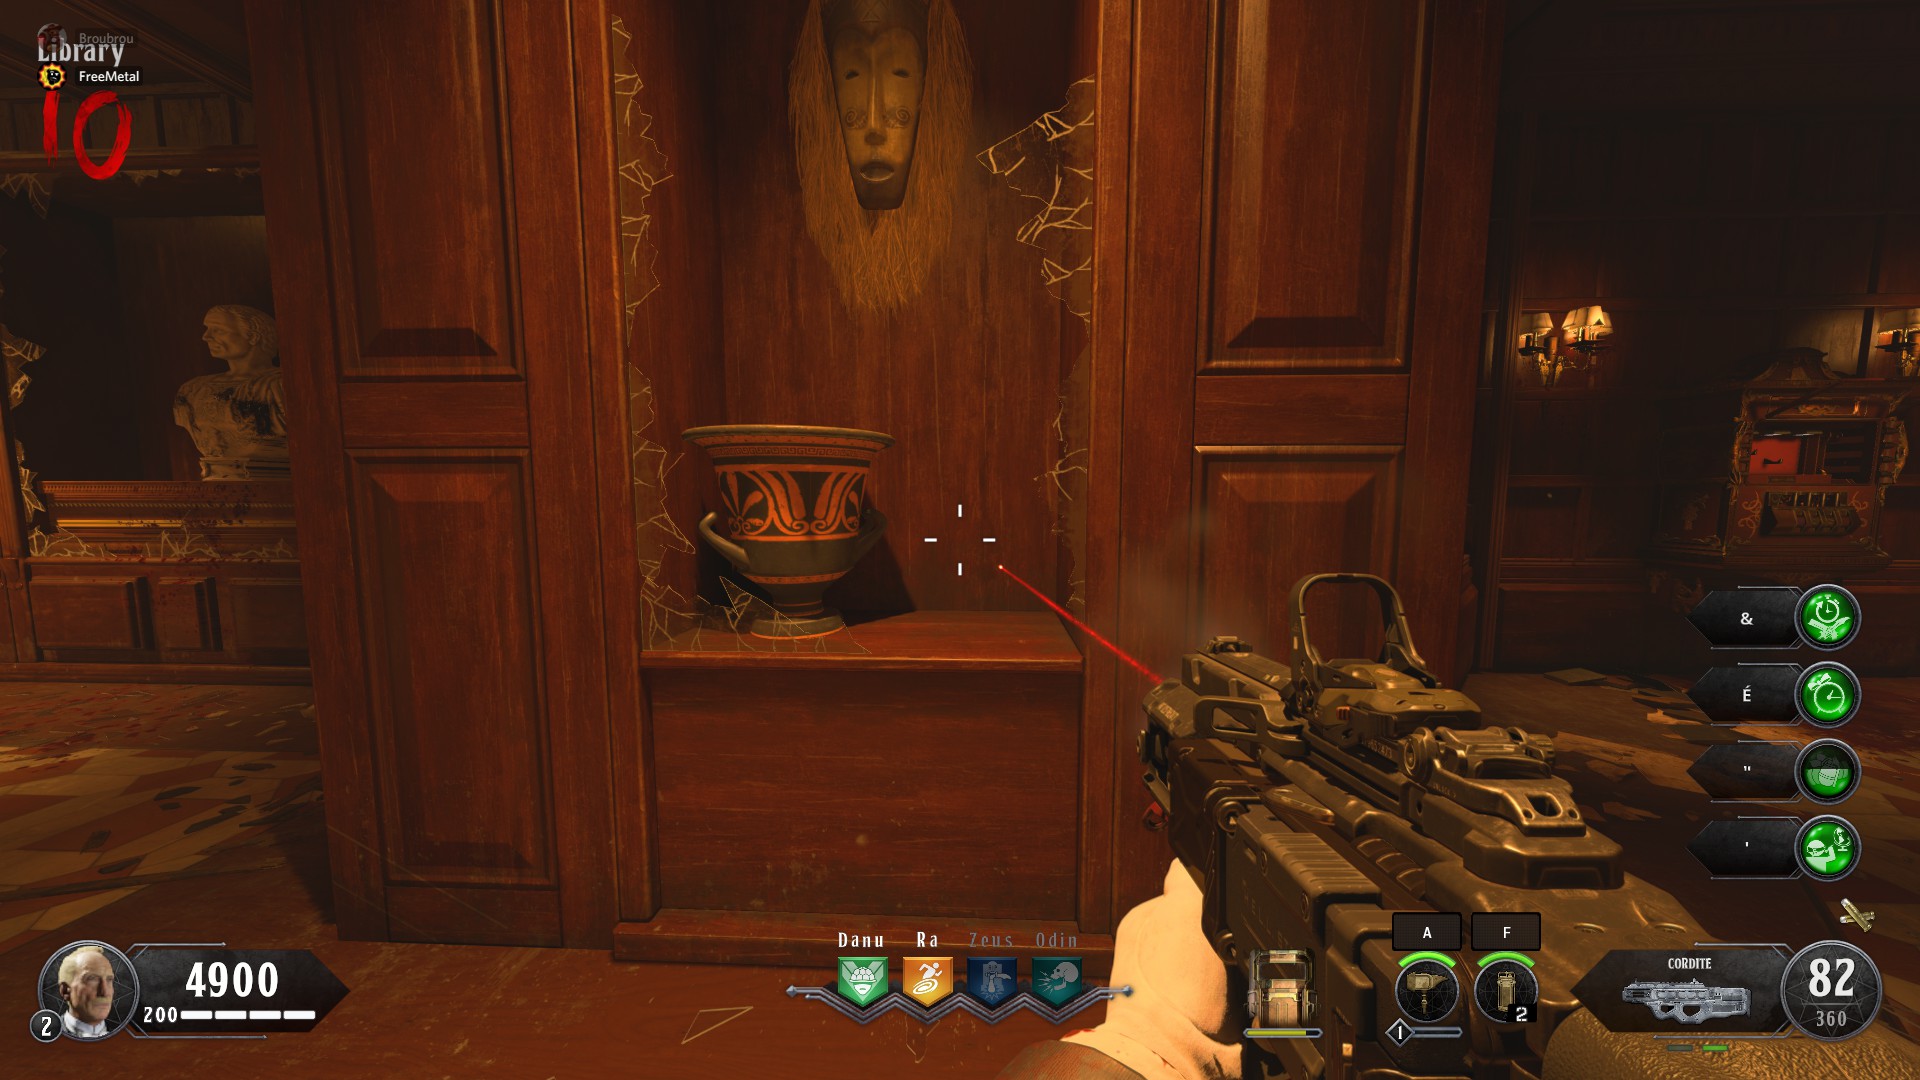
    • The symbol is inside a broken cabinet, on the left of Alistair's Folly case.


      Scratches can be
    • On the upper right corner of a window, on the left of the symbol


    • On a crate facing the zodiac symbol


    • On the stone tile next to the dinosaur skeleton's left foot


  • Main hall
    • The symbol is between two columns, at the bottom left of the western stairs, from spawn


      Scratches can be
    • Next to a statue in the fountain, on the right of the main stairs.


    • On the wall on the right of the grandfather clock, above the chimney


    • On the upper left corner of the wall, when coming from the Forest

  • Trophy room
    • The symbol is behind the right side of the closet at the far left of the room


      Scratches can be
    • On the left side of the chimney facing the symbol


    • On the table on the left of the bed, near a mask


    • On the green wall above a bathtub, behind a zombie window

Main easter egg quest - Part 2
  • Wine cellar
    • The symbol is at the bottom of a wine shelf, on the right side of the perk machine


      Scratches can be
    • On the front of the large barrel, near the right stairs


    • On the closet at your right when coming from left stairs but in the center of the basement


    • On a barrel near the workbench

- Pfew. Now that you've got your code, go to the Greenhouse Laboratory.

On the upper floor you will find a circular pannel. Over here, you must enter the three symbols you found, from the least amount of scratches to the most.


So if you have Libra 10, Gemini 4 and Scorpio 7, you will simply input Gemini - Scorpio - Libra.
Once the symbol is pointed, knife to confirm it.


If the code you entered is wrong, displayed symbols will disappear and all symbols and marks will change. Don't enter the wrong code.

If the code you entered is correct, symbols on the display will remain.

Take your shield in hand and interact with the crank next to you to open the roof. Once fully opened, bash the crank to hold it, otherwise releasing the "Interact" button will let the roof close again.


- Once done, activate the electrical trap of the Greenhouse Laboratory ground floor and have all players run throught it, shield in hands


Once all shields are charged up, run upstairs and bash the Telescope all together to fire a beam of light in the sky.

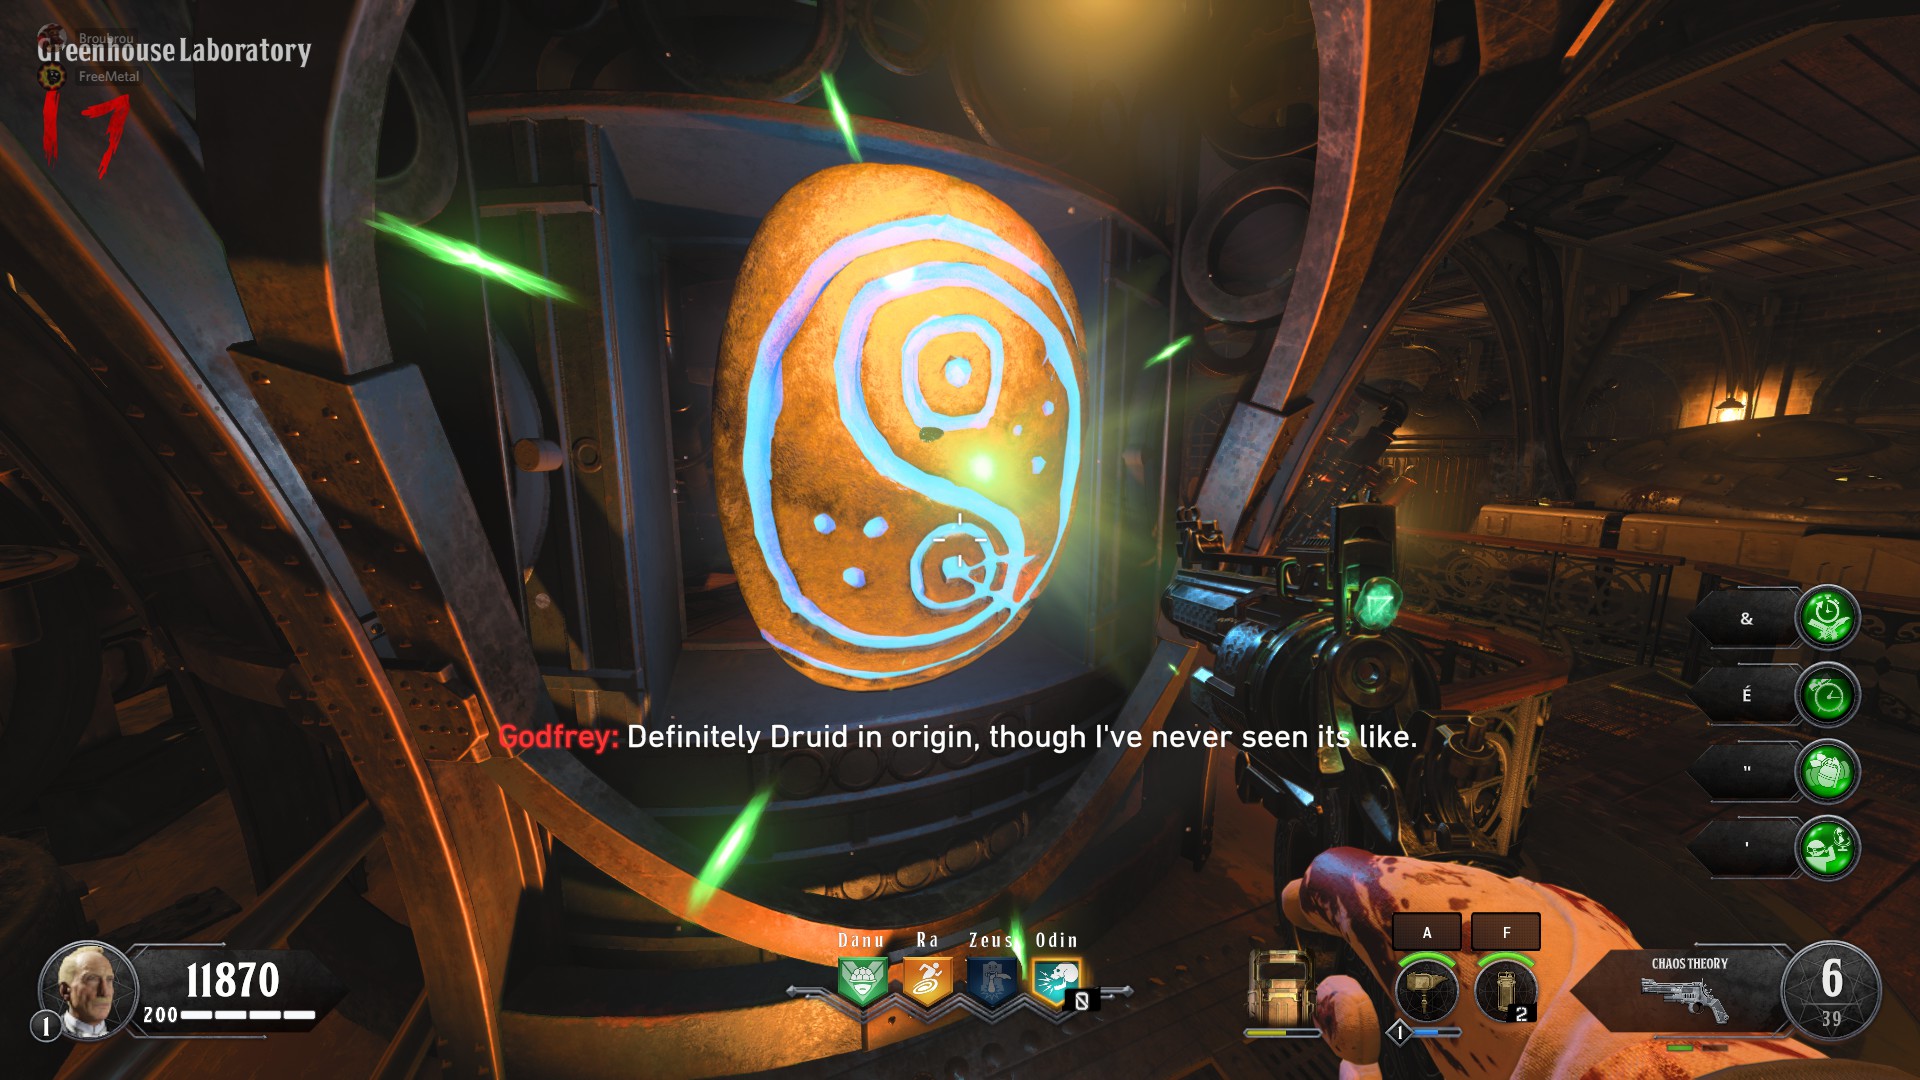
Go back downstairs, a hatch should open under the telescope, revealing a stone slab. Interact with the slab until it is pulled out from the closet.


Make sure to be geared up, when all players interact with the stone slab, a lockdown will begin. Survive zombies, vampires and werewolves in the Lab until the end. Pick up the stone slab and receive a free Max ammo.


Second step - Knight armor quest line


For this part of the Main quest, you will need the Alistair's annihilator wonder weapon.

- First of all You will need an energy core. Check "Equipment - Fire core" bellow.

Once in hand, you will need to put it inside a fire trap, people usually go for the one in the Library's doorframe. Activate the trap and shoot the flames with the Alistair's annihilator.

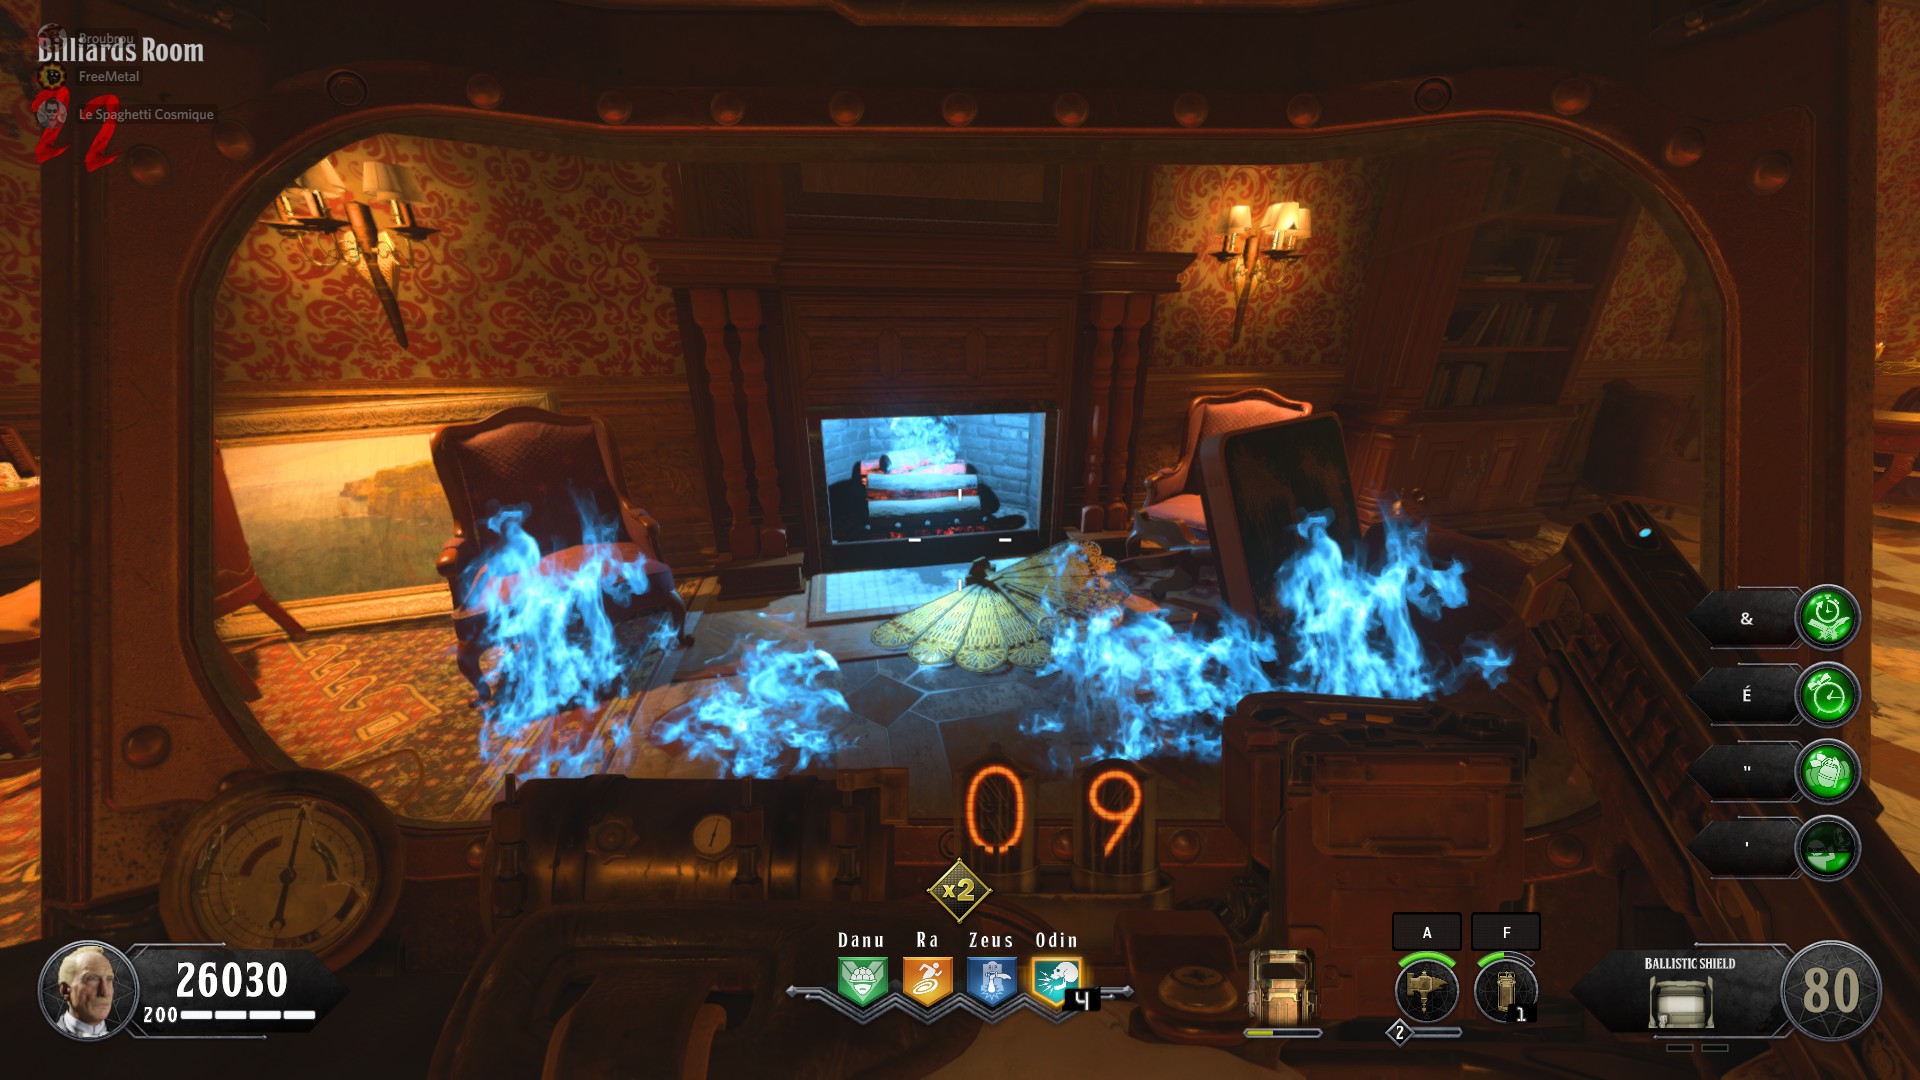
Flames should turn blue. Take your shield and run through the flames, you will need to shield bash 4 fire places in a particular order. The last fireplace will give you a crystal to pick up.


In total, you have 3 run of 4 fireplaces to do. So in the end, 3 crystals.

The order is:
  • First run: Smoking room -> Library (Down the stairs) -> Library (Other side of the door) -> Billiards room


  • Second run: Main hall (Next to Mozu's wallbuy -> East Gallery (Next to Strife's wallbuy) -> Main hall (Facing the Mozu's fireplace) -> West gallery (Next to Essex wallbuy)


  • Third run: Trophy Room -> Master Bedroom - > Music Room -> Dining room


You must obviously be quick after you ignited the first fireplace.


In a second time you must interact with three statues of Knight scattered around the map.

They are:
  • In the Mansion, between the Main Hall and the hallway leading to the Dining room.


  • In the Graveyard, right at the bottom of the stairs leading to the Mausoleum


  • In the Gardens, in a corner of the Greenhouse terrace


Upon interaction, a crystal will appear and follow you as long as you stay close to it. Bring it to the Forest, three circles on the ground will have appeared. Lead it the circle matching it's color.


Once all crystals are in place, three ghost knights will appear. Kill zombies close to them to make them move towards the Pack-a-Punch.


They will eventually meet there and form a triangle. You must kill a Werewolf inside this triangle, so a stone slab will appear.


All players must interact with the slab in order to start a ritual, simply survive until the end to pick up the second slab.


Main easter egg quest - Part 3
Second step - Effigy quest line


Head to the Graveyard area. 5 White trees will drop leaves from time to time. You must shoot the lowest branch to make it fall, then interact with it to let them build the effigy. Make sure to hit the trunk, sometimes the branch has no hitbox.


Once the 5 branches have been collected, search for a tomb marked with the date "1912". The player whose name is on the tomb can interact with it to enter a special mode.


Shoot the ground in front of the Effigy with the Alistair's annihilator's fire shot. Then, the player in spirit mode will have to interact with the Effigy while on fire. He will end up in afterlife, being invisible to other players but still targeted by ennemies. The player in afterlife must (again) locate a ghost lady hidden inside the Mansion. She can be behind windows or in perk machines so look carefully.


Once found, escort the ghost all the way back to the Effigy. She will eventually reveal the stone slab, all players must interact with it. Survive and pick up the slab.


Final step - Boss fight


Make sure to have ammo, perks, shield, silver bullets and weapons because there is no coming back.

Once ready, all players must interact for a few seconds with the stone gate in the forest. You uwill be thrown in the arena to fight an invisible Werewolf boss.


The boss fight is separated in three different stage, feel free to pick up Max ammo and Carpenter as more will spawn while going to next stages, if you picked the previous ones.

First stage: One of the tile on the ground will have a green light. You might have noticed in the corners of the arena, 3 statues casting a beam of light. You must interact with them to rotate them in order to cast their beams of light towards the green tlie. Once done, lure the boss on the stone tile, he will become visible and vulnerable. Attack him as much as you can.


If he manages to escape, repeat the process. When enough damages have been dealt, you will move on to stage 2.

Second stage: This time the boss will be gone and would have to "simply" survive against every ennemies the map has to offer you. Eventually, the boss will come back and you'll enter stage 3.

Third stage: Quite the same step than stage 1 but now the green tile is invisible. To reveal it, a beam of light from a statue must point it out. Once the boss is trapped, attack him again until he dies and the easter egg ends.


GG :)

Equipment - Ballistic shield
3 parts will be required to build up the shield. It works kinda like the old zombie shield, except you now have a gun attached to it and need to pay to get a new one, with an ever increasing price.

The crafting table is located in the Smoking room, upstairs next to the Billiards room.

The first part is located:
  • In the west balcony, bellow a stained glass window, next to the RK7 wallbuy


  • In the east balcony, against the stone fence, next to the Saug wallbuy


  • On top of the Grand staircase, leaning on a pillar, not far from the sentinel artifact.


The second part is located:
  • On a table next to the stairs in Study, the room above the Library


  • On a broken shelf at the right side of the Library, next to a chinese dragon statue


  • On a couch, at your right when entering the Library from the Main lobby


The third part is located:
  • On a chair in the hallway between the Main lobby and the Dining room


  • On the floor between the Swordfish wallbuy and the door leading outside, in the Dining room


  • On a shelf, next to the stairs going to the Bedroom, in the Dining room


Once all parts are collected, simply head to the crafting table and build the Shield. First time you equip it is free, it will increase more and more in price as you repair it / pick a new one.


Equipment - Silver bullets
You can use Silver bullets on your weapon in order to increase damage output, especially on Zombie Werewolves. You can also use this feature to purchase ammunition. The bullets are also something needed for the Main Quest.

In order to craft them you will need to find multiple items, 6 in total. The first 3 will be silver items you will have to melt.

The Candelabra is located:
  • In the Entrance Hall, on a table at your left when coming in


  • In the Billiards room, laying on the floor at your right when coming from the Smoking room


  • In the Main hall, on a stone edge between the Mozu and the stairs leading to the Bedroom


The Trophy is located:
  • In the Hallway going from the Main lobby to the Dining room. It is on the floor next to a couch


  • In the Dining room, on a table behind the Grandfather clock


  • In the Dining room, on the main table, in the corner next to the Swordfish wallbuy


The Plate is located:
  • In the Wine cellar, on the wall facing the Rope on the chair


  • In the Wine cellar, on the wall facing the Crafting table, in the other side of the basement compared to the Rope


  • In the Wine cellar, on the table right next to the Rope


Once you have collected all silver items, you need to go to the Wine cellar and melt the silver using the workbench on the left of the stairs. Don't forget to pick up silver after crafting it.


The 3 next items will let you craft the powder, required for the bullets:

The Charcoal is located:
  • In front of the fireplace in the Main hall, near the Mozu and on the opposite side of the Candelabra possible spot


  • In front of the fireplace in the Bedroom


  • In front of the fireplace in the Billiards room


The Guano is located:
  • Past the Graveyard, next to a tree in the Mausoleum area


  • In the Graveyard, at the left of the bottom of the left staircase leading to the Mausoleum


  • In the Graveyard, in a corner next to a street lamp, in the alley closest to the Mansion


The Sulphur is located:
  • In the Greenhouse Lab, at your left when entering


  • In the Greenhouse Lab, at your right when entering


  • In the Greenhouse lab, a bit further on the right side, next to Fly catcher plants


Once you have all of this, head to the Library and craft the silver bullets on the workbench. The first weapon you equip with silver ammunition is free.
Equipment - Traps
Dead of the night has 2 types of Traps.

Electrical trap: This one is the only of it's kind, it is located in the Greenhouse Laboratory and purchasable from the beginning.


Fire trap: These traps are most commonly on door frames. You will need to find an item called Fire core to power them, before being able to purchase them.

Fire cores are located:
  • In the Cemetery Path leading to the Graveyard, on a wooden bench on your right when leaving the Manor


  • In the Dining room, on a green couch next to the Swordfish wallbuy


  • In the Gardens, at your very left when coming from the Plaza downstairs of the Mansion.


  • In the Gardens, next to the Gazebo leading to the back entrance of the Greenhouse Laboratory


  • In the Graveyard, on the side of the area facing the Mansion, in front of a stone sarcophagus.


  • In the Graveyard, on the side of the area facing the Mansion, between a street lamp and a stone obelisk


  • In the Greenhouse Laboratory, on the ground in front of the fly-catcher plant


  • In the Greenhouse Laboratory, on the ground on the left of the workbench used to craft the Chaos Theory (it's written on it)


  • In the Main Hall, on a stone edge with glasses, next to the East hallway (going to Dining room)


  • In the Mausoleum, on the stairs on the left of the altar


  • In the Mausoleum, on a broken wall next to a statue, on the right back side of the place


  • In Music room, on the piano's bench


  • In the Smoking room, on a couch on the left of the Shield's workbench


  • In the Trophy room, on a red desk on your right when coming from Bedroom


  • In the Wine cellar, on a barrel between the Perk machine and the Crafting table
WonderWeapon - Alistair's Folly
Dead of the Night's wonderweapon is an Acid spitting pistol called the Alistair's folly. It can be obtained from the mystery box as well as from the Library after a quest i'm about to detail to you.

You must find 4 Symbols (Blue, Green, Red and Yellow), each one of them have 4 possible locations and can be 4 different symbols. (A-shaped, D-shaped, W-shaped or Z-shaped)

Once the code is found, you must enter it in the Library, bellow the case holding the Alistair's Folly. Funny things to note, it is possible to get the weapon if you randomly enter the right code. Also possible to have 4 times the same symbol. Symbols do change every games.


The Blue symbol is located in the East of the Manor:
  • In the Graveyard, on a tombstone on your right when entering the area from the left entrance


  • In the Graveyard, on the right side of the right stairs going to the Mausoleum


  • On the right side of the Mausoleum, on top of a crypt


  • On the left side of the Mausoleum, on the base of the Lion statue


The Green symbol is located in the West of the Manor:
  • Behind a gate next to the Terrace in front of the Greenhouse Lab, on the left when coming down from the Mansion' stairs.


  • Inside a circular building, between the Garden's perk machine and the Greenhouse Lab.


  • In the Gardens, on a house behind a gate, on the left of the Perk machine


  • In the Gardens, on a stone fence behind a gate, on the right of the Perk machine


The Red symbol is located in the Mansion itself:
  • In the Master bedroom, on the right side of the fireplace


  • On the wall of the staircase connecting the East gallery to the Main lobby


  • In the Wine cellar, on a wooden barrel outside the window on the right side of the basement


  • In the Dining room, on a wall behind the bar, at your left when coming from the Main lobby hallway


The Yellow symbol is located in the South part of the Map:
  • Around the Forest entrance, on the left of the Bowie knife wallbuy, on the Mansion's wall


  • Around the Forest entrance behind a metal gate, on the right side of the Bowie knife wallbuy


  • Around the Forest entrance, on the right side of the GKS wallbuy, on the Mansion's wall


  • Around the Forest entrance behind a metal gate, on the left side of the GKS wallbuy


Once the correct code is in your pocket, go back to the Library and enter the symbols. Aim a bit upwards to validate it. If correct, the case will open.
WonderWeapon - Chaos Theory (Upgraded Alistair's Folly)
The stage 2 of Alistair's Folly, the Chaos Theory will grant you the ability to charge shots for 3 ammunition. This will either create a green pool stunning zombies for a time before killing them or a blueish tornado quickly dispatching the hordes.

Two parts will be needed to upgrade the Wonder weapon.

To begin with, you must kill a zombie werewolf with silver bullets. He will drop the Chaos material, a weird looking black and red shape. Pick it up.


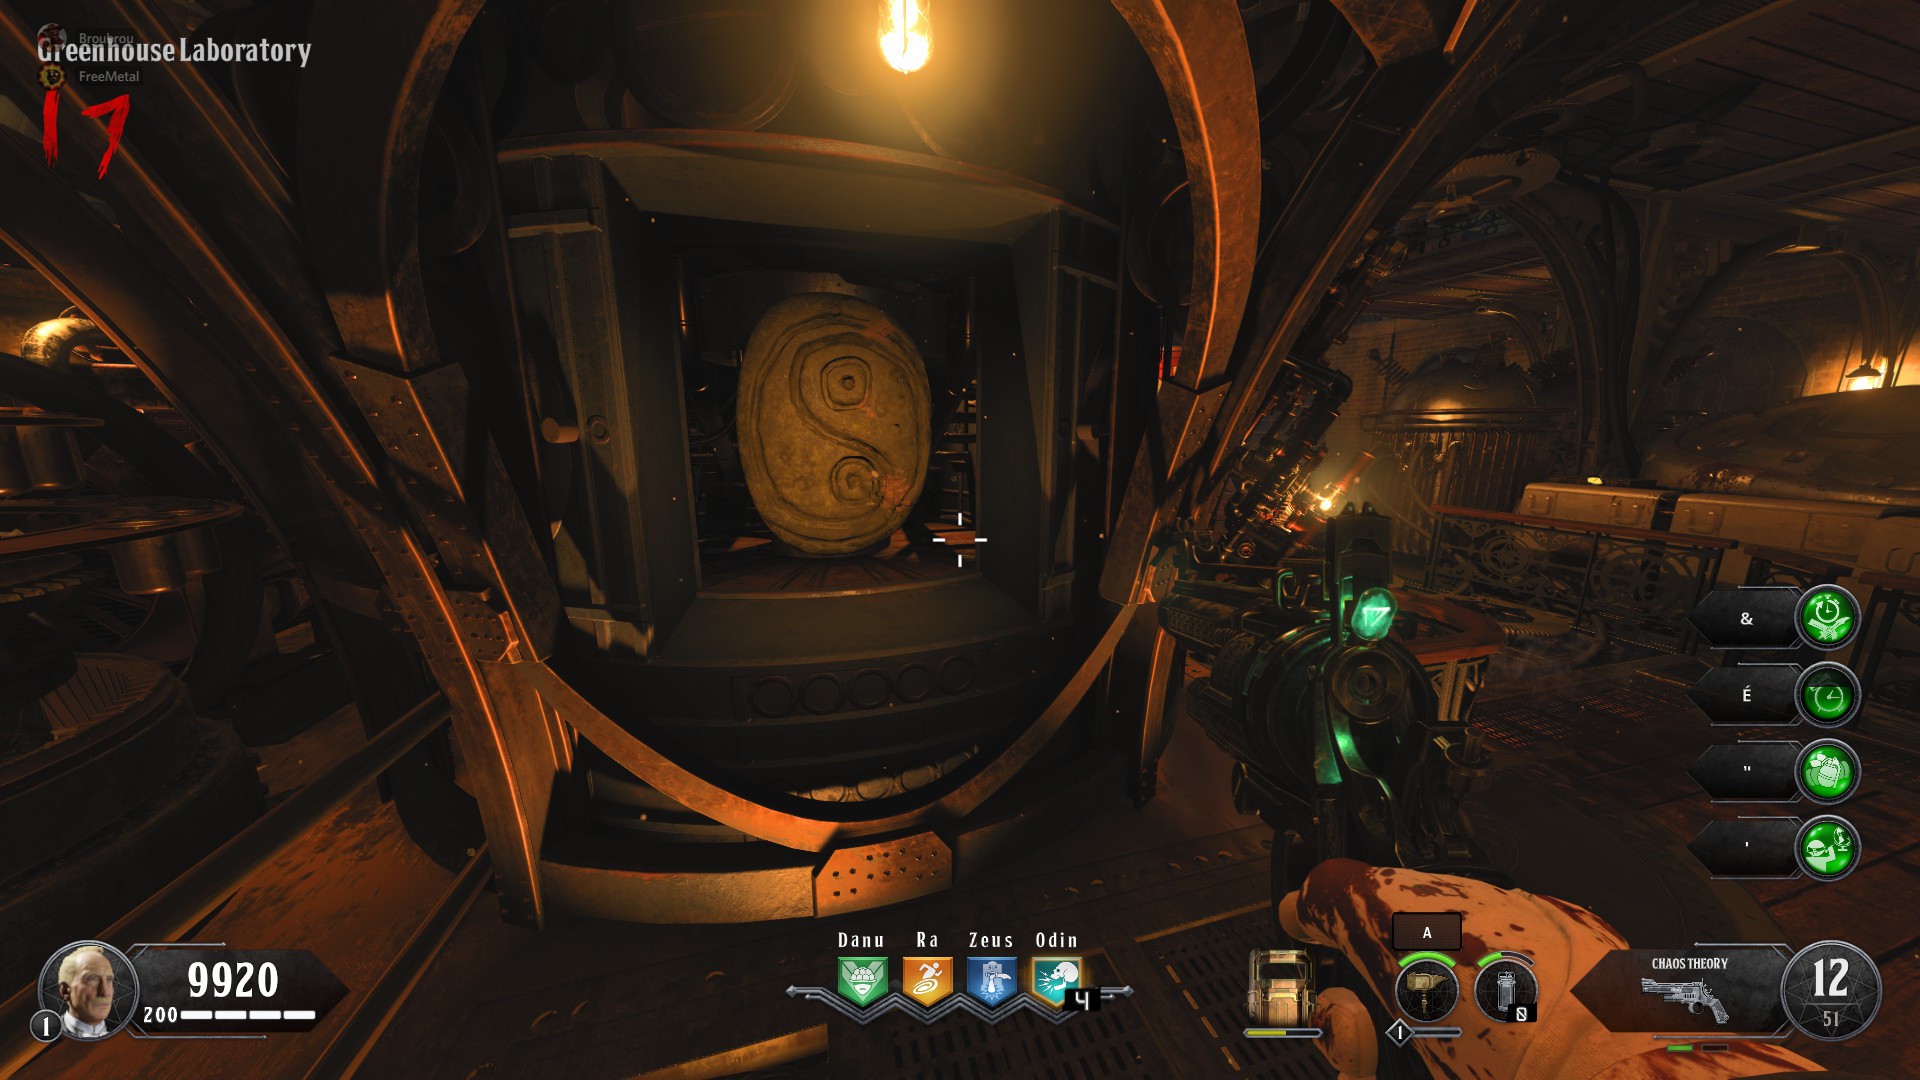
Head towards the Greenhouse Laboratory and place the Chaos material inside Alistair's machinery in the middle of the room. After a short time, pick up the Prima Materia on the side of the machine that just opened.

*P*

Now head to the Library with a Shield in hand. On the left side of the room there are a few bookshelves. Punch the very different looking one with your equipment to reveal the second part to pick up.


Run back towards the Greenhouse Laboratory and craft the Chaos Theory on the workbench at the back right of the building.

WonderWeapon - Alistair's Annihilator (Upgraded Chaos Theory)
The final stage of the Alistair's folly, Alistair's annihilator, will give you a scope as well as two new other charged shots.

One creating a green Portal on the ground, shrinking to death incoming zombies, the second one a red fire ball burning your foes.

The first step is to go to the Mausoleum, there is a handful of lamps on the stone fence between it and the Graveyard. One of them is glowing orange instead of yellow. Shoot this one with the Chaos Theory. The lamp will change color and another lamp will go Orange, shoot it.


At some point, shooting an Orange lamp will instead trigger the apparition of a Bat that will try to fly away. Shoot it with the Chaos Theory, it will release the Bat Chaos Materia.


If you struggle to shoot the lamp or the bat in time, you will be able to retry about a minute later.

The second step will ask you to kill a few vampires with the Chaos theory to pick up the Bile they will drop.

(Ignore the white circle on the gronud in the screenshot)


Once you have 4 shots of Bile, go to the Graveyard and interact with the large Tomb in front of the left entrance. A Nosferatu will appear, kill him to pick up the Nosferatu Chaos Material.


In a third time, you now need to go to the Forest. You might notice small dirt piles with blue Mushrooms on it. You must shoot a zombie with the Chaos Theory while he is standing on it (or very close). If the green shot landed, the zombie will now dig up for you. One of the three mounds will reveal the part.
Make sure to shoot the zombie, not the ground.


Finally, head back to the Greenhouse Laboratory. Place the Bat materia on the machine then pick the result back up on the other side. Do the same with the Nosferatu materia. Then, head to the workbench in the back left of the building to craft the weapon.

Secret equipment - Stake Knife
This is a secret melee weapon, not that easy to obtain but very effective. It does one shot zombies until round 26 and one shot all Nosferatus and Crimson Nosferatus.

To begin the serie of steps unlocking the Knife, begin by going to the Forest.

Find the tree with a lantern on it, in the left path going down the Pack-a-Punch, around the Koshka wall buy.

If you look at this tree from it's North-West perspective, you'll notice that the lad has an elemental symbol on it. You will also notice that three other tree in the background have symbols.

While facing the tree with the lantern, read and remember the code seen there, from left to right. It changes every game.


Symbols are actually the Alchemical symbols of Air, Earth, Fire and Water. They are triangles basically.


In a second time, head to the Gardens, near the Greenhouse laboratory, in the Eastern part of the map.

4 Stones tiles are hidden there, each of them have one of the 4 symbols you spotted earlier. You need to shoot the tiles in the same order you red the code.

Be careful because if you shoot the wrong tile, you will not be able to get Stake Knife anymore for this match.

The tiles are:
  • Bellow the Gazebo window at the entrance of the Gardens, facing the Mansion


  • On the left side of the Vapr-XKG wall buy, in the Gardens


  • In the fountain on the right side of the Perk machine, in the Gardens


  • On the stone fence, on the right of the path in the Gardens, on your right when facing the Perk machine


If done correctly, the character should talk and a sound should play.

Third step requires you to buy the Bowie knife. Go back to the forest, there is a tree slightly downwards compared to the tree with lantern you used previously. This new tree has the 4 symbols on it. Knife them in the same correct order. If done correctly, a scratch should appear.


Now bash the 4 symbols with your shield in no particular order. A crack should be heard and a branch should fall. Pick it up


In a fourth time head to the Mausoleum and place the branch on the altar, facing the perk machine. Now you'll have to slain around 10-15 Nosferatu to feed the branch. Once over, it will glow red.


Finally, just craft the Stake knife on the workbench in front of the left Cemetery entrance.

Secret equipment - Savage Impaler
Twin crossbows, the Savage Impaler are actually looking pretty much like the NX Shadowclan from Black Ops 3, in terms of in game model. They are great against zombies even in high rounds and they shred nosferatus pretty fast as well as Werewolves In order to get them tho you will need to go through a little journey i'm about to tell you about.

First and foremost you must blow out 6 candles located in the Mansion by knifing the tip of the flame. They are located:
  • In the East galery, on a table in front of the Strife wallbuy


  • In the Music room, on a table facing a couch and a large painting


  • In the East hallway, going from Main lobby to Dining room, on a red desk


  • In Alistair's Bedroom, on the bedside table


  • In the Basement, on a wooden bench at the bottom of the western stairs


  • In Study, the Library' second floor, on a table at the very right of the top of the stairs


Each time a candle is blown, an audio cue should play.

For the second step, head to the bottom of the forest.

A few meters away from the right side of the pack-a-punch should stand a tombstone, with clouds emanating from it. Interacting with it will let you enter a special state where all zombies will chase you. This is made clear by the redish effect on your screen. This state will remain a couple of minute, in order to reactivate it, you will need to interact with the tombstone again.


Each player can access this mode only once per round.

While in this mode, the player needs to spot a Ghost lady somewhere in the Mansion. She is usually waiting outside the map, in rooms such as Music, Dining, Bedroom, Entrance Hall , Greenhouse Lab ... Make sure to check zombie windows as well.


Once found, approaching her should make her move. Now you must escort her all the way to the Mausoleum. This may require multiple activation of your zombie-blood-like state.

Once arrived, the ghost should be visible by every players. The third step can begin.


The ghost will now possess one zombie (Spotted by his light blueish mists around his body) and you will have to kill him in a special way, in order to make him drop an item. If killed the wrong way, the ghost will simply possess another one until you do the right thing.

  • First zombie must be killed with regular weapon
  • Second with Fire ( Wraith fire, Traps ...)
  • Third with Specialist weapon (Scepter of Râ, Hammer ...)
  • Fourth with Balistic shield


Make sure to pick up the item dropped by each zombies, or the ghost will just be waiting.


Now that you have the 4 items, circles will have appeared inside the Mausoleum. Place in there the 4 items, a large circle should appear.


This is almost over !

Now you must kill around 8 nosferatus, in the white large circle, until the circle goes blue.


Then, rush down the right stairs going back to the Graveyard and interact with the Tomb at your very right. If done correctly, the Crypt will open and you will be able to pick up the Savage Impaler at the end.


If you are unsuccessful at opening the crypt, simply kill again a few Nosferatus in the circle.

  • When you pick up the weapon, you'll be locked underground until you killed all incoming Nosferatus.
  • Only one player can pick up this Savage Impaler, it will now be obtainable from the mystery box for the other ones.

Side easter egg - Hidden room 1 - Billiards pool
You can open a secret closet in the Billards room, giving free points, an elixir, or a weapon.

To do so, simply push every balls into holes, in the correct order. From 1 to 9. Balls will always have the same colors, 1 Yellow, 2 Blue, 3 Pink etc ..


Side easter egg - Hidden room 2 - Wine Cellar
In the Wine cellar area you might notice 6 leaking barrels, they are easily spotted. They do leak at different speed from the front. You must knife them from the fastest leaking to the slowest.


If done correctly, a secret room shall open, possibly hidding free silver bullets.

If wrong, you won't be able to open the door in this game.

Side easter egg - Hidden room 3 - East & West gallery
In the first areas you'll open, respectively the Eastern AND Western gallery are two bookshelves.

On each of them, there are 2 books with a symbol on the cover.


You must interact with the 4 books in the following order:


Side easter egg - Jump scare
Useless to do but funny to see, you can find a jump scare even in the map. To trigger it, simply interact multiple times with a crystal from the Pack-a-Punch quest.


Side easter egg - Secret music
The secret song of this map is Mystery from Kevin Sherwood and Elena Siegman.

To activate it you must shoot 4 coins hidden within the map. They are located:
  • In the Main Hall, bellow the table right in front of the Mozu's wallbuy


  • In the East Hallway, behing the right door of the Dining hall, next to the desk with the candle


  • In the Wine Cellar, inside a broken barrel, behind the bench with the candle


  • In the Library, on top of the Egyptian statue, easily spotted from the balcony


https://www.youtube.com/watch?v=SzdJB5Li_DU&feature=em-uploademail
Gauntlet - Super Blood Wolf Moon
Gauntlet is a special gamemode where each round from 1 to 30 has a special rule that you must play with.

You can view it as a puzzle mode for the map, this is another challenge compared to high rounds survival or main quest completion.

Each waves will always be the same for everyone, so here is the full list with a few tips for each one.

If you fail a wave, it restarts and you get a mark. At 3 mark the game ends.

I recommend you read throught the rounds before starting in order to adapt your loadout, for instance i recommend you to start with the RK7 or Strife, to save a few points at round 5.

Things you might wanna set up as fast as possible and things you need absolutely to prepare / keep:
  • Shield (Technically not necessary but very handy for the whole match)
  • Alistair's folly, Chaos theory and Alistair's annihilator (Not necessary either but you know, wonderweapons save lives)
  • Bowie knife or 4000 points for round 8 (Forest terrace door + Bowie knife)
  • Silver bullets (Very handy at round 9)
  • Pack-a-Punch (Very handy and needed by round 12)
  • Pack-a-Punched Koshka or 9500 points by the end of round 12 (Koshka wallbuy + Pack-a-Punch)
  • Stake knife by round 13
  • Having an un-packed tactical rifle for round 16
  • Savage impaler by round 18
  • Having an un-packed sniper rifle for round 24
  • Have less than 1000 points by the end of round 28
  • Have Auger DMR or ICR-7 packed or not by the end of round 29

Rounds and tips you should read before playing otherwise you'll be badly surprised:

1 in solo, 8, 9, 11, 12, 13, 17, 18, 20, 21, 22, 23, 24, 28, 29 ,30

  • Round 1: Power Up! - Activate the Sentinel Artifact.

    Trickier than you think in solo play, as there are very few zombies. You need to get 500 + 750 points to open both doors.


  • Round 2: Hat Trick - Kill Zombies with 3 Unique Weapons.

    Weapon, knife and equipment should work just fine. Remember tho that if you have the Strife with the Stiletto knife, pistol and knife will count as the same weapon.


  • Round 3: Pool Party - Sink all the Billiard Balls.

    It is obviously located in the Billiards room, when facing the Sentinel artifact and Main lobby, go to the left side. Shoot or grenade the balls. You can do this easily during round 1.


  • Round 4: Board Silly - All Boards Must be in Place at the End of the round.

    Don't open extra doors before this round, this way you should have 2 in each side of the spawn area, 1 in the Music room and 1 in the Smoking room.


  • Round 5: Piss Around - Use Unpacked Pistols Only.

    Strife or RK7 will work very well. You might wanna pick them in your starting loadout.


  • Round 6: Stay Down! Weapons Can Only be Used While Prone.

    Quite an easy round, just try to not get cornered as you wouldn't be able to prone and would be basically defenseless.


  • Round 7: Unfriendly Dinner - Defend the Dining Room While Avoiding Friendly Fire.

    No matter the number of players in the game, bots will appear to fill the crew to have 4 players. They tend to burst their shots everywhere so i recommend you stay in a corner of the room, preferably the one next to the stairs leading to the bedroom. (Stairs you should keep closed until this step)

    If they are downed, don't revive them.


  • Round 8: BowDie -Bowie Knife Kills Only.

    Save 4000 points for this round so you can open the door and purchase the knife. Hopefully money will flow back faster during this round


  • Round 9: Be-Were - Survive the Werewolf Onslaught.

    More Werewolves will spawn depending on the amount of player, there are 5 in solo play. Silver bullets aid a lot obviously otherwise you will just need to shoot more.


  • Round 10: Corner Pocket - Defend the Billiard Room.

    Pretty easy, keep your equipment (Preferably wraithfire) and your specialist weapon for this one. They should give you a lot of easy time, just finish the few ennemies left after that with whatever your weapons are at this point.


  • Round 11: Ranger - Move Less Than 100m During the round.

    Easiest way might be to go to the Smoking room, just next to the Billiard room you should be around from last step. Stay in the corner where the shield crafting table is, is probably the best way. Danu perk machine in the Entrance Hall is also an easy place.


  • Round 12: Packoshka - All Players Must Possess a Packed Koshka by the End of the round.

    Forest must be opened, Koshka wallbuy and pack-a-punch are there. You might get the weapon from the box for a much smaller price, but i would preferably for the safe way, keep 9500 points.


  • Round 13: Stake in the G* Round - Get 25 Kills with the Stake Knife.

    Hopefully you got the knife before this round begins so you'll just have to knife a few zombies.


  • Round 14: Muzzle Flesh - Zombies Only Appear When You are Shooting.

    This one shouldn't be that much of a problem if you make sure you have ammo and you shoot once in a while when running, to reveal eventual zombies blocking your way.


  • Round 15: Green Thumb - Defend the Greenhouse Laboratory.

    A trap is available in the building. Shouldn't be a problem to defend here, especially if you have the Wonderweapon.


  • Round 16: Tactical Error - Use Unpacked Tactical Rifles Only.

    Essex for 500 points in the West gallery, Swordfish for 1400 points in the Dining room, ABR from the mystery box or Auger DMR in the Mausoleum. Safest way should be to go for Essex or Swordfish. Loading silver bullets might help as well


  • Round 17: Debit or Credit? - Kills Drain Points. Damage and Death Points are Disabled for the round.

    You will only loose money during this round so make sure you bought everything you really need before starting the kiling ...


  • Round 18: Cross Eyed - At Least One Player Must Possess the Savage Impaler by the End of the round.

    Unlike the Stake knife, you only need to have this weapon by the end of the round, so you might (especially in coop) keep a zombie to finish whatever step you didn't already do. Best scenario is to have the impaler already in your pocket.


  • Round 19: Phantom Pain - Stay Close to the Ghost or Take Damage.

    Perks like Quick-Revive or Dying wish can help you survive longer if you are forcer to move away from the ghost. You will slowly take damage. Wonderweapon helps a lot.


  • Round 20: Put a Cork In It - Defend the Wine Cellar.

    Not very hard with your wonderweapon, specialist weapon and stuff. Just keep in might that there is very little space or maneuver.


  • Round 21: Perk Drunk - More Perks. More Blurry Vision.

    Having more than 2 perks makes your vision VERY blurry but it's still rather decent in the center so, you could definitely survive with 4 perks. It looks like this:


  • Round 22: Stock Crash - All Weapons Only Have One Ammo Clip.

    Round is not that long actually. Try to abuse shield pistol, specialist weapon with faster recharge Elixir and Wraith fire. You'll have only 4 charged shots of Alistair's Annihilator but once you've packed the zombies, one shot should clear a lot of them. Try to keep the Savage impaler for the Werewolf to shred him with less than a clip. You could always equip Mule Kick in your loadout to mitigate the difficulty of this.

Gauntlet - Super Blood Wolf Moon - Part 2
  • Round 23: Cursed - Vampire Bites Will Slowly Kill You.

    To be fair i didn't catch the difficulty of this round. I was in the corner of the Shield with Specialist Weapon / Wraithfire and Alistair's annihilator, ended the round without problem.


  • Round 24: Scope It Out - Use Unpacked Sniper Rifles Only.

    Koshka is probably the best choice, find some place where you can easily train, like Main lobby and slowly go throught the round.


  • Round 25: Mousetrap - Defend the Mausoleum.

    Much easier if you have the Annihilator, it's a rather tight area for that much ennemies, but you'll get it done rather easily.


  • Round 26: Re-Roll - Active Perks are Randomly Replaced. Perk Altars are Disabled for the round.

    Your perks are replaced only for the round. If you can get Stone Cold Stronghold, just camp in a corner with the Wonderweapon.


  • Round 27: Nosferatu - Survive the Nosferatu Onslaught.

    This round is actually easier than what it sounds, there is a lot of normal zombies and only a few Nosferatus. It's not a full vampire round. Again, not much tips for this, survival is easy with Alistair's weapon.


  • Round 28: Bankrupt - Have Less Than 1000 Points at the End of the round.

    Make sure you keep a few zombies left alive, buy a weapon from the wall (preferably an expansive one like the Kohska) and repeat the process of shooting a bullet, reloading and buying ammo. You could also buy shield or mystery box but it might be much slower.


  • Round 29: Re-Possessed - Possess the Auger DMR and ICR-7 (Packed or Unpacked) by the End of the round.

    Auger DMR is 1600 points in the Mausoleum and ICR-7 is for 1550 points in the Greenhouse Laboratory. Again, if you have the Alistair's annihilator, replace your second weapon with the Auger / ICR then replace the wonderweapon at the very end of the round. Mind Pack-a-Punching one of the two weapons for next round.


  • Round 30: The Main Event - Defend the Main Hall.

    Lot of zombies, one Werewolf at the end, this is quite easy. You can use Shield, Equipment, Specialist weapon and Elixirs ... Easier if you could have the ICR / Auger packed beforehand.

Achievements
Alchemical Opus:
" In Dead of the Night, create Prima Materia 3 times. "

You will need to get the Chaos material from a Bat, a Nosferatu, and a Werewolf and bring them to the Greenhouse Laboratory. For more clarity, read through the part "WonderWeapon - Alistair's Annihilator" above


Board Gamer:
" In Dead of the Night, kill a Werewolf in the Library with a revolver. "

Alistair's folly, Mozu or Welling are your choices to do this. The first is the one you should go for as it is the best revolver pistol. Read the part "WonderWeapon - Alistair's Folly" above


Master Your Craft:
" In Dead of the Night, use every crafting table. "

You will need to craft the Ballistic shield, the Silver melter, the Silver bullets, Alistair's Folly, the Chaos Theory, Alistair's Annihilator and the Stake knife ... See all corresponding parts above for an easy way to go !


Mega Bite:
" In Dead of the Night, get bitten by a Crimson Nosferatu. "

You need to receive damage from the Crimson Nosferatu' special leap attack. To spawn such ennemy, read through the part "WonderWeapon - Alistair's Annihilator". Otherwise, they spawn on their own around round 30.


On The Clock:
" In Dead of the Night, stay within the clock circle until the time runs out."

Complete the Grandfather clock trial without leaving the circle, see "Preparation - Accessing Pack-a-Punch".


Quick Thinking:
" In Dead of the Night, unlock the Forest by round 7. "

Simply follow the entire part "Preparation - Accessing Pack-a-Punch".


Shockingly Good Time:
" In Dead of the Night, electrocute a Werewolf. "

Simply kill a Werewolf with the trap located on the ground floor of the Greenhouse Laboratory.


Shrinking Feelings:
" In Dead of the Night, shrink 15 zombies with a single shot from Alistair’s Annihilator. "

Follow the part "WonderWeapoon - Alistair's Annihilator". Train enough zombies and shoot them, hoping to get the correct element.


Trial By Ordeal:
" In Dead of the Night, defeat the evil within. "

Complete the main quest. Everything is detailed in the part 1 & 2 of "Main easter egg quest"


Well Done:
" In Dead of the Night, stake a Nosferatu in the Dining Room. "

Read through the part "Secret Equipment - Stake Knife", then simply kill a vampire in the Dining room.
Last thoughts
Thank you very much for reading. As said in the intro, this guide is unfortunately not linked with it's game hub so sharing it with your zombie mates would be fantastic, especially if you liked the BO 3 counterparts i made.

Black Ops 4 maps are huge in terms of content to cover so you'll excuse me if something is missing. I am looking to add everything good to know gameplay-wise, feel free to tell me if anything is indeed missing in the comments.

Here's a few of my other guides

https://steamoss.com/sharedfiles/filedetails/?id=550319350
https://steamoss.com/sharedfiles/filedetails/?id=639386288
https://steamoss.com/sharedfiles/filedetails/?id=776602072
https://steamoss.com/sharedfiles/filedetails/?id=946030431

If this gets attention, i will add TL;DR cheatsheets as well as guides for the other maps.

19 Comments
Section 25 Sep, 2024 @ 12:55pm 
thank you very much for the guide, it really helps since i play BO4 recently with a modded client. i hope you can keep doing guides for BO4
FreeMetal  [author] 22 Mar, 2024 @ 7:11am 
@atcha I made guides for every black ops 3 maps, you'll find some of them linked in the section Last Thoughts; right above this comment section.
atcha 22 Mar, 2024 @ 6:40am 
thank you so much man. do you have other maps in zombies or is this you're only guide.
Ivory 21 Sep, 2023 @ 1:51pm 
Yes, I have been grinding this map for 2 days now for wep exp and if the trophy isn't on the table on the dining room or in the little sofa area it is in the library hallway. You also are missing one of the ghost visions, it can show you a will which is the first cemetary door buy in the library and immediately to the left in a box on a shelf
FreeMetal  [author] 20 Sep, 2023 @ 12:21am 
Are you sure, i can see the trophy on the screenshot in the small room next to Dining.
Did they change it ?
Ivory 19 Sep, 2023 @ 8:12pm 
I know this is a while gone. But one of your locations for the silver trophy is incorrect. It isn't in the dining room hallway, it is in the library hallway.
FreeMetal  [author] 20 Jul, 2023 @ 10:40am 
Hey everyone, very recently Activision Blizzard decided that they will release Overwatch 2 (and other Blizzard games) on Steam starting in August. They also admitted that the withdrawal of Call of Duty games from Steam to be Battle.net exclusives was a mistake.

With that being said, it's definitely possible from now on that Black Ops 4 comes to Steam, with a proper Community Hub and Guide system.

I'll definitely write Guides for all maps like i did for Black Ops 3 if this indeed happens. :)
HenriqueKibe ZM 17 Jun, 2023 @ 11:00pm 
Please, keep doing these guides for Black Ops 4 and other Zombies (Black Ops 2, Cold War, etc...) Your guides are the best by far!!!
ElZuki 23 Jan, 2023 @ 11:34pm 
Cool guide, hope you continue to posting more bo4 content! I just bought it on christmas and im still learning the maps
FreeMetal  [author] 23 Dec, 2022 @ 12:18pm 
Thank you for your comment, glad it helped you ! :cuphead:
I wish i could find motivation to write the other guides for BO4